Node Unblocker: A Comprehensive Guide
Node Unblocker is an open-source web proxy built on Node.js that allows users to bypass internet censorship, evade network filters, and access restricted content. Whether you are dealing with strict corporate firewalls, educational network restrictions, or geo-blocked websites, Node Unblocker acts as a seamless intermediary to securely route your web traffic.
Zilvinas Tamulis
Last updated: Jun 08, 2026
8 min read
TL;DR
- Node Unblocker is a proxy application that allows you to bypass network restrictions
- You can set up a local instance of Node Unblocker or host it as a web service
- It supports custom middleware, allowing you to intercept and modify HTTP requests, rewrite URLs, or inject scripts on the fly
- Node Unblocker doesn’t hide your IP address from the target website, but hides your activity from your network administrator
- You can set up Node Unblocker with Puppeteer for automated scraping tasks
- Node Unblocker can assist with various use cases, such as market research, analysis, content aggregation, and eCommerce trends
What is Node Unblocker?
Node Unblocker is a web proxy service that allows you to access blocked websites by rerouting internet traffic through its servers. When you access a website through the application, it fetches the requested content and passes it back to you. This can help bypass internet censorship in a country or restrictions imposed by your workplace or educational institution. Node Unblocker essentially acts as an intermediary between the user and the blocked website, enabling access to content that would otherwise be inaccessible.
Under the hood, Node Unblocker exposes an Express-compatible middleware that rewrites URLs in HTML/CSS/JS responses on the fly so links, cookies, and AJAX requests inside the proxied page continue to route through the proxy. It supports HTTP, HTTPS, and WebSocket upgrades.
Unlike a typical proxy service, Node Unblocker doesn’t hide your IP address from the website you’re trying to access. It’s simply a convenient tool to bypass restrictions imposed by your network administrators, limiting or blocking your access to specific websites.
To gain complete anonymity when browsing the web, consider using proxy providers such as Decodo. You can integrate these proxies in any application or script and make requests using 125M+ IPs worldwide, hiding your internet activity from your network providers and the websites you’re accessing.
How to use Node Unblocker?
To start with Node Unblocker, you’ll need to set up some things first. The initial preparation might take a few steps, but the tool becomes easy to use later. Read on to learn how to get everything up and running.
Install Node.js
Node Unblocker is written in JavaScript and is based on the Node.js runtime environment. To start with Node.js, go to the official website and download the latest version. Then, follow the installation wizard to set it up.
It's highly recommended to explicitly use Node.js version 20 or higher. Older versions like Node 16 and Node 18 have officially reached their End of Life (EOL) and no longer receive security updates.
Create a new Node.js project
Once you have Node.js installed, open your terminal tool and use the cd command to navigate to the directory where you want to create a new project.
Run the following command to initialize the project:
This will create a new package.json file where you can define your project parameters.
Install required packages
You’ll need to install two packages – Express.js and Node Unblocker itself. Express.js is a web application framework for Node.js, designed to simplify the process of building web applications and APIs. You can install both with one command:
After a short installation, you’ll see a new node_modules folder inside your project directory containing the express and unblocker modules.
Create the Node Unblocker script
In the root directory of your project, create a new index.js file (or index.mjs if you prefer ES modules).
Here's the full script in both formats. We'll break down each part below.
CommonJS (index.js)
ESM (index.mjs):
Both do the same thing. The ESM variant uses import syntax and looks more current if your project already uses ES modules.
Start the proxy with node index.js (or node index.mjs), then test it:
If you get HTML back, the proxy is working.
Configuration options
The Unblocker constructor accepts an options object that controls how the proxy behaves. Here's the full reference:
Option
Default
Description
prefix
'/proxy/'
URL path prefix for proxied requests. Avoid using '/' as it conflicts with a few edge cases in URL rewriting.
host
null
Hostname used in redirects (e.g., example.com or localhost:8080). When null, Unblocker determines this from the incoming request headers automatically.
requestMiddleware
[]
Array of functions that process outgoing requests before they're sent to the remote server. Use this for header injection, domain filtering, or logging.
responseMiddleware
[]
Array of functions that process incoming responses before they're returned to the client. Use this for content modification, script injection, or response filtering.
standardMiddleware
true
When true, Unblocker loads its built-in middleware stack (URL rewriting, charset conversion, cookie handling, etc.). Set to false to disable everything and selectively re-enable only what you need.
clientScripts
true
Injects client-side JavaScript that forces WebSocket connections and XMLHttpRequest calls to route through the proxy. Disable if you only need basic HTML proxying.
processContentTypes
['text/html', 'application/xml+xhtml', 'application/xhtml+xml', 'text/css']
Content types that built-in middleware will modify. Responses with other content types pass through untouched.
httpAgent
null
Custom http.Agent for outgoing HTTP requests. Use this to configure connection pooling, keep-alive behavior, or route traffic through an upstream proxy.
httpsAgent
null
Custom https.Agent for outgoing HTTPS requests. Same use cases as httpAgent, plus TLS configuration like custom certificates or rejectUnauthorized.
For most setups, the defaults work fine. The options worth customizing early are prefix (if /proxy/ conflicts with your app's routes), requestMiddleware (for access control), and httpAgent/httpsAgent (for routing traffic through an upstream proxy like Decodo).
Custom middleware examples
Unblocker's middleware system is where the library gets genuinely flexible. Each middleware function receives a data object containing the request, response, headers, and URL, and calls next() when done.
Request middleware: Domain whitelist
This restricts the proxy to a specific set of allowed domains. Any request to a domain not on the list gets blocked before it ever leaves your server.
Without something like this, your proxy is an open relay. Anyone who discovers the URL can proxy any site through your server.
Response middleware: Inject a tracking script
This injects a small JavaScript snippet into every HTML response that passes through the proxy. Useful for analytics, debugging, or adding custom behavior to proxied pages.
You can combine both in the same config:
Middleware functions run in array order, so put access control (like the domain whitelist) first in requestMiddleware, and put any content-modifying steps last in responseMiddleware to avoid transforming responses you're about to block.
Run the Node Unblocker
Now that the script is ready let’s get it up and running. To run the script, simply execute the following command in the terminal:
A new instance of Node Unblocker will be started locally. Open any browser of your choice and enter the URL you’re trying to access in this format:
Using our example, let’s access the Decodo website. Your URL, in this case, will look like this:
Just like that, you’ve accessed a website using Node Unblocker.
Debugging
If something isn't working, or you just want to see what's happening under the hood, Unblocker has built-in debug logging via the DEBUG environment variable.
To enable full logging:
This outputs detailed logs for every request, response, URL rewrite, and middleware step. It's verbose, but it'll tell you exactly where things go wrong.
If you only want to see middleware activity (useful when developing custom requestMiddleware or responseMiddleware):
On Windows, use set before the command:
Once everything looks right, disable debug logging for production. The output is significant and will slow things down under load.
How do you use Node Unblocker for web scraping?
To use Node Unblocker for scraping, you'll need a headless browser automation library like Puppeteer or Playwright. The proxy runs as a web service, and the browser library navigates through it to fetch and extract page content programmatically. For a full Node.js scraping setup without browser automation, see our guide to web scraping with Cheerio and Node.js.
You'll also need to host your Node Unblocker project online. Puppeteer and Playwright interact with live URLs, not localhost, so the proxy needs to be deployed and publicly reachable before you can automate against it.
Deploy your project to a cloud host
Choose a cloud hosting service like Render, Railway, or Fly.io. We'll use Render in this example.
A note on Acceptable Use Policies: Most cloud providers explicitly prohibit running open proxies on their infrastructure. Heroku's free tier (which older Node Unblocker tutorials reference) was discontinued in 2022, and even paid Heroku plans restrict proxy-style traffic. Before deploying, review your provider's AUP. At minimum, restrict access to your proxy by IP or authentication (covered in the middleware section above), and respect robots.txt on any target you scrape. Running an open, unrestricted proxy on a cloud platform is a fast way to get your account suspended.
Here's the deployment flow on Render:
- Push your Node Unblocker project to a GitHub, GitLab, or Bitbucket repository.
- Log in to the Render dashboard, click New, and choose Web Service.
- Select Build and deploy from a Git repository and connect your repo.
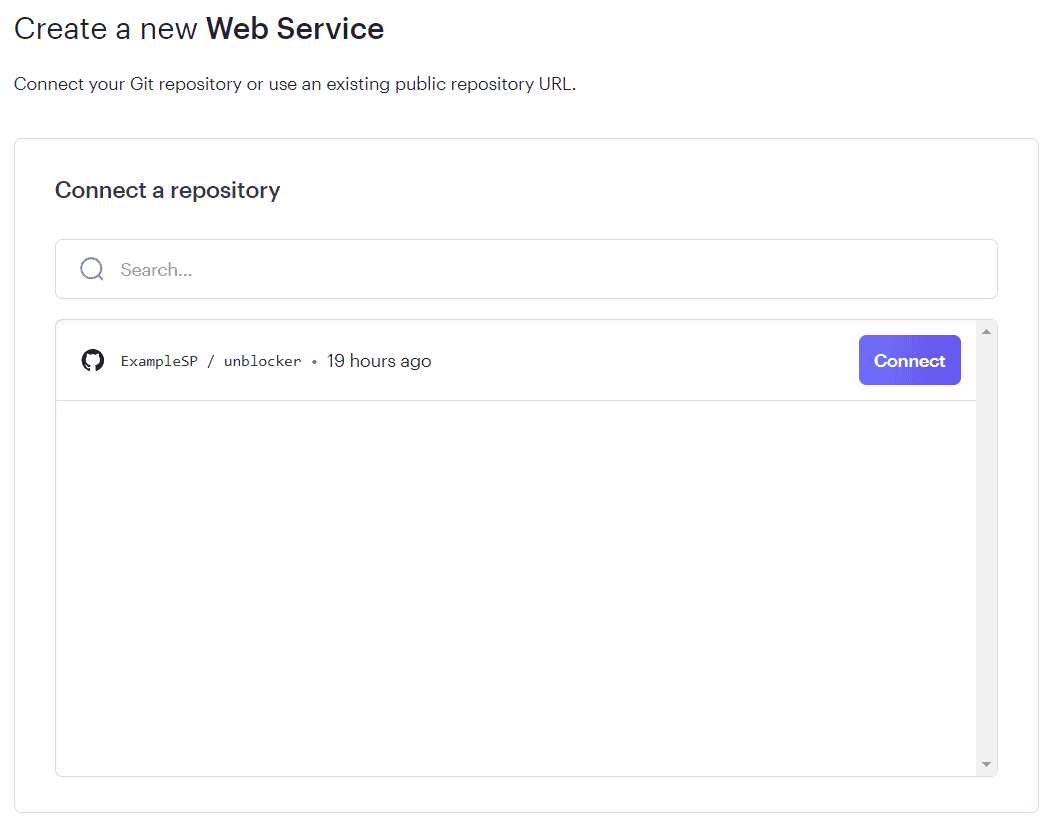
4. Leave the default settings (Render detects node index.js as the start command) and click Create Web Service.
Test it in your browser or with cURL:
If you get HTML back, the deployment is working.
One thing to keep in mind. Self-hosting Node Unblocker on a single server gives you one outbound IP, which target sites can rate-limit or block under sustained scraping load. If you need rotating IPs at scale without maintaining infrastructure, managed solutions like Site Unblocker handle CAPTCHA bypassing, JS rendering, and IP rotation in a single endpoint. You can also pair Node Unblocker with rotating residential proxies using the httpsAgent configuration option to route traffic through Decodo's proxy network instead of your server's IP.
Scraping with Puppeteer
Now that the proxy is live, you can automate it with Puppeteer. Install it alongside puppeteer-extra and the stealth plugin:
Here's a script that navigates to Books to Scrape through your deployed Node Unblocker proxy and extracts the first book title and price:
Run it:
Expected output:
The process is the same as any Puppeteer scraping workflow. The only difference is that every URL routes through your deployed proxy instead of being fetched directly.
A note on stealth
Routing Puppeteer through Node Unblocker hides your scraping traffic from network-level monitoring, but it doesn't hide Puppeteer itself from the target site. Headless Chrome leaks detectable signals through browser fingerprinting: the navigator.webdriver flag, missing browser plugins, canvas rendering differences, and WebGL quirks.
The puppeteer-extra-plugin-stealth plugin (used in the script above) patches the most common detection vectors. It's a good first step, but it's not bulletproof. Sites using advanced detection stacks like Cloudflare, PerimeterX, or DataDome analyze dozens of signals that stealth plugins can't fully mask.
For more resilient approaches to fingerprint evasion, see our guides on Nodriver and Camoufox, both of which are designed specifically for anti-detection browsing. When even those aren't enough, Decodo's Web Scraping API handles fingerprinting, CAPTCHA solving, and proxy rotation behind a single endpoint so your code only needs to parse the response.
Advantages of using Node Unblocker
Node Unblocker's core function is routing traffic through a proxy, which opens up a range of data collection scenarios. Here's where it fits and what to pair it with when the job outgrows a single self-hosted proxy.
Use case
What Node Unblocker does
When you need more
Recommended resource
Web scraping and market research
Routes scraping requests through your proxy to bypass basic access restrictions on target sites.
High-volume scraping, anti-bot bypass, JS rendering.
SEO and rank tracking
Lets you fetch search engine result pages from your proxy IP without direct exposure.
Geo-targeted SERP data, localized rankings, Google's anti-bot detection.
Academic research
Provides access to scholarly sites and databases that may be restricted on certain networks.
Typically sufficient for low-volume academic use.
—
Content aggregation
Fetches articles, posts, and media from multiple sources through a single proxy endpoint.
Deduplication, structured extraction, scale beyond a handful of sources.
eCommerce and pricing
Monitors competitor pricing, product availability, and reviews across ecommerce platforms.
Rotating IPs for anti-bot detection, structured price data, multi-region monitoring.
Real estate and property data
Accesses listing pages and property databases through the proxy to collect market data.
JS-rendered listing pages, geo-targeted results, high volume.
Travel and hospitality
Collects hotel pricing, destination reviews, and tourism data from travel platforms.
Geo-targeted hotel pricing, rate comparison across regions.
Supply chain and logistics
Routes requests to logistics platforms and shipment tracking services through the proxy.
Typically sufficient for monitoring use cases with moderate volume.
—
For most of these, Node Unblocker works as a starting point for low-volume, exploratory work. Once you need rotating IPs, anti-bot bypass, or structured output at scale, the managed tools in the right column take over without requiring you to maintain proxy infrastructure yourself.
Node Unblocker limitations
Node Unblocker is a useful tool for what it is, but it's important to be clear about what it isn't. This section covers the walls you'll hit, roughly in order of how quickly you'll hit them.
OAuth and postMessage flows break
Login flows that rely on OAuth redirects or postMessage communication between windows don't work through Node Unblocker. Google Sign-In, Facebook Login, and similar authentication flows fail because the proxy rewrites URLs in ways that break the redirect chain. If the site you're targeting requires authentication through a third-party provider, Node Unblocker can't get you past the login screen.
Complex SPAs don't render
Node Unblocker proxies the raw HTML response from the server. It doesn't execute JavaScript. Single-page applications that build their UI entirely on the client side come back as empty shells or partially loaded pages. YouTube is a semi-working example at best. Discord, Instagram, Roblox, and Twitter/X don't work in any meaningful way. If the content you need only exists after client-side JavaScript runs, Node Unblocker won't see it.
Your origin IP is fully exposed
Node Unblocker hides your browsing activity from your network administrator, but it doesn't hide your IP from the target website. The site you're accessing sees the IP of your Node Unblocker server, not a rotating pool of anonymous addresses. For scraping, this means the target can fingerprint your browser and ban your single IP with minimal effort.
Single IP, single server
A self-hosted Node Unblocker instance has one outbound IP address. That's it. Any target with basic rate limiting will throttle or block you after a modest number of requests. You can spin up multiple instances on different servers to get more IPs, but at that point, you're building and maintaining proxy infrastructure yourself, which defeats the purpose of using a lightweight tool.
No anti-bot evasion
Node Unblocker has no built-in CAPTCHA solving, no browser fingerprint management, and no mechanisms to bypass anti-bot systems. Sites protected by Cloudflare, PerimeterX, DataDome, or similar stacks will block requests from your proxy on sight. These systems analyze TLS fingerprints, JavaScript execution patterns, and browser-level signals that Node Unblocker doesn't touch.
Maintenance and compliance overhead
You own everything: uptime monitoring, security patches, scaling, and AUP compliance. Speaking of AUP, most cloud providers restrict or outright prohibit running open proxy services on their infrastructure. Heroku's free tier is gone (since 2022), and even paid plans on AWS, GCP, and Render have acceptable use policies that can get your account suspended if your proxy is flagged. You need to lock down access, monitor usage, and stay within your provider's terms.
When to move past Node Unblocker
When Node Unblocker hits these limits, the typical next step is a managed solution. Site Unblocker handles CAPTCHAs, JS rendering, and IP rotation in a single endpoint, while residential proxies give you 125M+ rotating IPs to plug into your own scraper. You keep your code, lose the infrastructure burden, and stop fighting limitations that Node Unblocker was never designed to solve.
Node Unblocker vs. alternatives
Knowing the limitations helps, but seeing how Node Unblocker stacks up against the alternatives makes the decision easier. Here's the full comparison:
Setup effort
Moderate. Requires Node.js, Express, cloud deployment, and ongoing maintenance.
Low. Install an app, connect, done.
Low. Get credentials, point your HTTP client at the proxy endpoint.
Low. Single endpoint, API key, no infrastructure to manage.
Low. One API call per target URL, structured data back.
IP rotation
None. One server, one IP.
One IP per VPN server. Manual switching.
Automatic. 125M+ IPs rotating per request or on a time interval.
Automatic. Managed rotation built into every request.
Automatic. Handled entirely behind the API.
CAPTCHA/anti-bot
None. No CAPTCHA solving, no fingerprint management, no anti-bot evasion.
None. VPN IPs are known and frequently blocked by anti-bot systems.
Residential IPs avoid datacenter detection, but no CAPTCHA solving.
Full stack. CAPTCHA solving, fingerprint rotation, anti-bot bypass.
Full stack. CAPTCHAs, JS challenges, fingerprinting, all handled.
JS rendering
None. Proxies raw HTTP responses only.
N/A. VPN routes traffic, doesn't render.
None. Proxies the connection, doesn't render content.
Yes. Full headless browser rendering.
Yes. Pages rendered before data is returned.
Best for
Bypassing network restrictions, learning how proxies work, low-volume local projects.
General browsing privacy, accessing geo-restricted streaming content.
Scraping at scale with your own code. Pairs with Puppeteer, Playwright, or Scrapy.
Scraping bot-protected and JS-heavy sites without building anti-detection infrastructure.
Getting clean, structured data from any site without managing scrapers, proxies, or browsers.
Pricing model
Free (self-hosted), but you pay for server hosting and your own time.
Monthly subscription, typically $5–15/mo.
Pay per GB of traffic.
Pay per request.
Pay per request.
The short version: Node Unblocker is a learning tool and a lightweight solution for low-stakes use cases. Once you need IP rotation, anti-bot bypass, or JS rendering, you're choosing between residential proxies (maximum control, bring your own scraper) and a managed API (minimum code, maximum coverage). The right pick depends on how much infrastructure you want to own.
Conclusion
While Node Unblocker serves as an excellent educational tool and handles basic proxying tasks quite well, it comes with clear limitations on the modern web. In real-world scenarios, its performance is often bottlenecked by sophisticated anti-bot systems and modern, dynamic web applications that easily detect and block simple hosting server IPs.
To overcome these roadblocks, your next steps depend on your project's architecture. If you want to maintain your current self-hosted setup, you should route your traffic through high-quality residential proxies to mimic genuine user devices and prevent IP bans. Alternatively, if you want to skip the headaches of maintaining a self-hosted scraper entirely, you can let an API handle the proxy rotation and JavaScript rendering for you by switching to the Site Unblocker.
About the author

Zilvinas Tamulis
Technical Copywriter
A technical writer with over 4 years of experience, Žilvinas blends his studies in Multimedia & Computer Design with practical expertise in creating user manuals, guides, and technical documentation. His work includes developing web projects used by hundreds daily, drawing from hands-on experience with JavaScript, PHP, and Python.
Connect with Žilvinas via LinkedIn
All information on Decodo Blog is provided on an as is basis and for informational purposes only. We make no representation and disclaim all liability with respect to your use of any information contained on Decodo Blog or any third-party websites that may belinked therein.