How to Set Up MCP Server: Step-by-Step Guide
Over the past year, the Model Context Protocol (MCP) has gone from a niche idea to a go-to standard for integrating LLM agents with real-world tools and data. This setup lets agents deliver smarter, context-aware responses and handle complex workflows on their own. In this guide, you'll learn how to set up the Decodo MCP server with tools like Cursor, VS Code, and Claude Desktop and supercharge your web scraping operations.
Mykolas Juodis
Last updated: Aug 04, 2025
7 min read
What is an MCP server?
Anthropic introduced the Model Context Protocol (MCP) as a means to provide AI with situational data for more accurate responses and operations. MCP is an open standard that enables AI models to interact with external tools, applications, and data sources. This way, it eliminates the need for custom integrations, allowing developers to create more intelligent AI assistants.
MCP servers are essentially the protocol's actual implementation on the server side. They receive requests from the client or AI assistant and provide them as commands to appropriate tools or external systems. The server then formats and returns the results to the AI assistant, enabling it to access specific data and perform certain actions.
MCP servers can run locally on your machine (using standard input/output) or be hosted remotely (with the client connecting over HTTP/SSE). For most use cases, running an MCP server locally is simpler and more secure, as your API credentials remain safely stored on your computer.
Prerequisites
To follow up with this guide, ensure you have the following tools:
- Node.js (v18+)
- MacOS or Windows operating system
- Decodo Web Scraping API credentials
- IDE or MCP Client: Cursor, Claude Desktop, or VS Code
To ensure you have the node and npx installed properly, run the following commands:
If the commands return an error, follow this guide to install Node.js.
Step 1: Obtain the Web Scraping API credentials
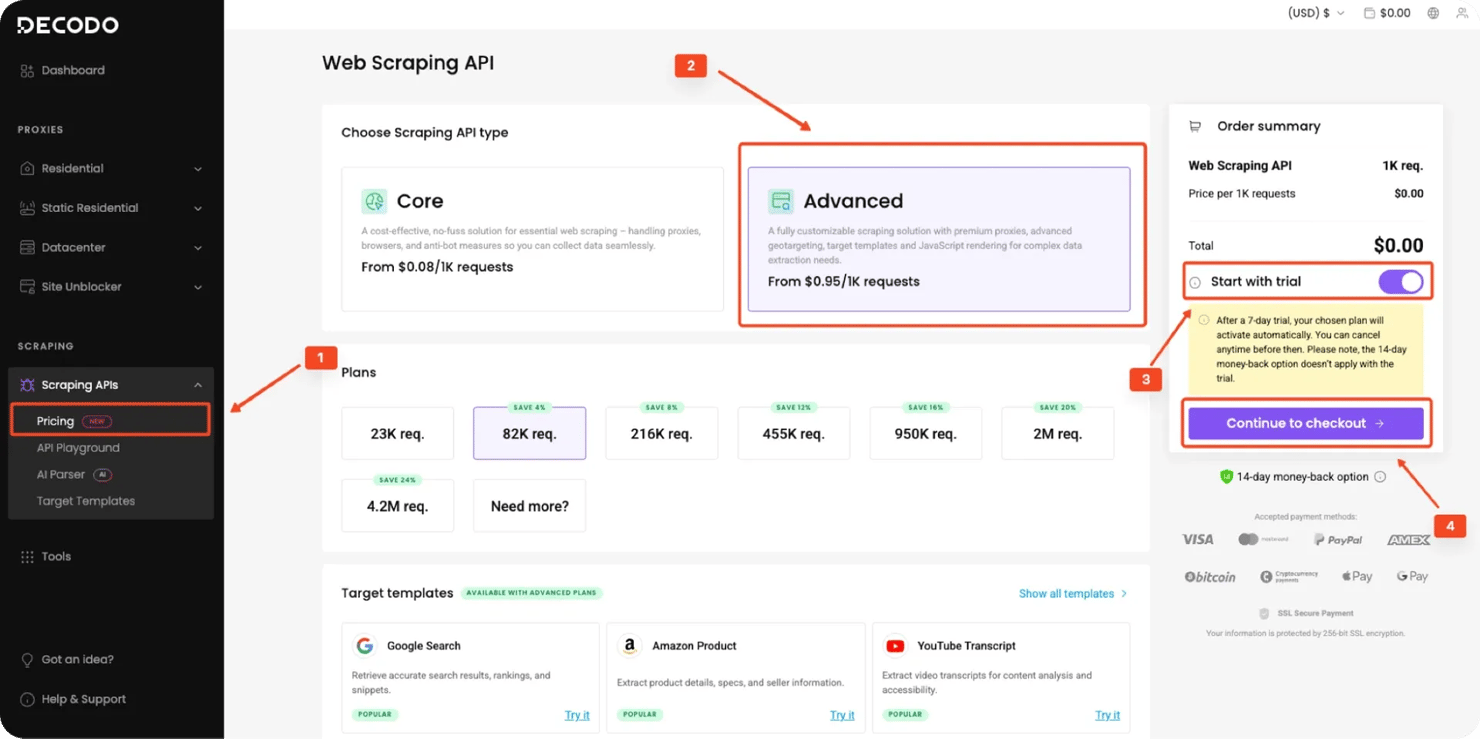
Before installing the MCP server, you'll need the Decodo's Web Scraping API credentials. You can create an account and choose a subscription or start with a free trial.
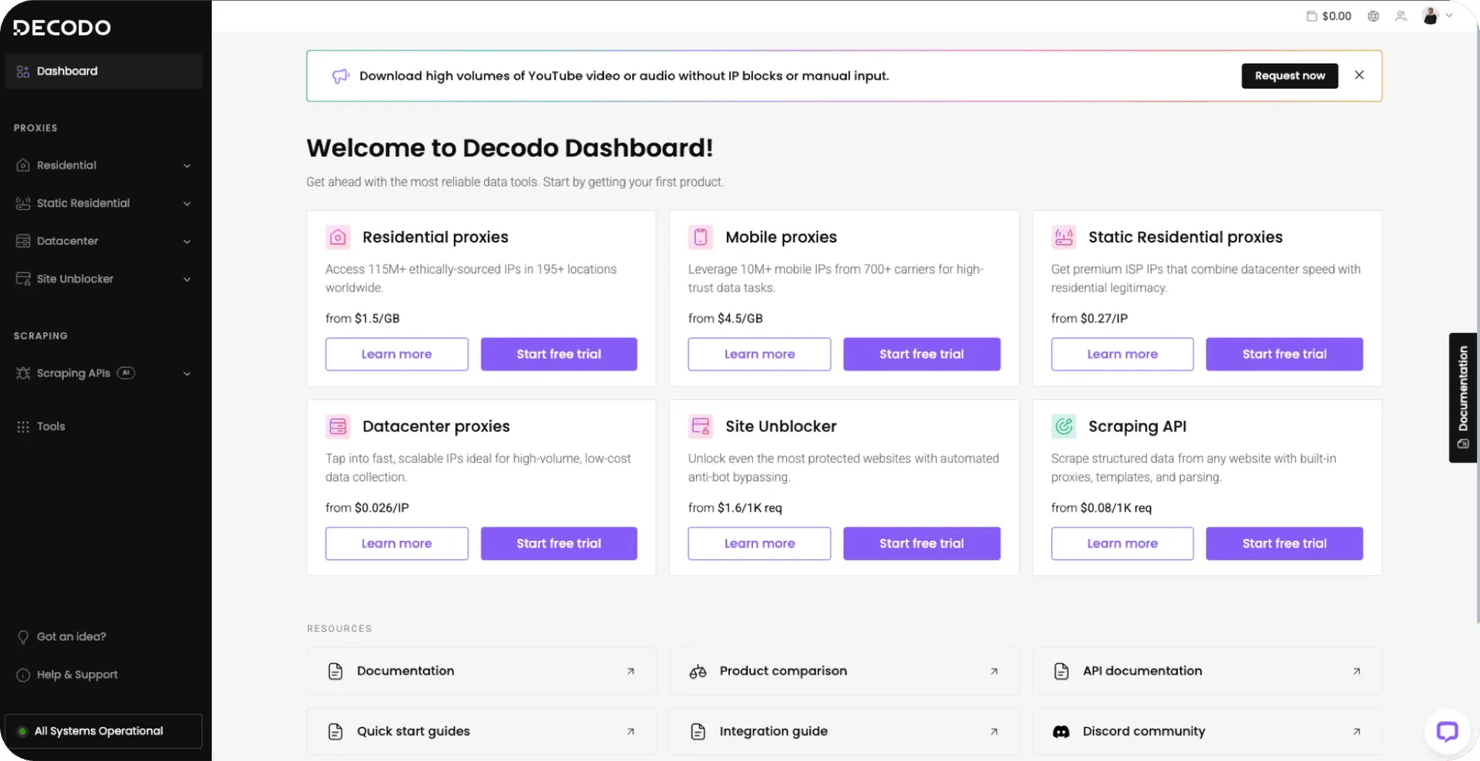
Head on over to the Decodo dashboard and start a free Web Scraping API Advanced trial.
Once you have an active Web Advanced subscription, you will be able to check your automatically generated authentication credentials, including your username and password.
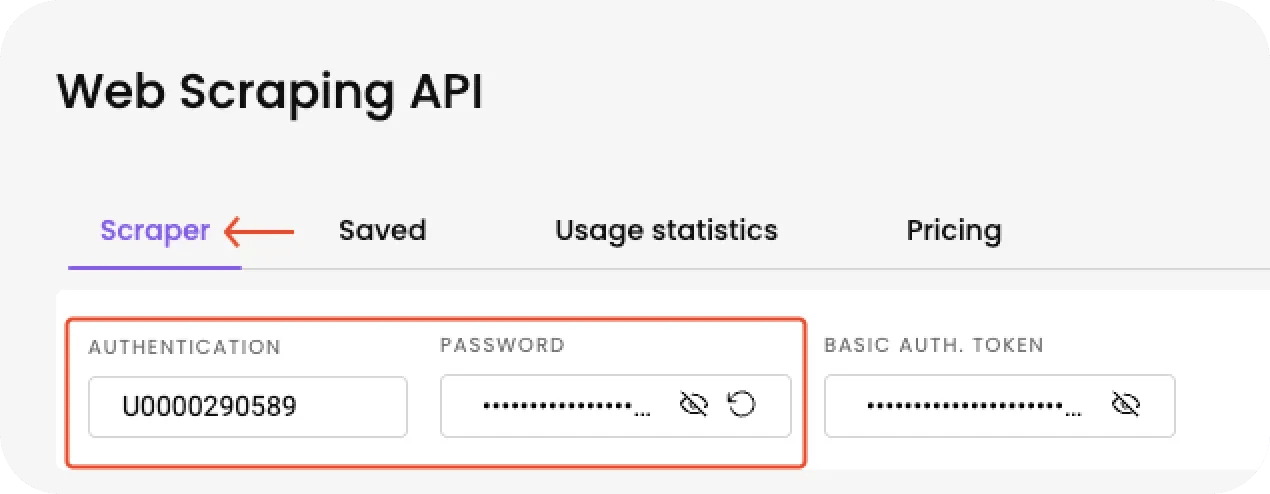
Copy both credentials and store them securely, as you'll need them when configuring your Decodo MCP server in the next steps.
Step 2: Install the Decodo MCP server
After securing your credentials, you need to download the Decodo MCP server source code. Open a terminal and run the following command:
This will download the MCP server source code to a folder called decodo-mcp-server. Most MCP servers are typically available through official repositories, such as GitHub, NPM packages, or Docker Hub images. In this case, we're working directly with the GitHub source.
Step 3: Install the MCP server
Now that you have the MCP server on your computer, you can proceed to install its dependencies. To do this, navigate into the downloaded repository folder:
Then run the following commands to install required packages and build the project:
This will install all Node.js dependencies and compile the server code. After a successful build, the compiled output will typically be located in a build/ directory.
Next, find the path to the server’s main file. For Decodo’s server, the main file is index.js inside the build directory. You can locate it by running:
Append index.js to this path. Yours might look like this:
This full path will be required when configuring your client, so make a note of it.
Step 4: Configure the MCP server
With the server built, you need to configure your AI client to use the new MCP server. You can do this by creating a configuration file (mcp.json or .mcp.json) or using a settings UI of the application you're using. Create an MCP server configuration block with your Decodo credentials:
Replace your_username and your_password with your Decodo credentials from the dashboard earlier. Also, update the file path to match the exact path to your server's main file (index.js).
Remote MCP setup with VS Code & Smithery
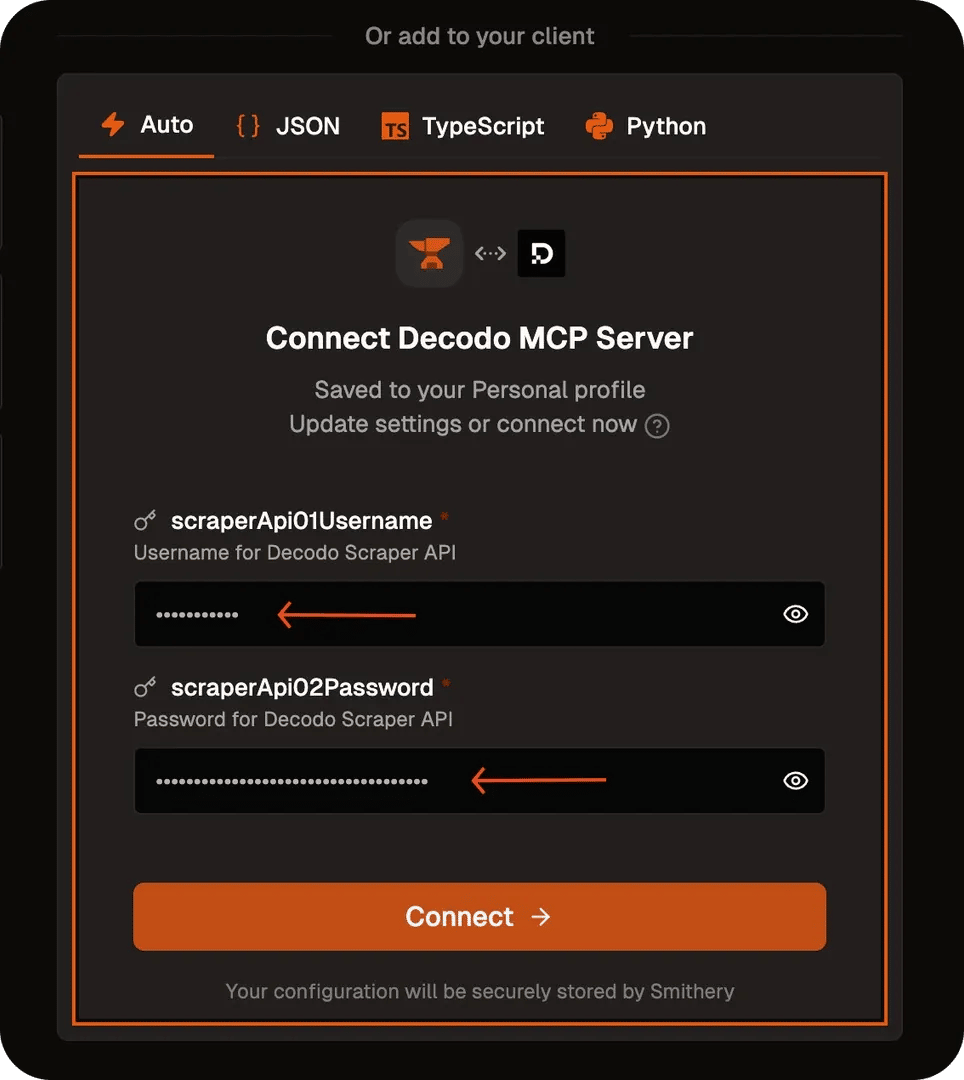
For remote setups, we'll use Smithery. Go to the Decodo's Smithery repository and log in or create an account using GitHub. Smithery will prompt you for a username and password, so use the Decodo credentials obtained from your dashboard earlier.
Smithery will then generate a remote connection URL, which you can use with clients that support remote HTTP connections.
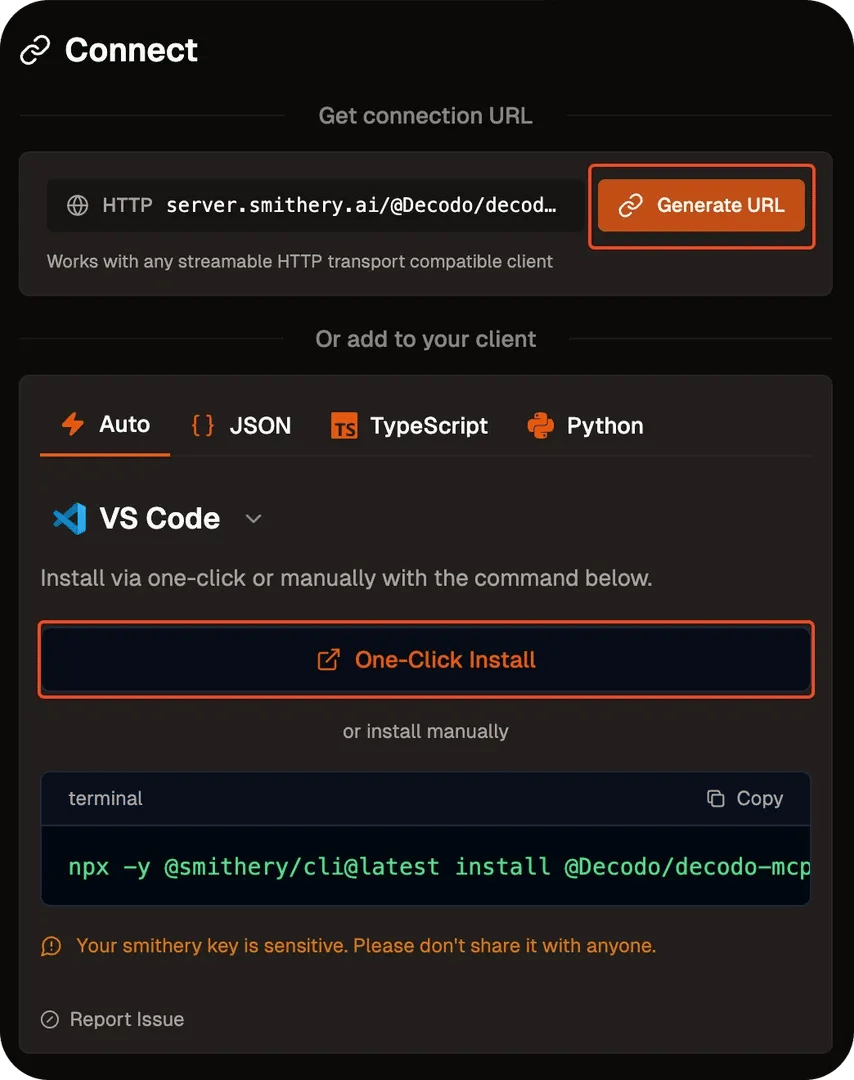
Alternatively, you can auto-install Decodo MCP locally with Smithery CLI. Smithery provides support for various clients, including VS Code.
Replace <smithery_profile> and <smithery_key> with your actual Smithery account details.
Manual setup with Cursor
In Cursor's settings (navigate to Cursor Settings → Tools & Integrations → New MCP Server), paste the JSON configuration above into the mcp.json file.
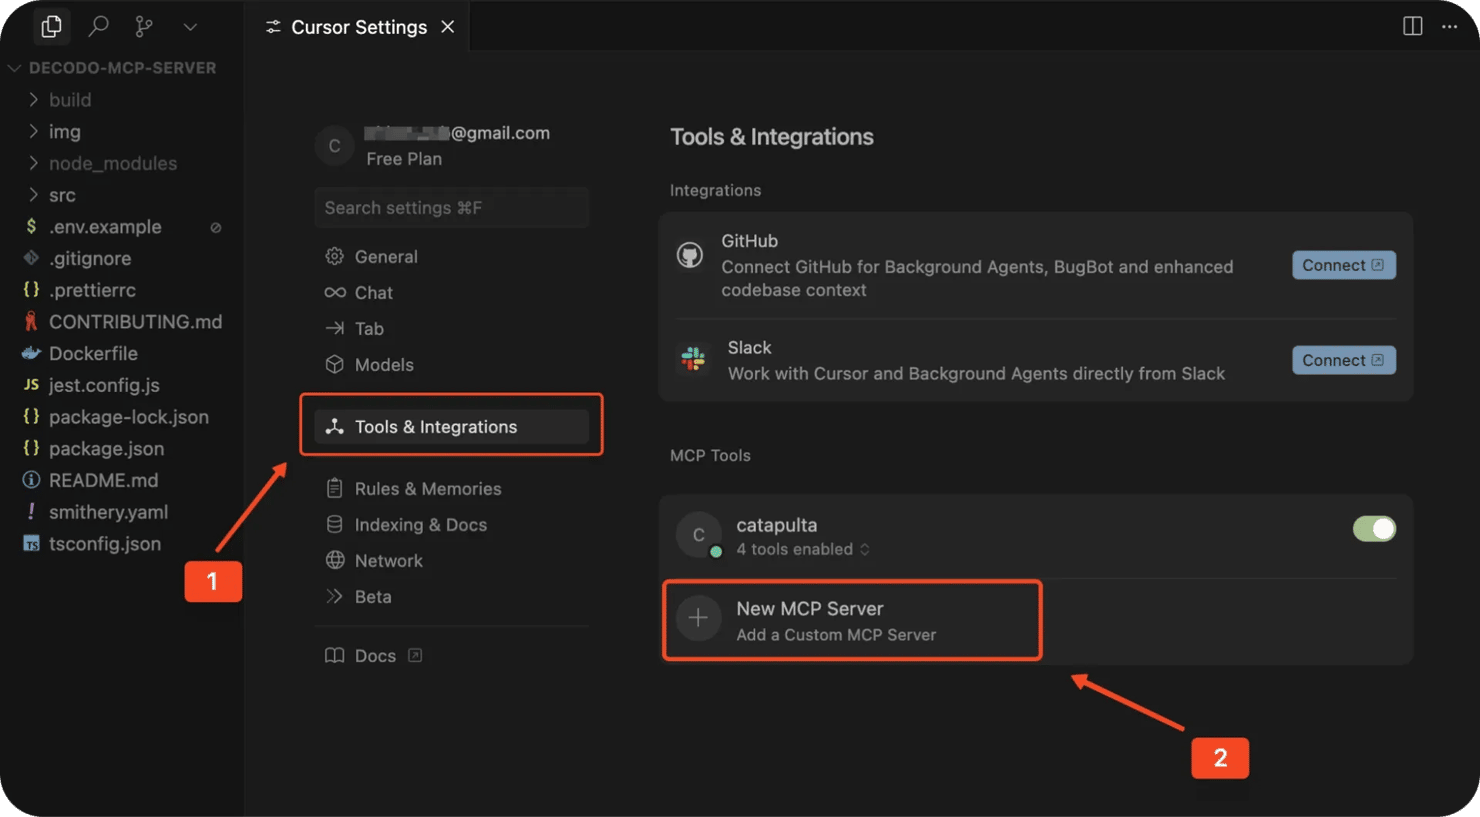
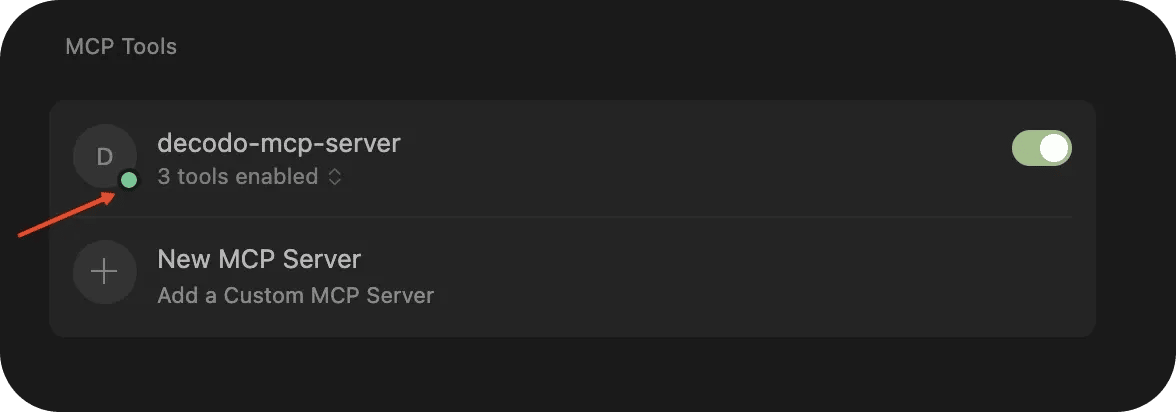
Save the mcp.json file and restart Cursor. Once the IDE launches, the status icon next to your server should change from red to green, indicating the server is running. If it stays red, check if the credentials or file path are correct, or try restarting Cursor again.
Manual setup with Claude Desktop
To configure Claude Desktop to work with the MCP server, first ensure that Claude Desktop is installed. Claude uses a configuration file (claude_desktop_config.json) to interact with different MCP servers.
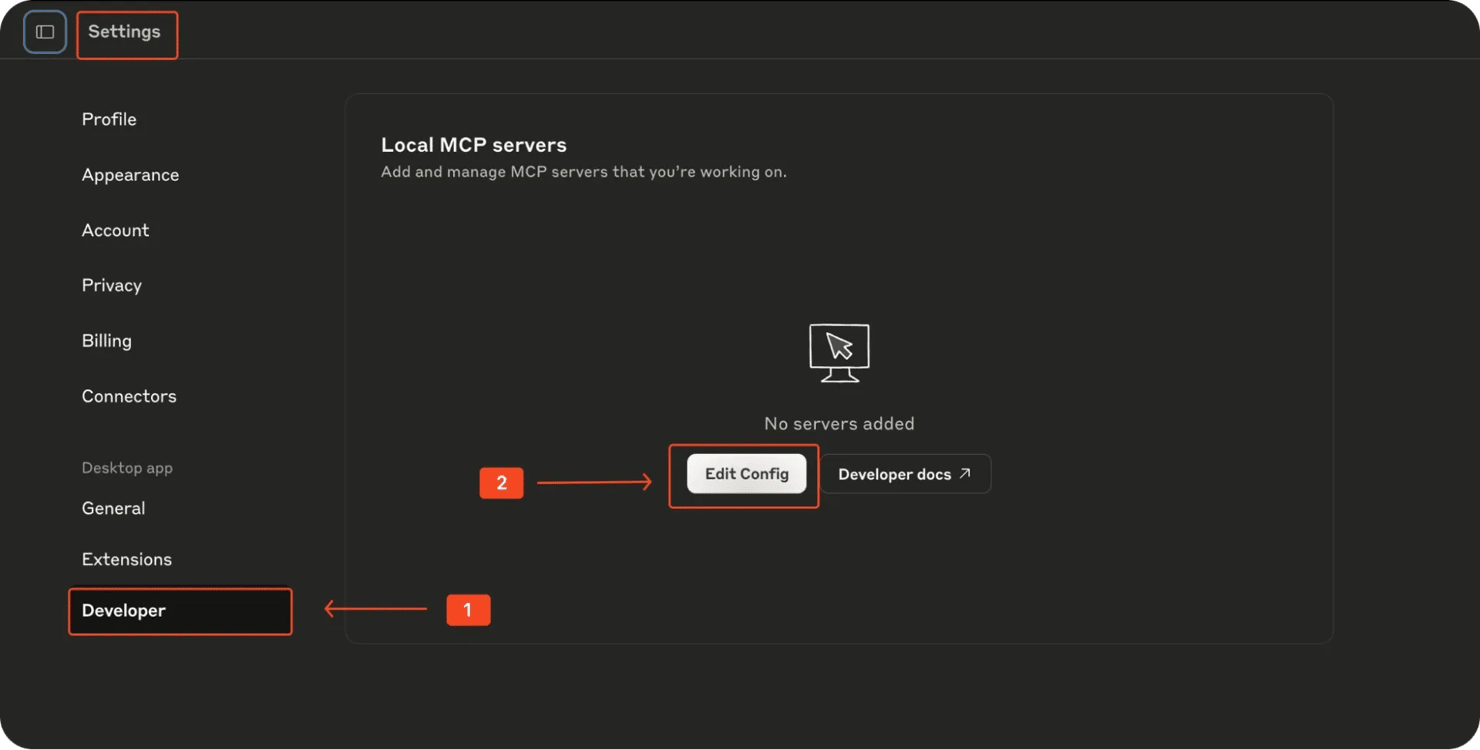
To locate this file, navigate in Claude to Settings → Developer → Edit Config and add the MCP configuration above directly into the file.
Open the configuration file with a text editor and locate the mcpServers section. If it doesn't exist, you can just add it.
Alternatively, you can manually find the claude_desktop_config.json file in one of the following locations, depending on your operating system:
- MacOS:
- Windows:
- Linux:
After saving your configuration changes, fully quit Claude Desktop, then restart the application to apply the new MCP server settings.
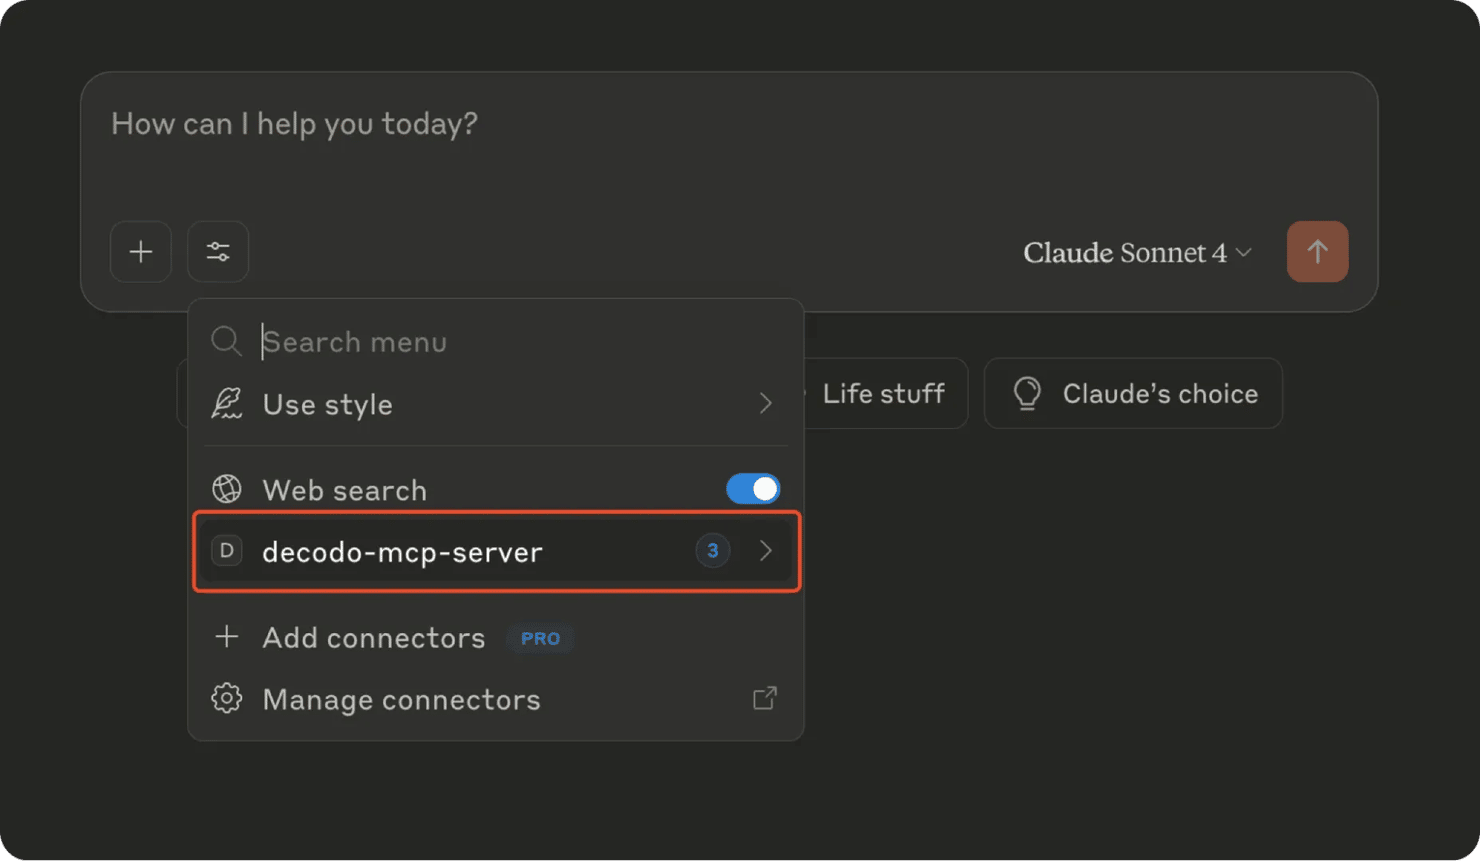
Once restarted, Claude Desktop will load your new MCP server configuration and be ready to interact with your locally running Decodo MCP server.
Note: Simply closing the Claude window will not reload the updated MCP configuration. You must fully quit the application.
Step 5: Test and use MCP tools
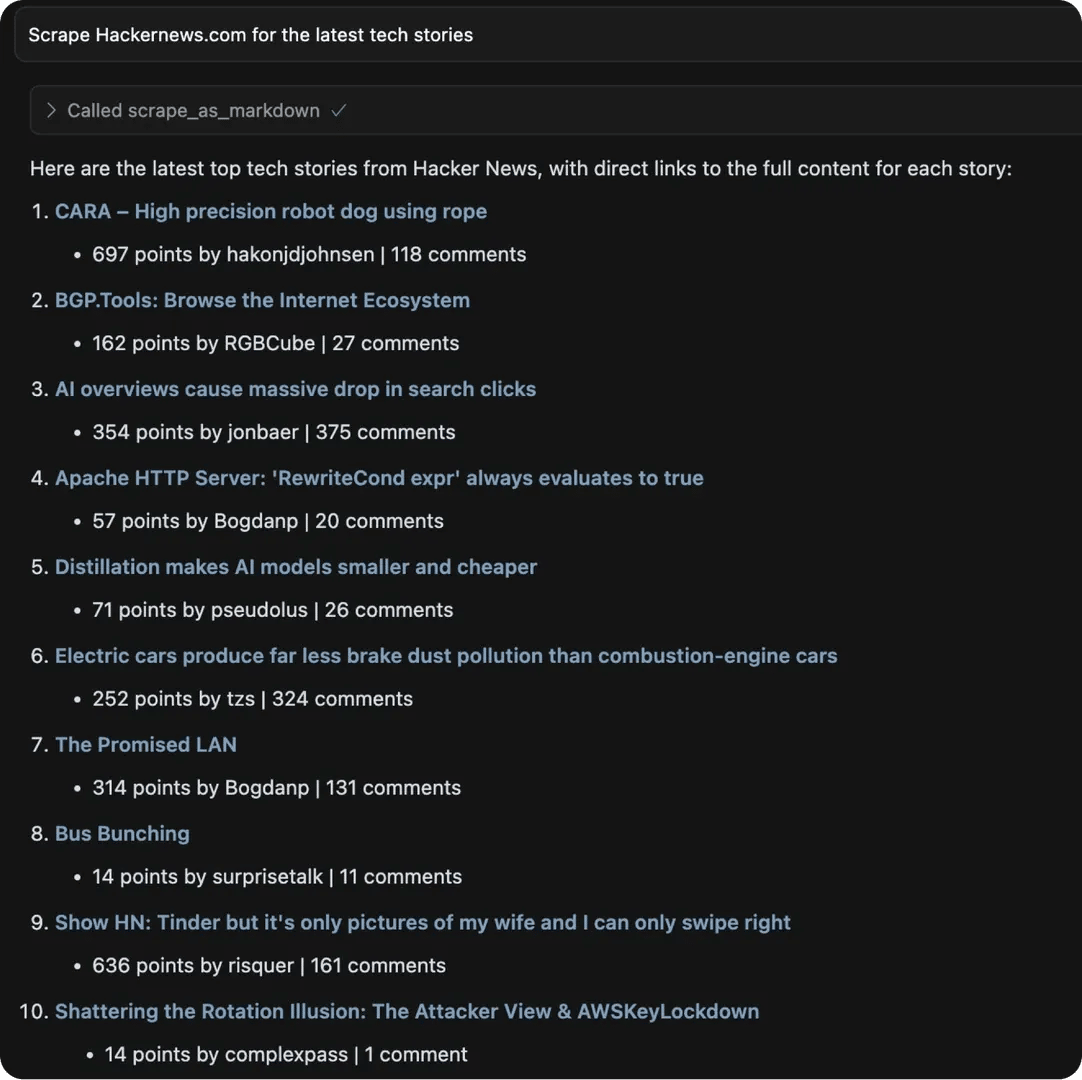
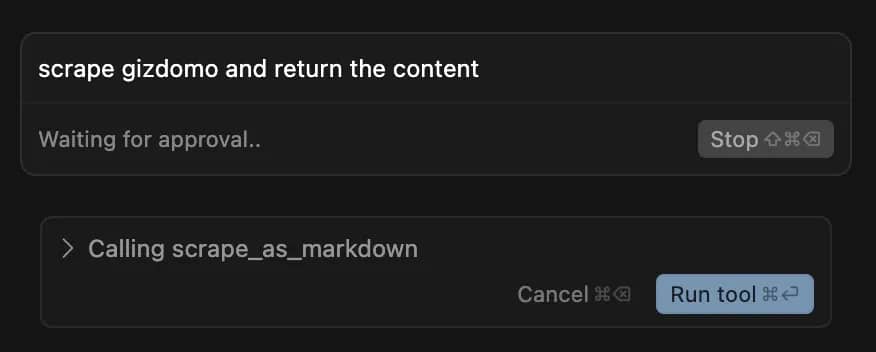
Finally, you can test your MCP server and see it work in real time. You can prompt your AI assistant to scrape a webpage or do a quick Google search directly in your chat interface without writing a single line of code. A quick test prompt could be:
With the instant prompt, here is what Cursor delivered as the result:
Typically, you don't have to explicitly instruct the AI client to use a tool in a specific way. You just ask for what you want, and the AI will automatically decide if using an MCP tool is appropriate; that is where the agentic aspect of your client comes into play.
You may have noticed that when using the MCP tool, it prompts you to confirm a tool's each action the first time. Many clients do this for security reasons, so you can usually allow it just for that run or always. However, during testing, it’s advisable to confirm each request individually.
Once you trust the server, you can set it to auto-approve to avoid interruptions.
Decodo MCP Tools
Decodo MCP provides the following tools:
- scrape_as_markdown : This tool is invoked for most general web scraping tasks. It fetches content from the provided website URL and returns the results in neatly formatted Markdown.
- google_search_parsed : This tool is specifically designed to handle Google Search queries. It also automatically parses search results into structured data.
- amazon_search_parsed : This tool searches Amazon and returns parsed product information
Note: For detailed information on these tools and their parameters, please refer to the official Decodo MCP documentation.
Why use Decodo's MCP?
Decodo is a leading provider of proxies and web data infrastructure, known for delivering fast, reliable, and highly secure web scraping infrastructure. Decodo's MCP offers a seamless way to integrate these advanced web scraping capabilities directly into your AI models.
Here are some of the benefits of Decodo's MCP:
- Scrape content from any site. With Decodo's MCP, you can easily scrape content from virtually any site. It also enables data extraction from websites that rely heavily on JavaScript.
- Bypass blocks and geo-restrictions. Decodo's MCP also inherits the Web Scraping APIs ability to bypass most scraping hurdles, such as blocks and geo-restrictions. Furthermore, Decodo automatically rotates IP addresses from its extensive proxy pool, which comprises of 125+ million IPs across 195 countries worldwide.
- Flexible setup and multi-platform support. The MCP offers multi-platform support (macOS, Windows, and Linux). It also provides options for configuring rendering and parsing parameters to fit your specific requirements.
- Built-in error handling and request management: Decodo's MCP also includes built-in error handling and smart request management. You get automatic retries, detailed error reporting, and intelligent rate limiting that ensures your tasks run reliably without overloading target servers.
Troubleshooting
If you're having trouble with your setup, check for the following common issues:
- Make sure you have Node.js 18 or higher installed
- Confirm that you’ve run both npm install and npm run build inside the decodo-mcp-server directory
- Ensure your SCRAPER_API_USERNAME and SCRAPER_API_PASSWORD environment variables are correctly set and match your Decodo dashboard credentials
- Double-check the file path to index.js in your MCP config
- Ensure to restart the application completely (not just closing the window) to reload your configuration
Bottom line
MCP servers turn your AI chat into a web scraping powerhouse. Instead of writing code to scrape websites, you just ask your AI "grab the latest stories from Hacker News" and it does it automatically.
The setup takes some technical work (Node.js, credentials, config files), but once it's running, you get enterprise-level web scraping that bypasses blocks and handles tricky sites, all through simple chat commands in Cursor, VS Code, or Claude Desktop.
Try Web Scraping API for free
Collect data from any website online, minus the CAPTCHAs, IP bans, or geo-restrictions – 7-day free trial available.
About the author

Mykolas Juodis
Head of Marketing
Mykolas is a seasoned digital marketing professional with over a decade of experience, currently leading Marketing department in the web data gathering industry. His extensive background in digital marketing, combined with his deep understanding of proxies and web scraping technologies, allows him to bridge the gap between technical solutions and practical business applications.
Connect with Mykolas via LinkedIn.
All information on Decodo Blog is provided on an as is basis and for informational purposes only. We make no representation and disclaim all liability with respect to your use of any information contained on Decodo Blog or any third-party websites that may belinked therein.