How To Set Up a Residential Proxy in the SwitchyOmega Extension
Find out how to set up a proxy in SwitchyOmega.
Hide your IP, access restricted content, and avoid geoblocking with easy setup.
14-day money-back option
115M+
IPs
195+
locations
24/7
tech support
99.99%
uptime
Easy
setup
Quick start with video guide
Watch our short video to start using SwitchyOmega right away.
What is SwitchyOmega?
SwitchyOmega (ZeroOmega) is a browser proxy manager that lets you control and switch proxy settings directly from your browser. It allows you to define multiple proxy profiles, apply rules based on domains or URLs, and route traffic through different proxies without touching system settings. Instead of automating rotation, it focuses on fast manual or rule-based switching, making it handy for testing, debugging, and lightweight scraping setups.
Since January 2025, the original SwitchyOmega project is no longer maintained and cannot be found on the Chrome Web Store. However, a community-supported alternative exists, ZeroOmega, which retains all features of SwitchyOmega.

Why residential proxies?
A residential proxy serves as a mediator, allowing users to get an IP address from an authentic desktop or mobile device connected to a local network. Due to its origin, residential proxies are a perfect match for overcoming geo-restrictions, bypassing CAPTCHAs, managing multiple accounts, and conducting web testing.
Decodo offers top-notch residential proxies with an extensive IP pool of over 55M IPs across 195+ locations. With an unparalleled response rate, clocking in at under 0.5 seconds, a success rate of 99.68%, and an affordable entry point with Pay As You Go, Decodo is an excellent deal for hustlers and fast-growing companies.
Set up Decodo proxies with SwitchyOmega
To start using Decodo's residential proxies with SwitchyOmega, follow the steps below.

Get residential proxies
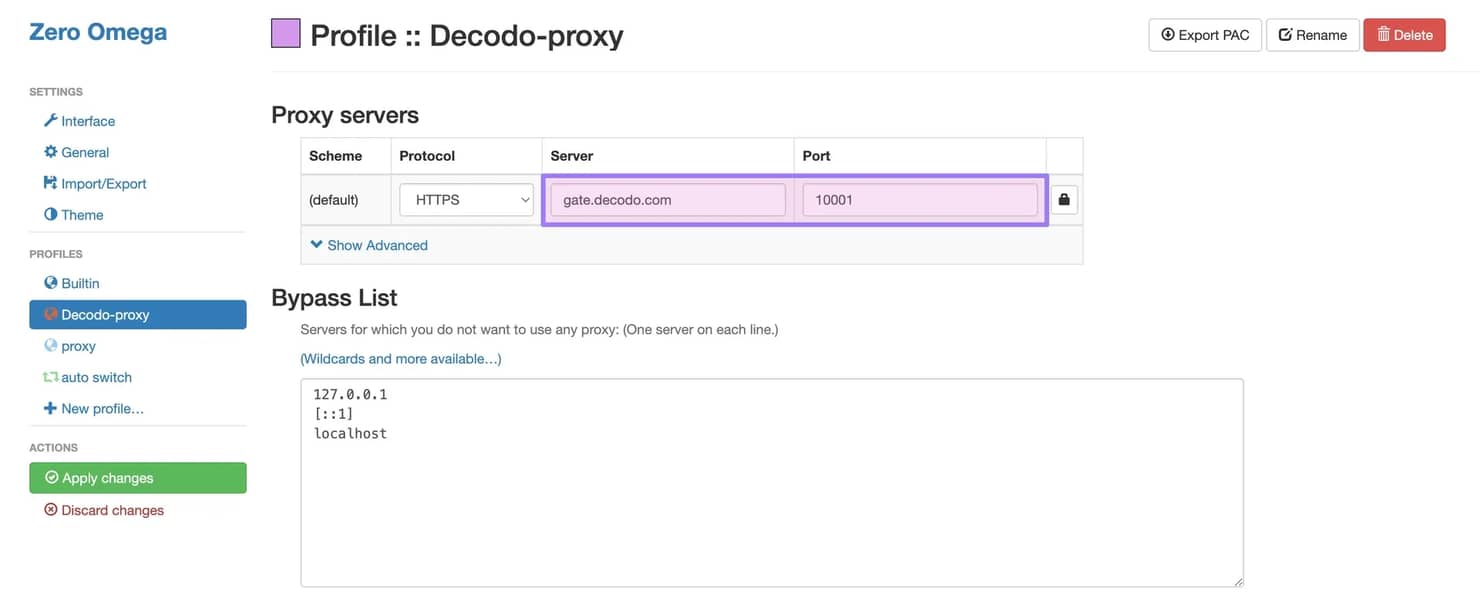
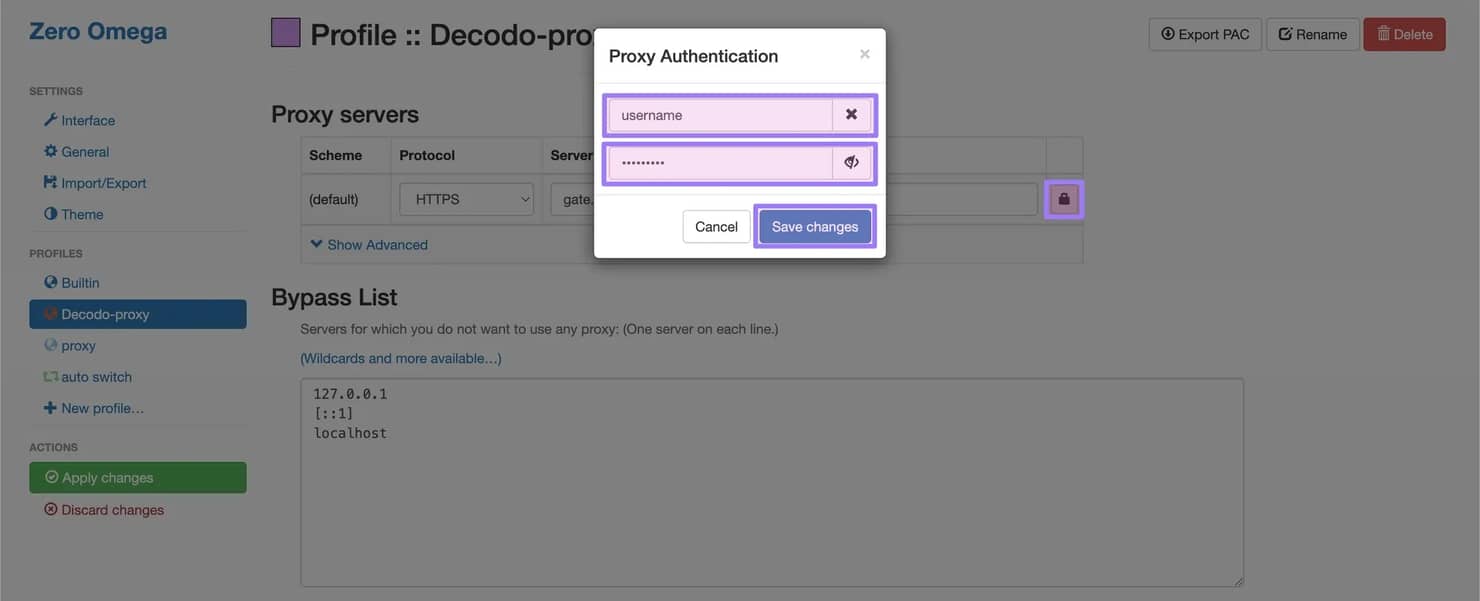
Log in to your Decodo dashboard, find residential proxies by choosing Residential under the Residential column on the left panel, and select a plan that suits your needs. Then, open the Proxy setup tab and copy the username and password. Save it, as you'll need to use it later.
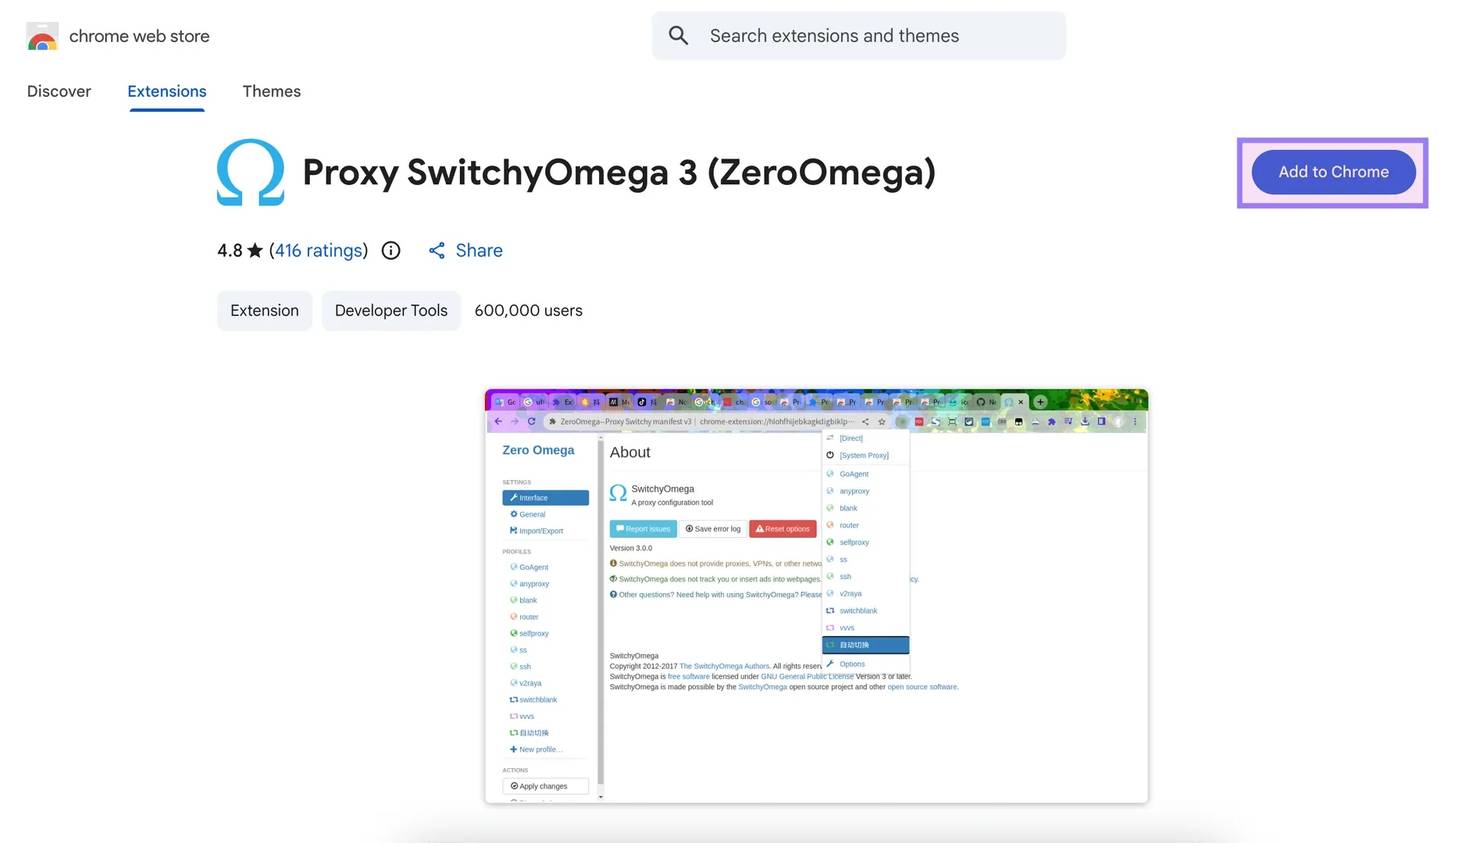
Install SwitchyOmega
Download and install the SwitchyOmega (ZeroOmega) extension from:
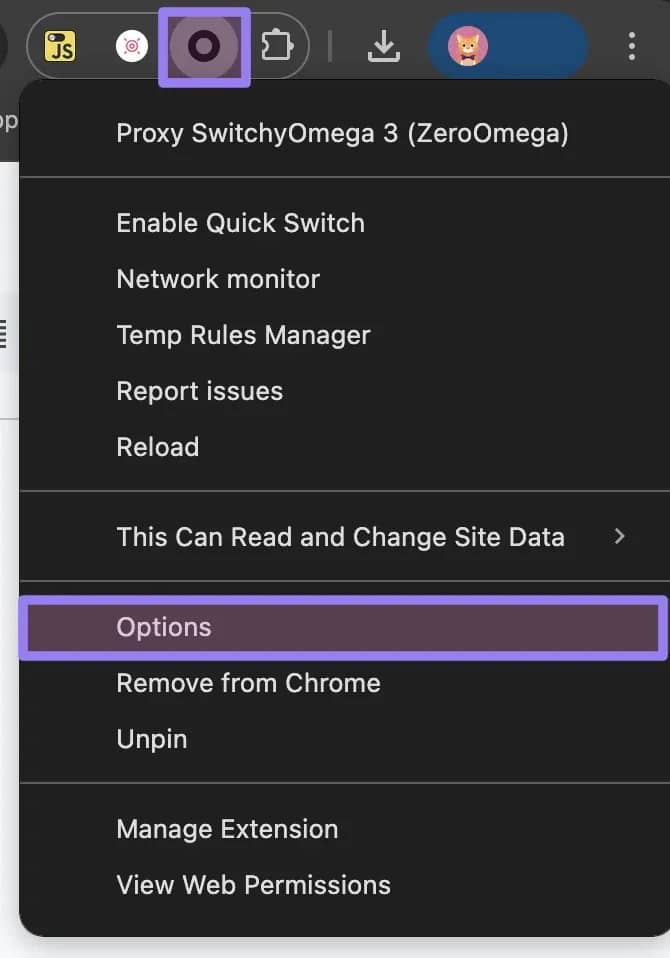
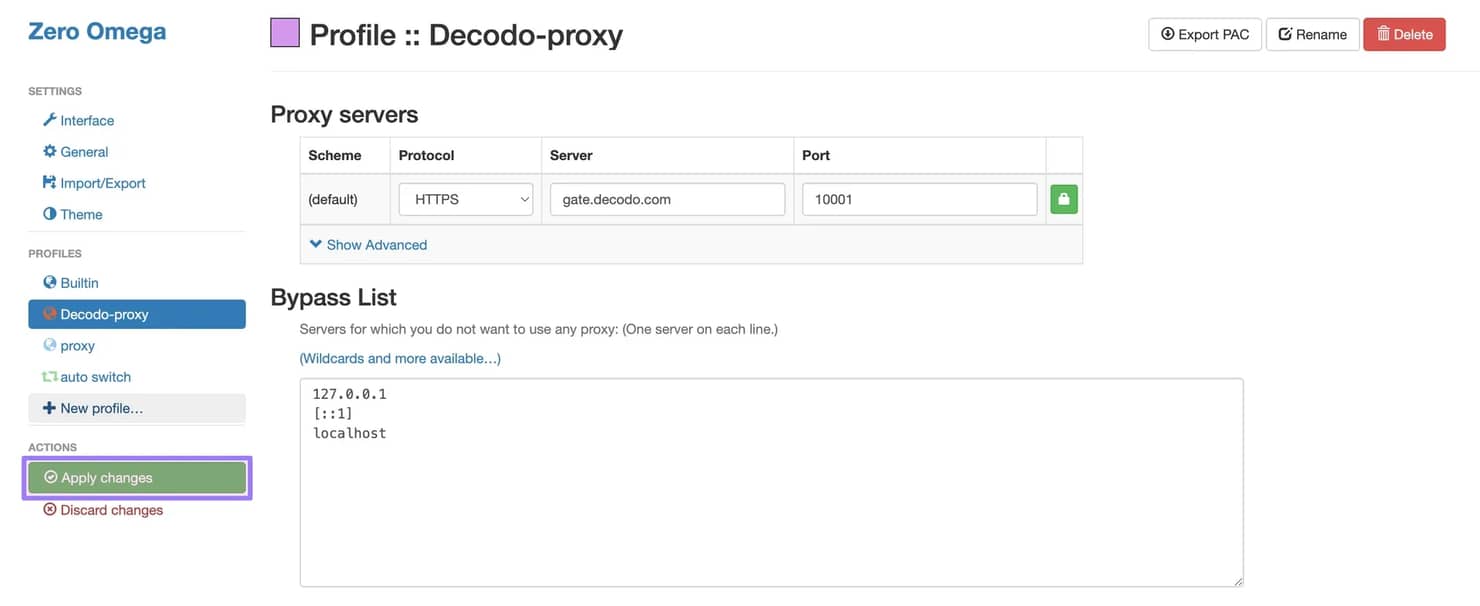
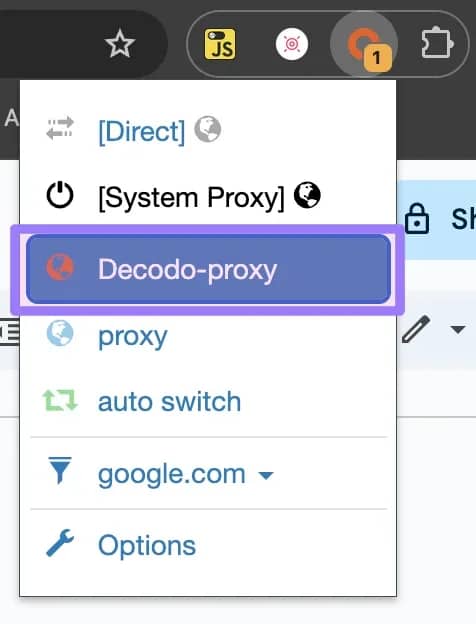
Configuration
The following configuration process is demonstrated on the Chrome browser:
- Find the Proxy SwitchyOmega 3 (ZeroOmega) extension, right-click, and select Options.
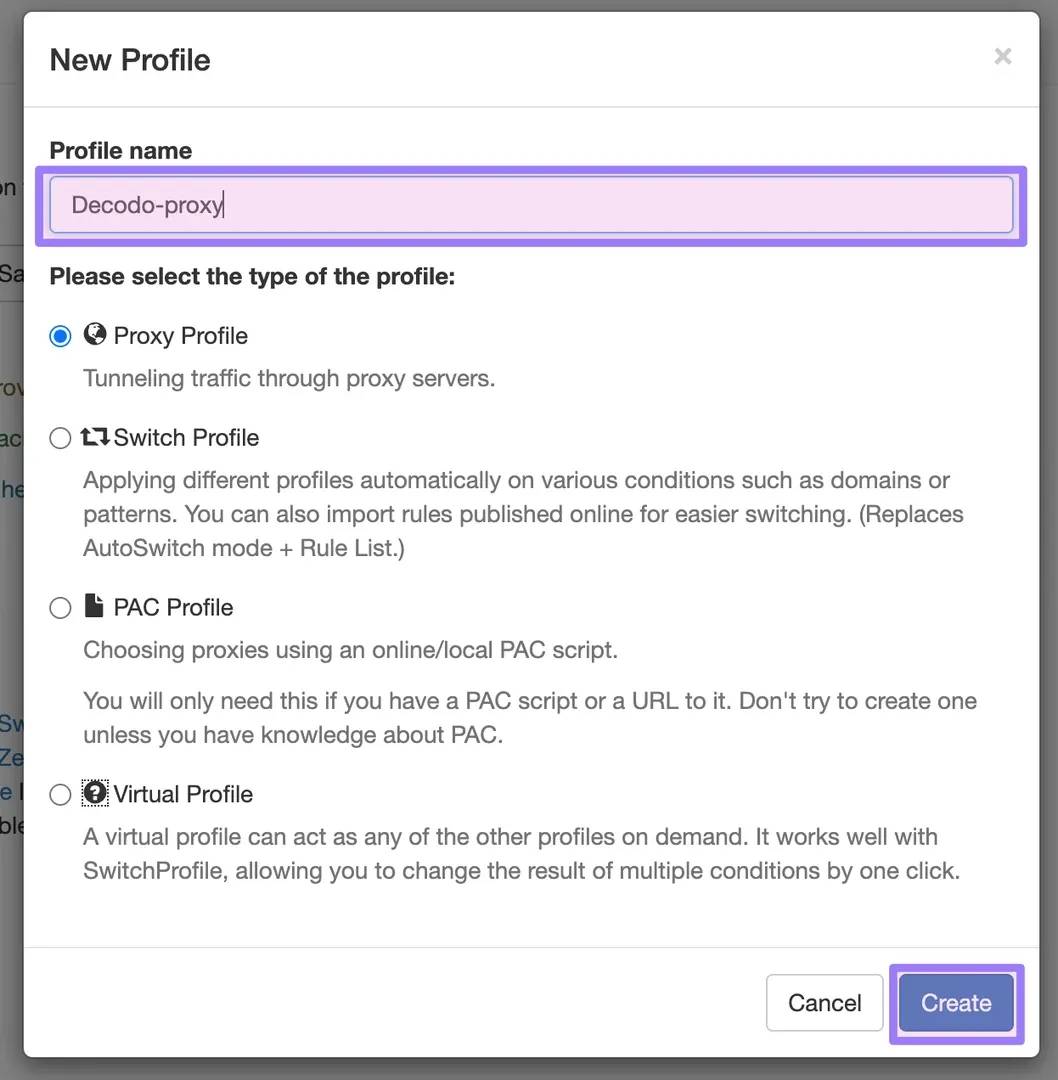

Choose Decodo
Never get flagged
Avoid getting detected by using our vast pool of residential exit nodes.
Unlimited connections
Use an unlimited number of connections, threads and countries at once.
City and Country level targeting
Use residential IPs from as many countries or cities as you like. Change locations as often as needed.