Golang Headless Browser: Complete chromedp Tutorial
A plain Go HTTP client only sees the HTML the server returns. That's enough for static pages. It breaks down when JavaScript renders the real content later, which is common on SPAs, infinite-scroll interfaces, and login-protected flows. chromedp solves that by driving Chrome or Chromium through the Chrome DevTools Protocol, or CDP, without a separate WebDriver layer. In this tutorial, you’ll set up chromedp, extract dynamic content, interact with pages, route traffic through proxies, run Chrome in Docker, and scale scraping with goroutines.
Justinas Tamasevicius
Last updated: Apr 30, 2026
16 min read
TL;DR
- chromedp gives you direct Chrome or Chromium automation from Go through CDP
- Use it when JavaScript renders the data. If the page returns complete HTML, a plain HTTP client is usually faster and cheaper.
- The core workflow is simple: create a context, run actions, wait for the right page state, then extract data
- Good selectors and explicit waits such as WaitVisible() and WaitReady() matter more than blind Sleep() calls
- chromedp handles clicks, forms, pagination, infinite scroll, screenshots, PDF export, network interception, and concurrent scraping
- It works well with proxies and Docker, but high-friction targets usually require more than browser control alone
Introduction to chromedp and headless browsers in Go
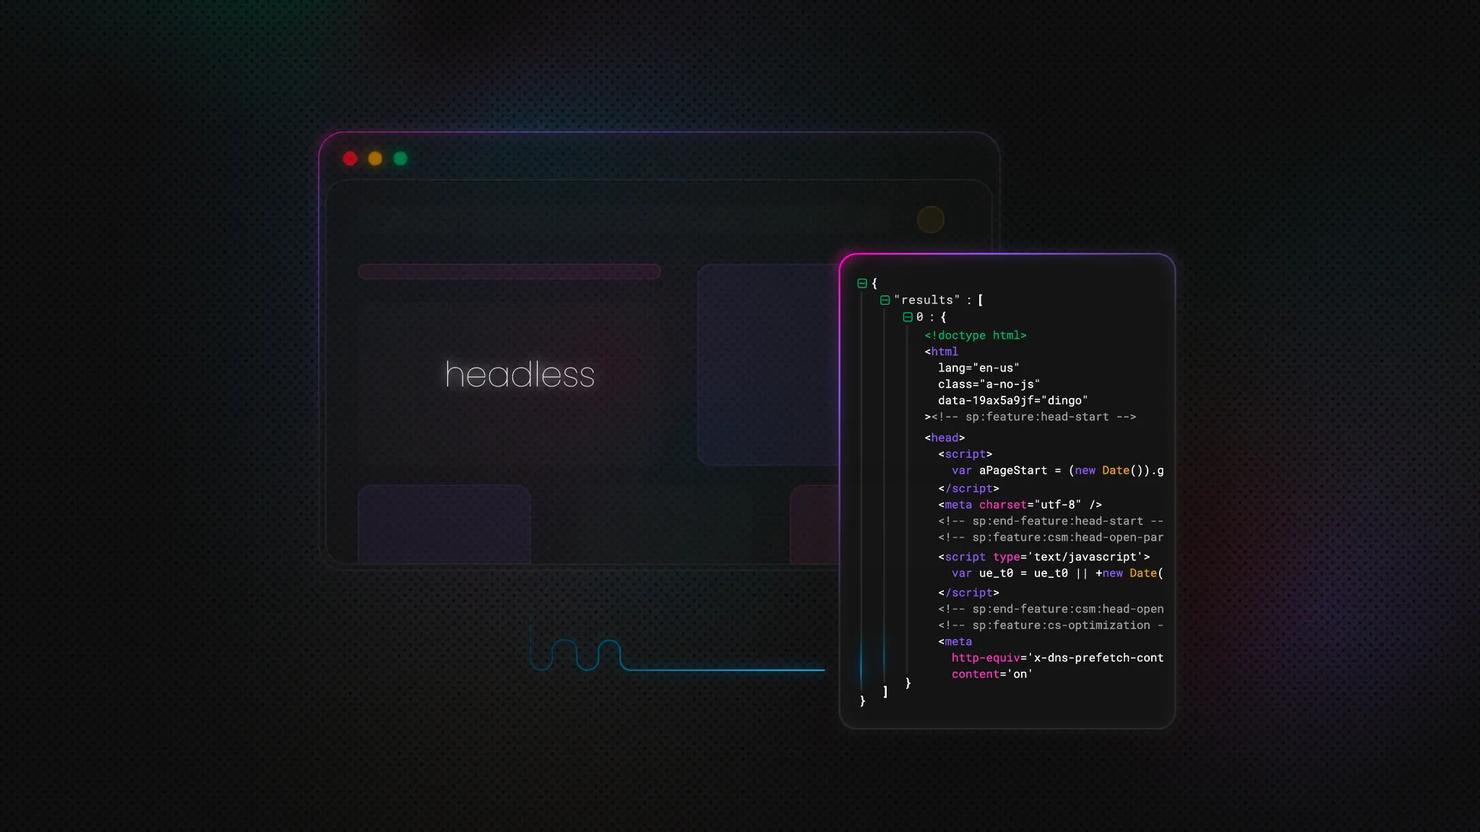
A headless browser is a real browser engine running without a visible UI. It still loads pages, executes JavaScript, handles cookies, processes network requests, and renders the DOM like a normal browser. That's useful because many modern pages fetch data with JavaScript after the initial load, so a plain HTTP client never sees the finished page.
In Go, chromedp is the most direct way to do that. It talks to Chrome or Chromium through the Chrome DevTools Protocol, or CDP. CDP is Chrome's low-level protocol for inspection, debugging, automation, and profiling. chromedp wraps it in an idiomatic Go API, so you control the browser with contexts and task lists instead of raw protocol messages.
You still need Chrome or Chromium installed, but you don't need a separate WebDriver service. That keeps the setup simpler and fits naturally with Go’s context.Context model, cancellation, and explicit task execution.
Why choose chromedp in Go
chromedp stays close to Go's standard patterns. It speaks to CDP directly, gives you precise control over navigation, waiting, DOM extraction, screenshots, PDF export, cookies, JavaScript evaluation, and network events. If you want to understand what the browser is doing rather than hide it behind too much abstraction, chromedp is a good fit.
That said, it's not the only option.
go-rod is the closest alternative in the Go ecosystem. It often feels more ergonomic when you want more built-in help with timing and interaction flow.
Playwright for Go takes a different approach. It gives you one API across Chromium, Firefox, and WebKit, but the Go binding is community-maintained. It's the better fit when cross-browser support matters more than direct CDP control and Go-native simplicity.
Which tool fits which job
Tool
API style
Browser support
Auto-waiting
CDP control level
Best use case
chromedp
Idiomatic Go, context-based
Chrome / Chromium
More explicit
Direct and low-level
Go-first scraping and automation where you want control
go-rod
Higher-level Go API
Chrome / Chromium
Stronger built-in waiting
Still close to CDP
Faster development when timing and interaction ergonomics matter
Playwright for Go
Cross-browser automation API
Chromium, Firefox, WebKit
Strong
More abstracted
Projects that must run across multiple browser engines
When a headless browser is worth it
Use a headless browser when the page depends on client-side rendering. That includes React, Vue, other SPA-style applications, infinite-scroll interfaces, and flows where you need to click, type, or wait for XHR or fetch requests to populate the page.
If the target returns complete HTML in the initial response, a plain HTTP client is usually the better engineering choice. It's faster, lighter, and easier to scale.
Set up chromedp in Go
Before you start, you need 2 things in place:
- Go 1.19 or later
- Chrome or Chromium installed on the machine that runs your scraper
chromedp installs as a normal Go module, but it still depends on a local browser binary. If Chrome is in a non-standard location, you can point chromedp to it explicitly instead of relying on auto-discovery.
Project initialization
Start with a clean project directory and initialize a module:
That installs chromedp the standard Go way.
Your first main.go can stay minimal:
This shows the basic execution model. You create a browser context with chromedp.NewContext() and run browser actions with chromedp.Run().
Understanding the chromedp context model
If you're used to Go backends, this API will feel familiar. chromedp uses Go's context.Context to control browser lifetime, cancellation, and deadlines. That gives you a hierarchy:
browser context -> tab context -> task execution
That hierarchy matters because cancellation flows downward. If you forget to cancel a parent context, you can leave browser processes running.
ExecAllocator vs. RemoteAllocator
There are 2 main ways to run Chrome with chromedp.
The default is ExecAllocator. Your Go program launches a local Chrome or Chromium process and controls it directly. This is the simplest setup for local development, scripts, and most standalone scrapers.
Here's the local pattern:
The second option is RemoteAllocator. In that model, your Go program connects to a browser that's already running elsewhere, usually through a DevTools WebSocket endpoint. Use it when you need a long-lived Chrome instance or want the browser process managed separately from the scraper.
Here's the remote pattern:
Use the local model when your scraper owns the browser lifecycle. Use the remote model when Chrome is managed separately, such as in a shared container, a remote browser service, or a debugging setup that connects to an existing instance.
Running in visible mode during development
By default, Chrome runs in headless mode. During development, it's often easier to watch the browser than guess what failed. Disable headless mode like this:
This makes debugging much easier. You will spot bad selectors, blocking modals, and premature waits immediately.
When you need ExecPath
Most of the time, chromedp finds Chrome on its own. When it doesn't, set the executable path explicitly. This is common on stripped-down Linux servers, custom Chromium installs, and some CI images.
Use this when you want a deterministic environment setup instead of relying on whatever browser binary happens to be on PATH.
Basic usage of chromedp
Once setup is done, the basic chromedp workflow is simple: run a sequence of actions and fail fast on the first error. For this tutorial, Books to Scrape is a good target because the markup is stable and the pagination is predictable.
Your first working chromedp scraper
Start with a simple flow:
- Navigate to the page
- Wait for a known element
- Extract the data you need
- Print the result
This example opens the first catalog page and extracts the first book title:
The 2 key actions here are Navigate(), which loads the page, and WaitReady(), which waits until the matching node exists in the DOM.
Extracting text, HTML, and attributes
In real scrapers, you usually need 3 kinds of values: visible text, raw HTML, and attributes such as href or src. chromedp provides a direct action for each.
In practice, that looks like this:
Use Text() when the page has already rendered the value you need. Adding chromedp.NodeVisible limits the match to a visible node, which helps avoid hidden duplicates in more complex layouts.
Use OuterHTML() when you want the raw markup for a block and plan to parse it yourself later.
Use AttributeValue() for URLs, image sources, data-* attributes, and other values that are not text nodes.
Working with multiple matching elements
Most scraping jobs need a list of nodes to execute more complex tasks. Nodes() returns the matching DOM nodes as a slice, which you can then iterate over. The underlying node type comes from the CDP package and is exposed as []*cdp.Node.
On Books to Scrape, each product card uses the .product_pod selector, so you can grab all visible books on the page and then query each card for its title, price, and rating.
This isn't the only way to structure it, but it shows the basic pattern. You collect the matching nodes first, then use stable selectors to extract fields from each card.
Finding and interacting with page elements
Once you move past simple extraction, chromedp becomes a real browser control library. You decide how to locate elements, when to wait, and how to trigger interactions in the same order a real browser would. Most failures happen in that middle layer, not in the request itself. chromedp gives you the core actions for it: waits, clicks, typing, form submission, and JavaScript evaluation in the page context.
Choosing the right selector strategy
By default, chromedp works well with CSS selectors through chromedp.ByQuery(). Start there. CSS selectors are compact, readable, and easy to test in DevTools. For most scraping and automation work, a class, ID, attribute selector, or structural selector such as nth-child is enough.
XPath via chromedp.BySearch() is useful when CSS becomes awkward, especially when you need to target an element through nearby text or a more complex document relationship.
chromedp.ByJSPath() is the fallback when neither CSS nor XPath expresses the target cleanly. Treat it as a last resort because it is usually the least readable and the hardest to maintain.
Waiting is where most scrapers break
Most scraping failures happen because the code acts before the page is ready. Navigation can finish while the key element is still missing, hidden, disabled, or still rendering. That's why chromedp gives you multiple wait actions instead of one generic wait.
- Use chromedp.WaitVisible() when the element must exist and be visible. This is the safest default for buttons, links, result cards, and other interactive elements.
- Use chromedp.WaitReady() when the node only needs to exist in the DOM, even if it isn't visible yet
- Use chromedp.WaitEnabled() when the element appears early but only becomes clickable after client-side validation or another JavaScript state change.
Use chromedp.Sleep() only as a last resort. On a fast connection, it wastes time. On a slow one, it still fails. Wait for a real condition whenever you can.
Clicking, typing, and submitting forms
Once the page is ready, the main interaction actions are straightforward:
- chromedp.Click() clicks the matching element
- chromedp.SendKeys() types into an input the way a user would, which makes it the safer default for search forms, filters, pagination, and login flows
- chromedp.SetValue() sets the input value directly. It can be faster, but it may skip listeners that depend on key, input, or change events.
- chromedp.Clear() clears an input before you refill it
- chromedp.Submit() submits the form element itself instead of clicking a visible button
When a page depends heavily on client-side logic, SendKeys() is usually safer than SetValue().
This example waits for a search field, clears it, types a query, and submits the form:
The sequence is the important part: wait, clear, type, submit.
When JavaScript is the better tool
Not every interaction maps cleanly to a built-in browser action. In those cases, use chromedp.Evaluate() to run JavaScript in the page context and return the result to Go.
This is useful when you need to read a JavaScript variable, inspect browser state, trigger a page function, scroll a specific container, or perform a DOM action that would be more verbose through CDP actions alone. It's powerful, but it should stay targeted. If you solve everything with injected JavaScript, the scraper becomes harder to reason about and easier to break when the page changes.
For example, reading a page-level value can be as simple as:
That same pattern also works for scroll helpers, custom DOM reads, and small interaction patches.
Advanced interactions and features
Once navigation, waits, and extraction are working, you can start using chromedp for more advanced browser tasks. That includes pagination, infinite scroll, screenshots, PDF export, network interception, and concurrent scraping.
Handling pagination
Pagination usually has 2 forms: click-driven and URL-driven.
Click-driven pagination is the more general option. You find the "next" control, click it, wait for the next page state, extract data, and repeat. Use it when navigation happens through JavaScript, URLs are opaque, or results load dynamically after interaction.
URL-driven pagination is simpler and usually faster. Books to Scrape exposes predictable catalog URLs and shows 20 items per page, so you can construct the URLs directly and skip the click layer. On sites with stable URL patterns, that's usually the cleaner choice.
Here is a compact URL-based pagination loop:
If the site doesn't expose a stable URL pattern, switch to click-based pagination and wait for a selector that clearly marks the new state, not just the old page shell.
Handling infinite scroll
Infinite scroll is pagination without clear page boundaries. The usual pattern is simple: scroll, wait for new content, count the matching elements, and stop when the count stops growing.
In chromedp, scrolling is often easiest through Evaluate(). You can call window.scrollTo() or window.scrollBy() directly, then compare the number of matching result cards before and after the scroll:
If the count doesn't increase after a scroll cycle, you have likely reached the end of the loaded content.
Taking screenshots and exporting PDFs
chromedp gives you 3 screenshot methods, and each one solves a different problem.
Use CaptureScreenshot() when you want an image of what's currently visible:
Use Screenshot() when you want to capture a specific element instead of the whole viewport. This is the right choice for a product card, chart, table, modal, or any other DOM node you want as a standalone image:
Use FullScreenshot() when you need the entire scrollable page in one image. It also takes a quality parameter for the captured output:
For PDF export, chromedp doesn't use one of those screenshot helpers. Instead, it calls the Chrome DevTools Protocol Page.printToPDF command through the cdproto/page package:
Intercepting network traffic with ListenTarget
ListenTarget() is useful when the page loads data through XHR or fetch and then renders it into the DOM. In those cases, you can intercept the raw response and parse structured JSON directly instead of scraping final HTML. That's often more reliable because it avoids brittle selectors and post-render timing issues.
This example uses DummyJSON as a predictable public API. It opens about:blank, triggers a fetch() call with Evaluate(), and intercepts the response through ListenTarget():
First, network.Enable() turns on Chrome's network event stream, which is required before you can observe responses. Then ListenTarget() registers a callback that receives browser events for the current target. Inside that callback, the code filters for EventResponseReceived() events and ignores everything except XHR and fetch traffic.
The next filter is the request URL. That keeps the listener narrow and avoids parsing unrelated background requests. Once the matching response appears, the code starts a goroutine and retrieves the body with network.GetResponseBody().
That cdp.WithExecutor(...) is also important. Inside a ListenTarget() callback, you need to execute the CDP command against the current target session, not just the parent Go context. Without that executor binding, GetResponseBody() often fails.
After that, the rest is straightforward. The raw response body is unmarshaled into a ProductsResponse struct, stored safely behind a mutex, and signaled through the done channel. The main flow waits until interception finishes, then prints the captured products.
Concurrent scraping with goroutines
Concurrency is one of Go’s real advantages here, but browser work is expensive. Unbounded concurrency will consume memory fast, especially if each worker launches its own browser process.
Give each goroutine its own chromedp context. Use a shared parent context if you want a common lifetime, then create a child context per worker. Coordinate completion with sync.WaitGroup() and cap concurrency with a semaphore or worker pool:
The buffered sem channel limits active workers to 3. In browser automation, that matters because the bottleneck is often RAM and browser overhead, not CPU alone.
Avoiding blocks and anti-scraping measures
Once you start running chromedp against real sites at scale, browser control stops being the only problem. Detection systems look at browser fingerprints, network behavior, TLS characteristics, request cadence, and interaction patterns together.
How headless Chrome gets detected
One of the best-known signals is navigator.webdriver. It's as a browser-exposed indicator of automation, and many defenses still check it first because it's cheap and easy.
Anti-bot systems also compare what the browser claims to be with what it actually exposes. A session can look suspicious if the user agent, viewport, GPU details, language settings, available APIs, timezone, and rendering behavior don't line up.
Behavior matters too. A browser that navigates instantly, clicks with identical timing, loads page after page without pause, and reuses the same IP under sustained volume is easier to separate from real traffic.
What you can do in chromedp
Start by making the browser configuration less obviously automated. chromedp lets you set the viewport, user agent, and startup flags directly when you create the browser process. A simple baseline looks like this:
A realistic viewport is important because a tiny default headless window is a weak signal. The disable-blink-features=AutomationControlled flag also matters because Chromium documents that it affects automation exposure.
You can also override navigator.webdriver early in the page lifecycle:
That can remove one obvious signal, but it doesn't solve deeper fingerprinting. Treat it as just a part of the strategy.
Using proxies with chromedp
For sustained scraping, IP quality and rotation are usually more important than small browser tweaks. chromedp lets you set a proxy server at launch through allocator flags:
If your proxy requires authentication, enable the network domain and respond to auth challenges through CDP events. Chrome DevTools Protocol exposes Fetch.authRequired and continueWithAuth, which is the standard pattern for authenticated upstream proxies in browser automation flows:
For rotation, a reliable approach is to create a new browser session, or at least a new allocator context, for each identity you want to rotate. That gives you a fresh browser process, fresh proxy endpoint, and a cleaner session boundary.
A good proxy choice would be Decodo's residential proxies because they provide browser-session-level IP rotation rather than DOM automation itself.
Your goroutines need backup
You've got concurrent scrapers running beautifully, until every single one gets rate-limited from the same IP. Decodo's rotating proxies fix that.
When chromedp isn't enough
Some targets use enterprise anti-bot platforms that evaluate TLS fingerprints, HTTP/2 traits, browser APIs, behavioral signals, IP reputation, and challenge outcomes together.
When you hit systems like Cloudflare Bot Management, DataDome, HUMAN, or similar stacks, a well-configured browser and solid proxies may still not be enough.
If your Go code turns into a long list of browser patches, proxy rotation logic, challenge handling, and retry heuristics, the scraping infrastructure becomes the main problem. At that point, a managed scraping layer such as a Web Scraping API can be the cleaner option because it moves rendering, fingerprint handling, proxy management, and challenge mitigation out of your scraper code.
Running chromedp with Docker
Docker helps when you want predictable browser behavior across local development, CI, and production. With chromedp, the simplest starting point is the official chromedp/headless-shell image, which bundles Chrome’s headless-shell for CDP-driven automation.
There are 2 practical deployment patterns:
- Run your Go program and the browser in the same container.
- Run the browser as a separate container and connect to it remotely.
Why Docker helps with chromedp
A browser in a container is less forgiving than a browser on your laptop. You want a pinned, known-good browser build, and you want the same runtime in local development, CI, and production. The chromedp/headless-shell image gives you exactly that: a ready-to-use headless Chrome environment designed for CDP workflows.
Option #1: Run your Go program inside the headless-shell image
This is usually the simplest setup. Build the Go binary in one stage, then copy it into a final image based on chromedp/headless-shell. Because the image already contains a compatible browser binary, chromedp can usually discover it without extra configuration.
In this model, a standard ExecAllocator setup is enough because the browser starts in the same container as the binary:
Just note that you'll need an disable-dev-shm-usage flag when working with containers.
Option B – run headless-shell as a sidecar
If you want the browser in a separate container, start chromedp/headless-shell with the DevTools port exposed, then connect to it through RemoteAllocator().
Then connect from Go:
This works well in Docker Compose or microservice-style deployments, but it adds one more moving part. Unless you need that separation, the single-container pattern is usually easier to operate.
The /dev/shm problem that trips people up
The most common Docker issue here is /dev/shm. Containers get a small shared-memory area by default, often 64 MB. Chrome uses shared memory heavily, so when that space is too small, the browser can crash or disconnect in ways that look random.
The usual fix is to start the container with a larger shared-memory allocation, such as --shm-size=2gb:
You can also pass chromedp.Flag("disable-dev-shm-usage", true). That tells Chrome to use /tmp instead of shared memory. It's often a practical default in production containers, especially when you cannot control container startup flags.
Troubleshooting common issues
"context canceled" error
This usually means the context ended too early or Chrome crashed underneath chromedp. Increase the timeout first. Then verify that Chrome is installed, reachable, and still running. In Docker, also check /dev/shm and browser flags.
"exec: chrome: executable file not found in $PATH"
This means chromedp couldn't find a Chrome or Chromium binary. Auto-discovery only works when the browser is installed in a standard location.
Install Chrome or Chromium, or set the executable explicitly with chromedp.ExecPath(...). This is common on Linux servers, CI runners, and custom Docker images where the browser path is not standard. For example:
Page content is empty or elements aren't found
This usually means you are reading the page too early. Replace blind sleeps with WaitVisible() or WaitReady(). If the selector still doesn't appear, inspect the rendered page in DevTools and verify that you are targeting the live DOM, not static HTML assumptions.
"read: connection reset by peer" or sudden disconnections
This usually means Chrome crashed or the browser connection broke. In Docker, check /dev/shm first. In remote-browser setups, verify that the browser process is still running and the DevTools WebSocket endpoint is still valid.
Final thoughts
For direct browser automation in Go, chromedp is hard to beat. It gives you direct control and solid CDP access without a separate WebDriver layer, keeping your workflow feeling like Go. For many dynamic tasks, pairing it with residential proxies is enough. However, when you hit aggressive anti-bot systems, browser control is only one part of the problem. Handling proxy rotation, fingerprinting, and CAPTCHAs quickly turns into heavy infrastructure work. If that happens, switching to a managed tool like Web Scraping API is usually more practical.
Go fast, scrape faster
Decodo's Web Scraping API returns parsed data so you can spend your time writing clean Go instead of wrestling with anti-bot detection.
About the author

Justinas Tamasevicius
Director of Engineering
Justinas Tamaševičius is Director of Engineering with over two decades of expertise in software development. What started as a self-taught passion during his school years has evolved into a distinguished career spanning backend engineering, system architecture, and infrastructure development.
Connect with Justinas via LinkedIn.
All information on Decodo Blog is provided on an as is basis and for informational purposes only. We make no representation and disclaim all liability with respect to your use of any information contained on Decodo Blog or any third-party websites that may belinked therein.