AutoGPT Integration Guide: Set Up, Customize, and Connect Your AI Agents to External Data
Most AutoGPT tutorials stop at "get it running", but that's the easy part. The harder part that determines whether your agents are useful is connecting them to live data, and AutoGPT helps you fix that. This guide covers AutoGPT local setup, UI navigation, custom Python block development, and the integration patterns that turn AutoGPT into a production workflow tool.
Justinas Tamasevicius
Last updated: Apr 23, 2026
8 min read

What is AutoGPT, and how has it evolved?
AutoGPT is an open-source platform for creating, deploying, and managing autonomous AI agents through a block-based, low-code interface. Agents run on triggers or schedules, the block system handles modular workflow composition, and the marketplace lets you import or share pre-built templates. On the LLM side, AutoGPT supports OpenAI, Anthropic, Groq, and Llama, so you're not locked into a single provider.
AutoGPT started in 2023 as one of the first demonstrations that you could chain GPT-4 prompts into a self-directed loop. The GitHub repo hit 100K stars in under a week, but the excitement hid a major problem: it didn't work reliably enough to ship. LLM chains are probabilistic by design, so an agent that succeeds 9 times out of 10 will silently drift on the tenth, choosing a different subtask order, misinterpreting an output, or looping indefinitely on an ambiguous instruction. In production, where you’re handling real data with real consequences, this issue is a blocker.
The current version of AutoGPT is the technical response to that problem. Instead of letting the LLM plan the entire sequence, you define workflows explicitly using a visual block system, and the LLM handles reasoning within each block. The unpredictability doesn't disappear, but it becomes contained and debuggable.
In general, the platform only has 2 components. The AutoGPT Server handles backend logic, the execution engine, the marketplace, and the database layer using PostgreSQL with Prisma ORM and FastAPI. The AutoGPT Frontend is a Next.js 14 application providing the agent builder canvas, workflow management, and a monitoring dashboard. They run independently, so you can deploy them separately if your infrastructure requires it.
For LLM fundamentals, guides like how to train a GPT model cover the foundational concepts, and the GPT glossary is worth bookmarking for reference.
Prerequisites and environment setup
Before installing AutoGPT, you need 4 dependencies in place: Node.js 22.x and pnpm for the frontend, Docker and Docker Compose v2 for the containerized backend services, and Git for cloning the repository. The frontend declares "engines": { "node": "22.x" }, so earlier Node versions will cause issues. Use pnpm rather than npm when running the frontend outside Docker (install it via npm i -g pnpm or enable it through Corepack).
macOS (via Homebrew)
Linux and WSL2 (via apt)
Verify each installation before proceeding.
Windows users: During Docker Desktop installation, select WSL2 as the backend rather than Hyper-V. Supabase, which AutoGPT uses for auth and storage, has known compatibility issues with Hyper-V on Windows.
You'll also need an API key from at least one LLM provider. OpenAI is the most straightforward starting point – generate one at platform.openai.com and keep it ready for the environment configuration step. If you're new to working in a terminal, our guide to running Python code in terminal covers the basics.
Installing AutoGPT locally with Docker
Backend setup
Start by cloning the repository and navigating into the platform directory.
Copy the example environment file to create your working configuration.
The .env file ships with sensible defaults and doesn't require manual editing at this stage, so you can start the backend services straight away.
The first build pulls all required images and compiles the services, so you can expect a significant wait on the first run, but subsequent starts are much faster. Once running, the backend exposes 2 ports: 8001 for the WebSocket connection and 8006 for the HTTP API.
Frontend setup
With the Compose setup above, the UI is already served at http://localhost:3000. You only need a local dev server if you're working on the frontend outside Docker.
Verification and first login
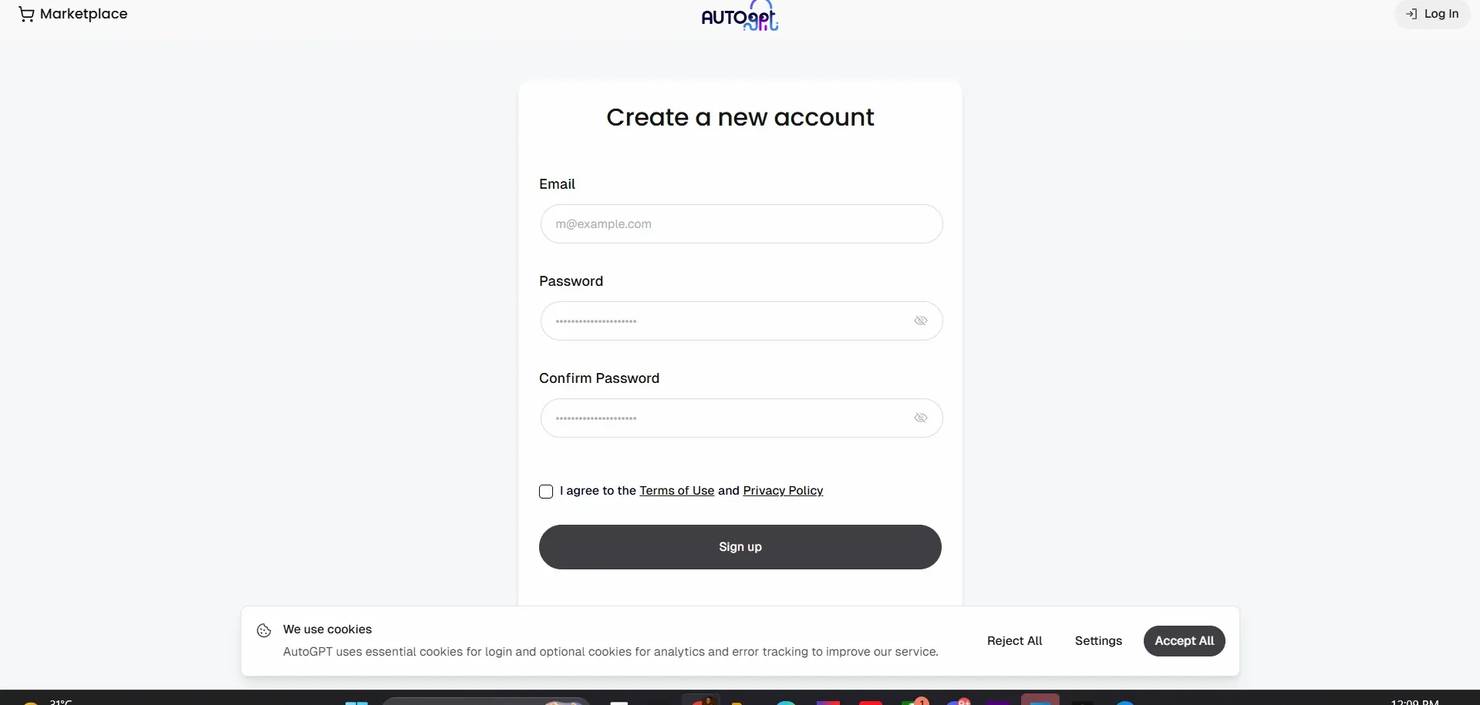
Visit http://localhost:3000. You should see the AutoGPT marketplace UI. Create an account and log in before building any agents. The account is local to your instance and doesn't require external verification.
For any deployment you plan to expose externally, generate a dedicated encryption key by running the following.
Copy the printed value into your .env file as the value for ENCRYPTION_KEY.
Navigating the AutoGPT user interface
The builder is a canvas-based workspace. The left sidebar holds the primary navigation icons, including Undo and Redo. The bottom bar contains agent controls: run, schedule, and edit options. Opening the Blocks menu reveals a search bar at the top – "Blocks, Marketplace Agents, Integrations or Keywords..." which is the fastest way to find a specific block rather than browsing manually.
The Blocks menu organizes components into 6 categories: Input blocks (11), Action blocks (100+), Output blocks (1), Integrations (100+), Marketplace Agents, and My Agents. Integrations are a first-class category, with services like Twitter, GitHub, Notion, Google, Discord, and Google Maps visible without scrolling. Each block has input fields on the left, output fields on the right, and connection edges you drag between them to define data flow. API keys and credentials appear as one-time fields that are stored securely after initial entry.
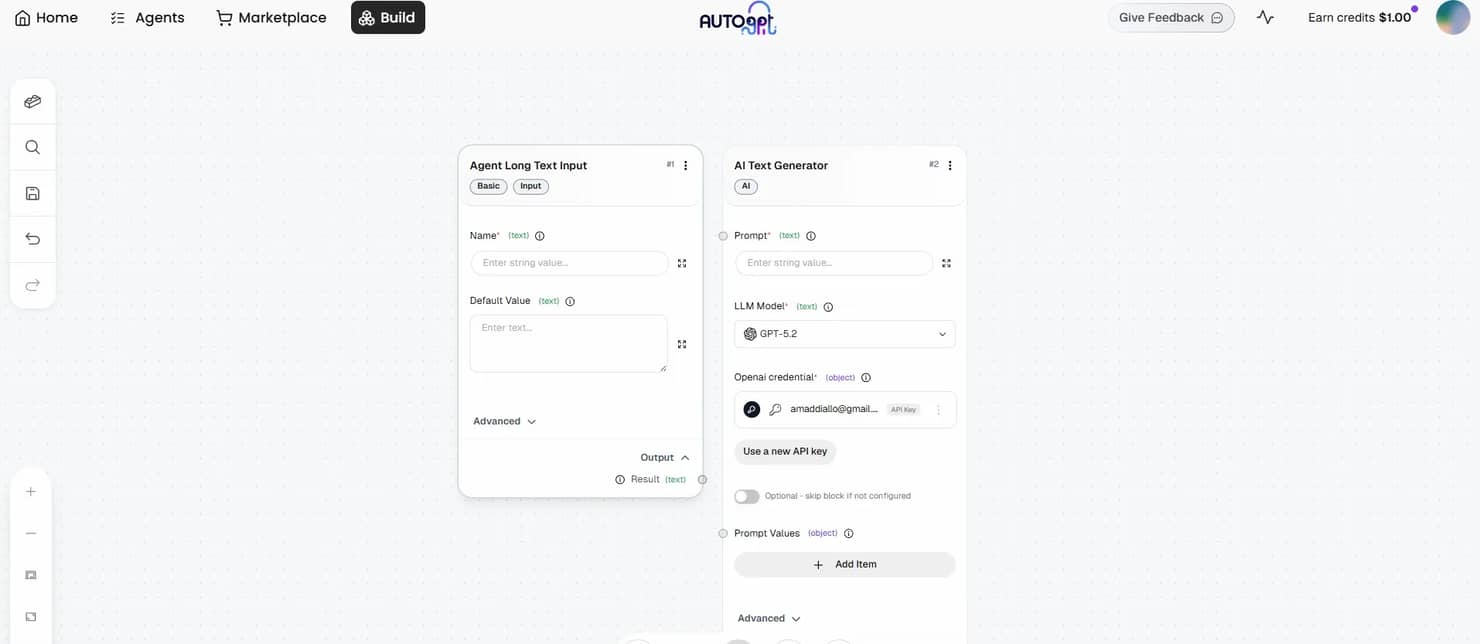
Building a minimal agent is the fastest way to understand the system. Search for "Long Text Input" in the Blocks menu and add it to the canvas, then search for "AI Text Generator" and connect the two. Set your OpenAI key in the credential field, save the agent, and click the run button in the bottom bar. The run modal prompts you for input values, executes the workflow, and surfaces results in the Agent Outputs pane.
Adding a dedicated Output block consolidates results in one place and makes the output easier to route to downstream blocks. Saved agents appear under My Agents in the Blocks menu and become reusable as blocks inside other agents, which lets you build layered workflows without duplicating shared logic.
Configuring environment variables and API keys
Both the backend and frontend have separate .env files. The backend file lives at autogpt_platform/.env and controls the execution engine, database connections, and LLM provider keys. The frontend file at autogpt_platform/frontend/.env manages the Next.js application configuration. Both are copied from their respective .env.default files during setup.
Add your OpenAI key to the backend .env using this format.
The same pattern applies to alternative providers.
For vector memory, Pinecone is available as a set of built-in blocks (initialize index, query, upsert, and others) rather than as env vars. When you add a Pinecone block to an agent and run it, the builder prompts you to enter your Pinecone API key through the platform's credentials system – the same pattern used by other third-party integrations. There are no PINECONE_API_KEY or PINECONE_ENV lines in .env.default.
For env-based memory configuration, AutoGPT includes Graphiti, a temporal knowledge graph backed by FalkorDB. The relevant section of .env.default looks like this.
For env-based memory configuration, AutoGPT includes Graphiti, a temporal knowledge graph backed by FalkorDB. The relevant section of .env.default looks like this.
Graphiti's LLM key falls back to CHAT_API_KEY, then OPEN_ROUTER_API_KEY. The embedder key falls back to CHAT_OPENAI_API_KEY, then OPENAI_API_KEY. For most setups, having OPENAI_API_KEY set is enough to satisfy both fallback chains. Note that Graphiti is currently rollout-controlled by a LaunchDarkly feature flag, so availability may vary by deployment.
The template also groups several optional retrieval and search keys under "Data & Search Services" – EXA, JINA, MEM0, and others, each as its own *_API_KEY line. Add only the ones your agents actually use.
Security best practices
- Never commit .env to version control. Add .env to your .gitignore before your first commit.
- Use separate keys for development and production. Keys scoped to development environments limit blast radius if they're accidentally exposed.
- Rotate keys that may have been exposed. Most providers (OpenAI, Anthropic, Groq) let you revoke and regenerate keys from their dashboards without changing your account.
- Store production credentials outside the repository. Use a secrets manager or environment injection at the deployment level rather than hardcoding values in any file that gets committed.
Writing custom blocks in Python
Built-in blocks cover most standard workflows, but real extensibility comes from writing your own. Before adding the example block, install beautifulsoup4 into the backend package by running the following.
Custom blocks must follow loader conventions, or they won't appear in the UI:
- The filename must be snake_case with a .py extension.
- The class name must end with Block.
- The id field must be a unique 36-character UUID string.
- Input and output schemas use SchemaField on BlockSchemaInput and BlockSchemaOutput.
- The run method must be async and yield outputs.
- Use test_mock for any block that calls external services – this prevents real API calls (and API costs) during test runs.
- Store any required credentials as environment variables accessed inside the block, not as hardcoded strings in the class definition.
Create autogpt_platform/backend/backend/blocks/web_data_fetcher.py with the following.
Replace the sample UUID with a freshly generated one – the loader rejects duplicates. After saving the file, restart the backend with docker compose up -d --build so the block is re-imported and appears in the Blocks menu.
For more on the scraping layer behind this pattern, the Python web scraping guide and the BeautifulSoup tutorial cover the parsing mechanics in detail.
Connecting AutoGPT to external APIs and data sources
An agent that only calls an LLM works with static knowledge. One connected to live data sources can monitor, compare, alert, and act on information that didn't exist when you built it.
REST API integration
AutoGPT's built-in HTTP Request blocks handle most standard API integrations without custom code. Configure the endpoint URL, authentication headers, query parameters, and how to map the JSON response to downstream blocks.
For a bearer token API, set the URL field to your endpoint, add an Authorization header with the value Bearer YOUR_API_KEY, and set the method to GET or POST. The response body arrives as a JSON string in the output field – pipe it into a JSON Parse block to extract specific keys before routing them onward.
For APIs that require OAuth flows, pagination handling, or stateful sessions, a custom Python block gives you full control. The pattern mirrors the web data fetcher block, where you define inputs, make the request in the run method using httpx, parse the response, and yield the fields you need downstream.
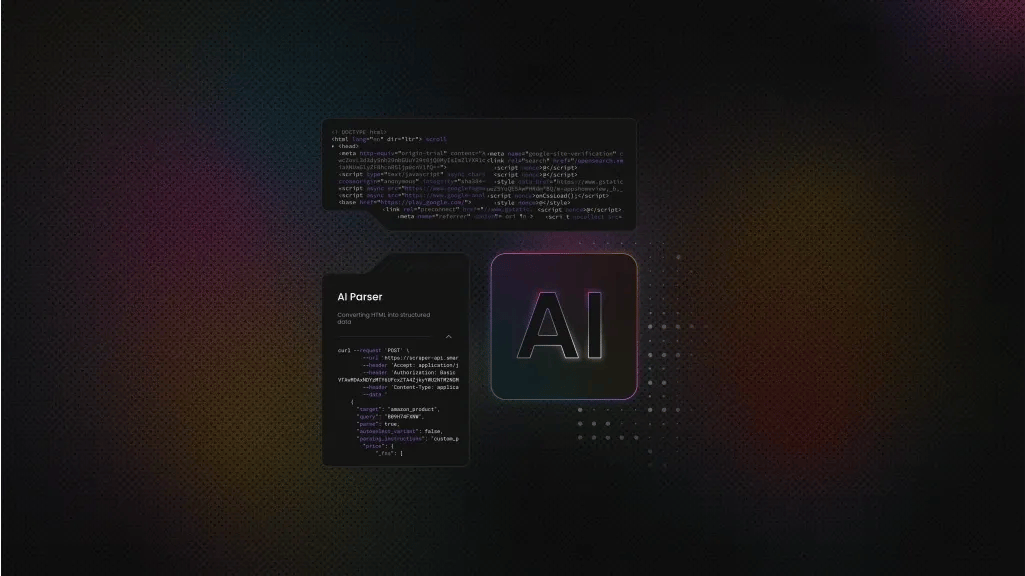
Live web data with Decodo's Web Scraping API
For data that lives on websites rather than behind an official API, Decodo's Web Scraping API provides structured access to publicly available pages. The API requires a POST request with a JSON payload, which the built-in Send Web Request block can't handle directly, making a custom block the right approach.
Start by installing the dependency.
Then create autogpt_platform/backend/backend/blocks/decodo_scraper.py:
The block supports 3 auth methods in priority order:
- basic_auth_token (the base64 token from your Decodo dashboard) takes precedence
- api_key for Bearer token auth
- username and password as a legacy fallback.
The headless parameter is set to "html" rather than a boolean – Decodo expects a string mode for rendered HTML output. Errors at the HTTP level and response parsing level both surface as RuntimeError with enough context to debug without reading logs.
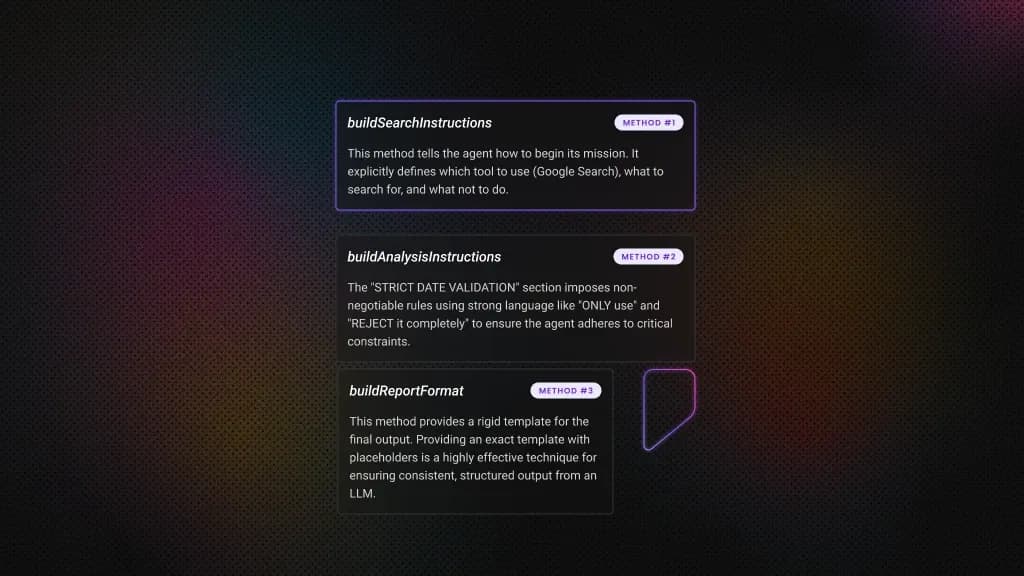
Wire it into a workflow where DecodoScraperBlock fetches and parses the page, an AI Text Generator block analyzes the extracted text, and an Output block stores or forwards the result. For a price monitoring workflow, the AI block prompt would instruct the model to compare extracted prices against your catalog and flag anything below a given threshold.
This pattern covers cases where no official API exists, where the target site uses JavaScript rendering that a plain HTTP request won't capture, or where rate limits on public APIs make direct access impractical.
Direct web access with Decodo's MCP Server
Decodo's MCP Server takes a different approach. Rather than building scraping logic into each workflow block, it gives AutoGPT agents direct, real-time web access as a native capability, so the agent queries sources when it needs current information without you wiring a dedicated scraping block into every workflow.
Use the scraping block pattern when you're monitoring specific pages on a schedule. Use the MCP Server when your agent needs to query sources dynamically across variable inputs as part of its reasoning – for example, a research agent that decides which URLs to fetch based on intermediate results rather than a fixed target list. The MCP Server setup guide covers the full configuration.
For readers building comparable workflows in other frameworks, the LangChain and Web Scraping API guide covers the same integration patterns with a different orchestration layer. Decodo's n8n integration is worth checking if you’re looking for a visual workflow orchestration running together with AutoGPT agents.
Let the agent cook
AutoGPT can plan the tasks, but it still needs data. Decodo's Web Scraping API feeds it clean, structured results without the IP bans.
Practical integration examples
The block patterns covered so far, scheduling, scraping, AI processing, and output routing, combine into workflows that replace work people are doing manually today. The 4 examples below are starting points, not limits. Each one follows the same spine: a trigger, a data collection layer, an AI processing step, and an output that lands somewhere actionable.
Competitive price monitoring
A Schedule Trigger fires daily and passes a list of competitor URLs to a custom DecodoScraperBlock, which returns structured pricing data. An action block extracts the specific price fields, and an AI Text Generator block compares the extracted prices against your catalog values and flags where competitors undercut you. The final step sends the output as a formatted Slack or email alert via an integration block. Users often leverage such tools for monitoring competitors and dynamic pricing across various eCommerce platforms.
Market research automation
A Schedule Trigger fires at your chosen interval, multiple DecodoScraperBlocks pull from news sites, review platforms, and social feeds in parallel, and their outputs route into a single AI analysis block configured for sentiment and trend extraction. The output block writes a structured report to a Google Doc or Notion page via the relevant integration. What used to take an analyst 2 to 3 hours is produced before the working day starts. What is AI scraping? covers how the data collection layer handles dynamic content.
Lead enrichment pipeline
Feed the agent a CSV of company domains through a File Input block. An iteration pattern passes each domain to a DecodoScraperBlock that pulls publicly available firmographic data – employee count signals, tech stack indicators from job listings, and recent press mentions. A subsequent action block structures each record, and a File Output block writes the enriched dataset ready for CRM import.
Content monitoring and alerting
A Schedule Trigger runs the agent at your chosen frequency. A Send Web Request block fetches the target page and stores the response, while a subsequent AI block compares the current content against a previously stored version to identify meaningful changes. When changes exist, an AI Text Generator block summarizes what changed, and a notification integration block sends the summary. Regulatory filing pages, competitor product pages, and policy documents are the highest-value targets for this pattern.
For the scraping layer behind several of these workflows, AI web scraping with Python covers the implementation in depth.
Troubleshooting common issues
Most setup problems fall into a small number of categories. The issues below cover the ones that appear most often, in roughly the order you're likely to hit them – from initial build failures through to agent execution problems once everything is running.
Docker build failures
The most common culprit is a port conflict. If something else is running on port 3000 or 8001, Docker Compose fails to bind, so run lsof -i :3000 on macOS or Linux to identify what's holding the port. If the build completes but containers exit immediately, Docker is running out of memory – open Docker Desktop's Resources settings and push the allocation to at least 4GB.
On Windows, this almost always traces back to selecting Hyper-V instead of WSL2 during Docker Desktop installation, and reinstalling with WSL2 selected clears the issue.
Frontend not connecting to backend
Before touching any config, run docker compose ps in the autogpt_platform directory. If any backend container shows a status other than "running," that's your problem. If all containers are healthy, cross-check the port values in both .env files – the frontend needs to point at the exact ports the backend exposes. The default Compose configuration puts both services on the same Docker network automatically, so network isolation is rarely the issue unless you've modified the Compose file.
API key errors
These fail in 4 predictable ways: trailing spaces or accidental quotes in the .env file, an expired key, insufficient API credits, or a key dropped into the wrong provider field. That last one is worth calling out specifically – a Groq key in the OpenAI field fails silently with a generic authentication error. Before debugging configuration, verify the key is valid and has credits directly in the provider dashboard.
Custom block not appearing in UI
Check the file path first. The block needs to live in autogpt_platform/backend/backend/blocks/ with a .py extension and snake_case naming. A syntax error in the block class prevents it from loading, and the UI gives no indication why – the block just doesn't appear. Run docker compose logs -f to catch load errors at the backend level. Every new block file requires a full server restart regardless of whether any other changes were made.
Agent execution failures
Timeout errors on external calls mean the default timeout in your request block is too low – increase it in the block's configuration. Missing required inputs produce silent failures, so before running any agent, confirm every input field either has an incoming connection or a default value set. Circular dependencies between blocks stop execution entirely and don't produce a clear error. If an agent hangs without output, trace the data flow direction in the builder and look for loops.
Performance issues
If containers are running low on memory, reducing concurrent agent executions is faster than increasing resource limits. For persistent slowdowns, bump Docker's memory ceiling in Desktop settings and monitor with docker compose logs -f, which streams live output from all services in one view.
Final thoughts
A standalone AutoGPT agent is a capable tool. One connected to live data is a different category – it monitors, compares, enriches, and acts on information that didn't exist when you built it.
The patterns in this guide cover local setup, environment configuration, custom Python blocks, REST API connections, and live web data via Decodo's scraping layer, and each is reusable across most production use cases. Stack them deliberately, and you get workflows that eliminate the manual work between data collection and decision-making.
From here, the marketplace has pre-built agent templates worth auditing before building from scratch. Multi-agent workflows, where one agent's output triggers another, are where the architecture gets genuinely powerful, and scheduled automation is where the ROI compounds as agents run on your data, at your cadence, without prompting.
Autonomous, not invincible
Your AutoGPT agent can't bypass CAPTCHAs or rotate proxies on its own. Decodo handles that layer, so the agent keeps running.
About the author

Justinas Tamasevicius
Director of Engineering
Justinas Tamaševičius is Director of Engineering with over two decades of expertise in software development. What started as a self-taught passion during his school years has evolved into a distinguished career spanning backend engineering, system architecture, and infrastructure development.
Connect with Justinas via LinkedIn.
All information on Decodo Blog is provided on an as is basis and for informational purposes only. We make no representation and disclaim all liability with respect to your use of any information contained on Decodo Blog or any third-party websites that may belinked therein.