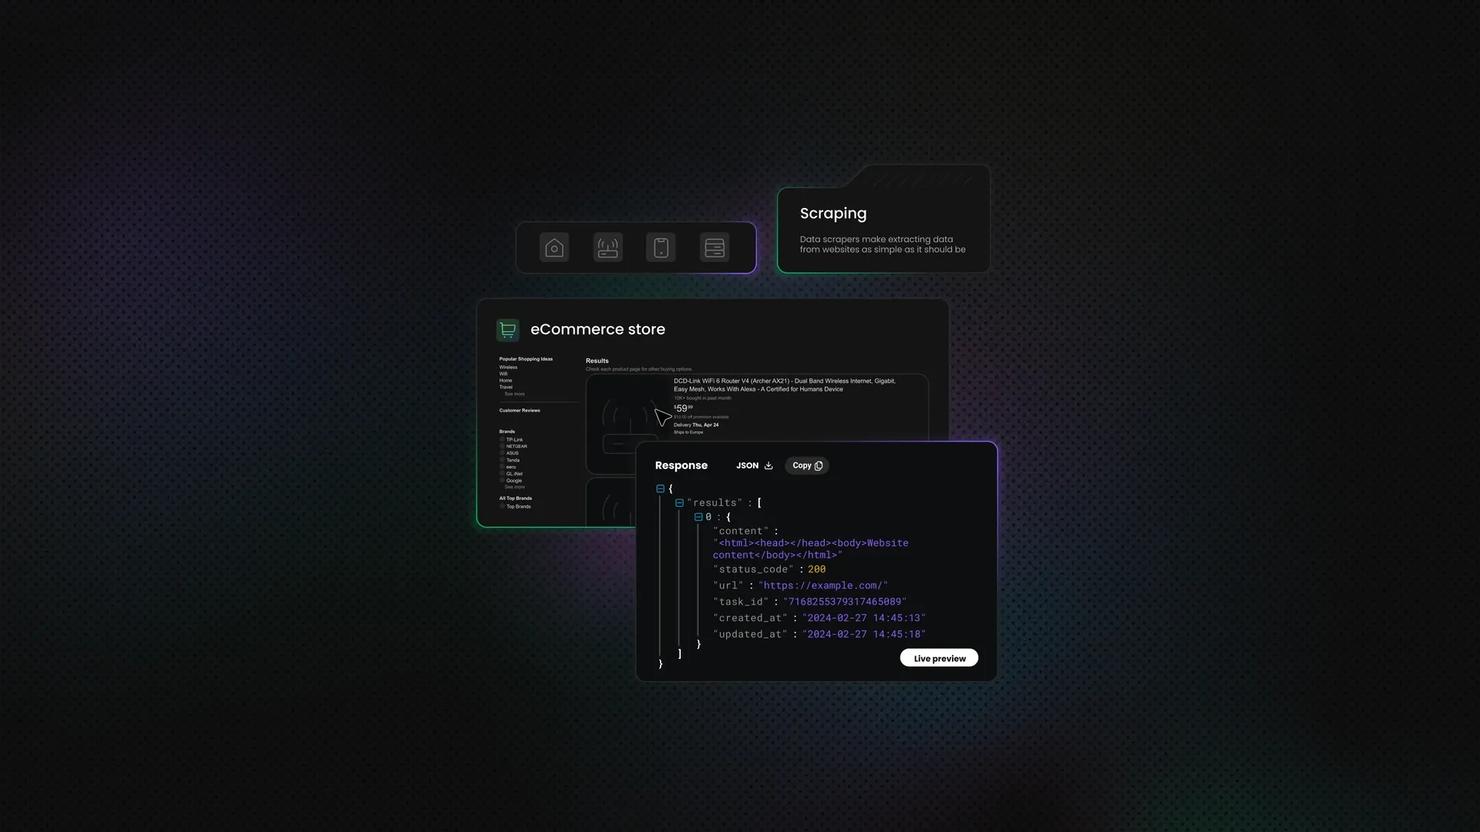
Web Scraping with Linux and Bash
Web scraping with Linux is more capable than most people expect. Bash may not be the go-to tool for web scraping, but with a handful of pre-installed command-line utilities you can build a working scraper without touching Python or a browser. This guide covers how to make HTTP requests in Linux, parse into HTML and JSON, set up proxy support with Decodo, and build a fully working Bash-based scraper from scratch.
Vilius Sakutis
Last updated: Jul 16, 2026
25 min read

TL;DR
- You can build a web scraper that works on the Linux command line with pre-installed tools like curl, jq, and htmlq
- curl handles the HTTP requests, you can use jq to process JSON from any public API, and htmlq to extract structured data from HTML web pages
- Bash works well for lightweight web scraping tasks like REST API consumption, quick scripts, and server-side automation
- You can use proxies directly on Bash with curl, and that makes it easier for you to handle rate limiting and access-restricted web pages
- You can automate scraping jobs using cron or systemd timers for scheduled scraping runs
- Switch to Decodo’s Web Scraping API when you're scraping more complex websites that render their web pages dynamically with JavaScript or have anti-bot systems built in
The Linux web scraping toolkit: What you need and why
Here are the necessary tools you'll need to be able to scrape web pages successfully and effectively:
Tool
What it does
Best for
curl
Sends HTTP requests with custom headers, cookies, and proxies
Almost every request you make
wget
Downloads files and recursive/bulk content
Grabbing many files or a whole directory
grep
Matches text with patterns and regex
Quick text filtering on simple HTML
sed
Finds and replaces text; strips tags
Cleaning raw output into plain text
awk
Works with structured, column-based text
Tabular text responses
jq
Parses, filters, and reshapes JSON
REST APIs and JSON endpoints
htmlq
Applies CSS selectors to raw HTML (Rust)
Reliable HTML parsing
pup
CSS selectors with JSON output (Go)
HTML you want to pipe into jq
curl
curl is the main tool you'll use when sending requests to your target URL on Bash. You can configure it to send GET requests, POST requests, and other types of requests with custom headers.
Here are some of the things you'll be able to do with curl:
- Fetch HTML data from a web page
- Call a scraping API or a public one
- Send custom headers to mimic a browser
- Save the results into a text file that you can parse later
You can get curl up and running on Ubuntu/Debian systems with the following command:
You can also set it up on Red Hat/CentOS systems like this:
Here are the key flags you need to know when using curl:
- -s – silent mode, it hides progress output so your terminal stays clean when you get outputs
- -L – automatically follows redirects, important for sites that move from HTTP to HTTPS
- -H – sets a custom request header, like a specific Content-Type or Authorization token
- -A – sets your User-Agent string so you don't get flagged as a bot as soon as you send a request
- -x – routes your request through a proxy
- --compressed – accepts compressed responses, so it reduces the amount of data you have to use
- -o – saves the response directly to a file instead of printing it to your screen
For a deeper dive into everything curl can do in terms of web scraping, you can check out Decodo's full curl web scraping tutorial.
wget
GNU wget also fetches data from the web, but it serves a slightly different purpose. You can use curl to send custom HTTP requests, while wget is better for bulk downloads and recursive jobs where you just want to pull a lot of files fast. It does the job when you're dealing with multiple files, or you're trying to fetch a main file or a web page that has content, subdirectories, and internal files that are linked within it. wget also supports proxies if you want to hook those up too.
For example, imagine you’re scraping a blog site that publishes monthly reports as PDF files across different pages. Instead of setting your scraper to open each page and download each file one by one, you can just use wget to follow the links on the site and download everything for you automatically. You don't need to write extra logic or scripts to handle it like you normally would if you were to use curl for this type of extraction.
grep
grep (global regular expression print) searches a set of text to see if it matches a particular string that interests you by matching patterns and regular expressions. When fetching HTML data with curl, you can easily pipe it into grep to filter out the exact data point you need. You can use the -o flag we mentioned earlier to extract text portions that match. You can also use the -P flag to enable Perl-compatible regex to match word patterns better.
sed
sed (stream editor) takes things a step further; it doesn't just find text, it lets you substitute and replace it. You can use it to strip HTML tags out of raw page output.
For example, if your scraper gives you results like this:
sed will effectively remove every HTML tag and leave you with plain text like this:
awk
awk is built for working with structured text. It comes in handy when you're scraping tabular data from structured text responses and need to pull out specific fields column by column. It’s especially useful in scenarios where APIs return structured text like tables instead of clean JSON.
Note: regex-based tools like grep, sed, and awk work fine for simple text or basic HTML. Once you scrape larger, more reputable sites like eBay or Google Maps, they rarely return simple HTML. As soon as a platform changes its structure or nests elements, these tools break. Most of the time you’ll want higher-level tools like jq, htmlq, or pup.
jq
This is a tool that you can use to parse JSON data directly in Bash. You can use it to pull out specific fields, filter results, and reshape the data into a format you need. jq is one of the most useful tools you can have if you usually handle JSON on the Linux command line. It's essential if you’re trying to consume REST APIs in Bash or get data from web applications that expose clean JSON endpoints.
You can install jq with the following command on Debian-based systems:
If you're not on a Debian-based system, you can install jq using your system’s package manager(like brew for Mac users), or you can download the binary from their GitHub repo.
htmlq
htmlq is a more reliable way to extract data from web pages that display their content in HTML format. It is a Rust-based tool that lets you apply CSS selectors directly to raw HTML, the same way you would with a headless browser. It's significantly more reliable than grep or sed for extracting HTML data because it actually understands HTML structure; it doesn't just match patterns. You just need to pipe curl output straight into it and target the exact elements you need.
You can install it with the following command:
or download a prebuilt binary from GitHub.
pup
pup is the Go-based alternative to htmlq and does the same job as it (i.e., parses HTML by targeting elements with dedicated CSS selectors on the command line), but it has a JSON output mode that you can use to pipe structured HTML data directly into jq for further filtering.
So your pipeline can look like this:
You can install pup via your package manager or grab a binary from GitHub.
These tools are what you should reach for by default any time you need to extract structured data from a web page on the command line. For a deeper look at how CSS selectors compare to XPath for targeting elements, you can check out our guide on XPath vs. CSS selectors.
Making HTTP requests from the Linux command line
curl is the tool you'll use for almost every HTTP request you make on the Linux command line. It's pre-installed on most Unix systems, it's fast, and it's flexible enough to handle GET requests, POST requests, custom headers, cookies, and compressed responses, all from a single command.
Let’s walk through how you can actually make these requests and handle responses at the production level.
Sending a basic GET request
The simplest thing you can do is send a GET request to a REST API and print the result.
This command fetches web data directly from a public API and prints the raw response to your terminal. You’ll usually get JSON back, something like this:

Setting a realistic User-Agent
When you send requests with curl, each request goes with a default user agent, but most of the websites and APIs you’re scraping will tend to block the agent because it still looks like a bot. You can fix that by setting a more realistic HTTP header with the -A flag like this:
You can also use the -H flag to set any custom header, including Accept, Authorization, or Content-Type like this:
Following redirects
Some web pages sometimes redirect HTTP requests to HTTPS, or move content to a new URL. When this happens, curl will stop your scraping at the redirect and return nothing or an error code like 301 Moved Permanently. In such cases, you need to use the -L tag to ensure curl automatically follows the redirect, like this:
Handling compressed responses
The response you get from an endpoint or a web page can be compressed to reduce the bandwidth. You can tell curl to handle this automatically with the --compressed flag like this:
This flag lets curl accept compressed data (like gzip) and decompress it for you before it gives you output.
Checking HTTP status codes before parsing
Before you start parsing anything, you can use curl to check if the request actually worked. Here’s a curl command you can use to do that:
You can build this into your scripts as a validation step. If the status code isn't 200, simply exit and log the error instead of processing a bad response.
Saving the response to a temp file
When scraping data from the web on Bash, it’s not advisable to process the data you get as soon as you get it. You want to save the response to a temp file first, validate it, then process it. Here's the command you can use to do that:
The -s flag runs curl in silent mode, no progress bar, no noise. When you properly save your responses, you can easily avoid silent failures where a bad response gets parsed and written to your output file with no error:
Sending and managing cookies
Some web pages need a valid session cookie to return useful data. You can send a cookie to a server with the -b flag like this:
Save cookies from the response to a file with the -c flag like this:
You can also use the saved cookies on your next request, like this:
Making POST requests
When you need to submit a POST request – for example, send form data or hit an API endpoint – you can use the -d flag to send such requests like this:
Debugging
When a request isn't working, and you can't figure out why, simply run it with the -v flag for verbose output like this:
curl will print every request and response header so you can see exactly what's going out and what's coming back. You can use this during development for debugging, but remember to turn it off when you’re pushing to production.
For a much deeper look at how you can use curl for web scraping, check out how to scrape with curl.
Parsing HTML output on the command line
Now that you've fetched all the data you need with curl, the next step in your web scraping process is to extract and parse the specific data points you actually care about, i.e., titles, links, prices, or whatever structured data you can get from that HTML web page.
There are three ways to extract and parse HTML output on the Linux command line, and each method has its use case and when it's applicable. Let's walk through all of them.
Using grep and sed
This is actually the fastest way to pull text from HTML on Bash, and it works fine when the markup is simple and predictable. If you're dealing with a simple web page where the tags follow a consistent pattern, grep and sed can get the job done in a single line.
For instance, if you want to grab the page title, you can do it like this:
The -o flag tells grep to print only the matching portion, and -P enables Perl-compatible regex, so it pulls whatever sits between the <title> tags.
If you also need to extract all the links from a page, you can target href values like this:
And if you want to strip all HTML tags entirely and just get plain text, you can use sed to do that:
This command fetches the HTML from the page and passes it to sed, which removes anything inside angle brackets (< >). So you get back plain text content of the page without the HTML tags.
Using htmlq
htmlq is a Rust-based command-line tool that can help you parse HTML data better. Instead of guessing patterns with regex, it uses CSS selectors, the same way you inspect elements in your browser.
For instance, if you're scraping a public jobs board and you want to pull all the job titles, here's how to do it with htmlq:
The --text flag strips the surrounding tags and gives you clean text content.
If you need the URLs behind those listings, you can simply use the -a flag to extract attribute values like this:
This command pulls every href from anchor tags matching the .result-link selector. You can also chain multiple selectors in a single pass to collect different fields from the same page fetch. You can fetch job titles, company names, and links without having to make extra requests.
htmlq should be your default tool over grep and sed if you're gathering data from any web page with a stable HTML structure. It's faster to write, easier to maintain, and doesn't break when the markup changes over time.
Using pup for JSON Output
pup is a Go-based HTML parser that works similarly to htmlq, but it has JSON output mode. Instead of printing elements that match as text, pup can convert them into structured JSON, which you can then pipe into a tool like jq to filter it further:
Here’s how to do that:
The command above turns a list of HTML elements into a clean JSON array, each item with the exact fields you specified. It's particularly useful when you're extracting data that has nested attributes, like a job card containing a title, a company name, and a link all wrapped in the same parent element.
Some important tips when parsing HTML output
- Before you write CSS selectors, try to open the page in your browser and inspect the HTML with dev tools. Look at how the website arranges elements on their web pages, the attributes they give to them, and whether the structure is the same across all their web pages.
- When choosing what to target, focus on stable attributes like IDs, data attributes, and ARIA labels instead of class names. Many sites change their class names often, so something like a data-job-id attribute is less likely to break than a class like .card-v2-title-bold.
If you're new to parsing concepts or want to understand the differences between selector strategies, check out our guide on XPath vs. CSS selectors.
Using jq to process JSON data
A lot of modern web applications expose their data through clean, structured JSON data that you can pull straight from the Linux command line. If your target has a public API or even a hidden JSON feed, you can simply use jq to extract and parse the data in it. jq is like sed, but built for JSON, so you can use it to filter, reshape, extract, and transform JSON documents right there in your terminal. When you pair it with curl, you can fetch the data, pipe it into jq, and extract exactly what you need.
Let’s walk through a simple example using the Hacker News Algolia API. It's a public API that returns clean JSON and does not require authentication for basic queries.
Fetching and pretty-printing JSON
You can start with a basic GET request and pipe the response straight into jq like this:
The command above pretty-prints the entire JSON response with proper indentation. This is your first step in any data collection process that involves JSON, just to see what you're working with before you start filtering.
Selecting specific fields
The response you get from Hacker News comes back as a JSON object with a hits array. Each item in that array holds fields like title, url, and points.
For instance, if you only want the titles from the response, you can run this command:
The .hits[] part iterates over every element in the array, and .story_title grabs that single field from each one. So you’re no longer looking at the entire payload, you’re just pulling the data points you need i.e., the story titles.
![macOS terminal running curl to hn.algolia.com | jq '.hits[].story_title' showing Hacker News "Ask HN" titles](https://decodo.com/cdn-cgi/image/width=1480,quality=70,format=auto/https://images.decodo.com/web_scraping_with_linux_3_png_f381cc8d83/web_scraping_with_linux_3_png_f381cc8d83.webp)
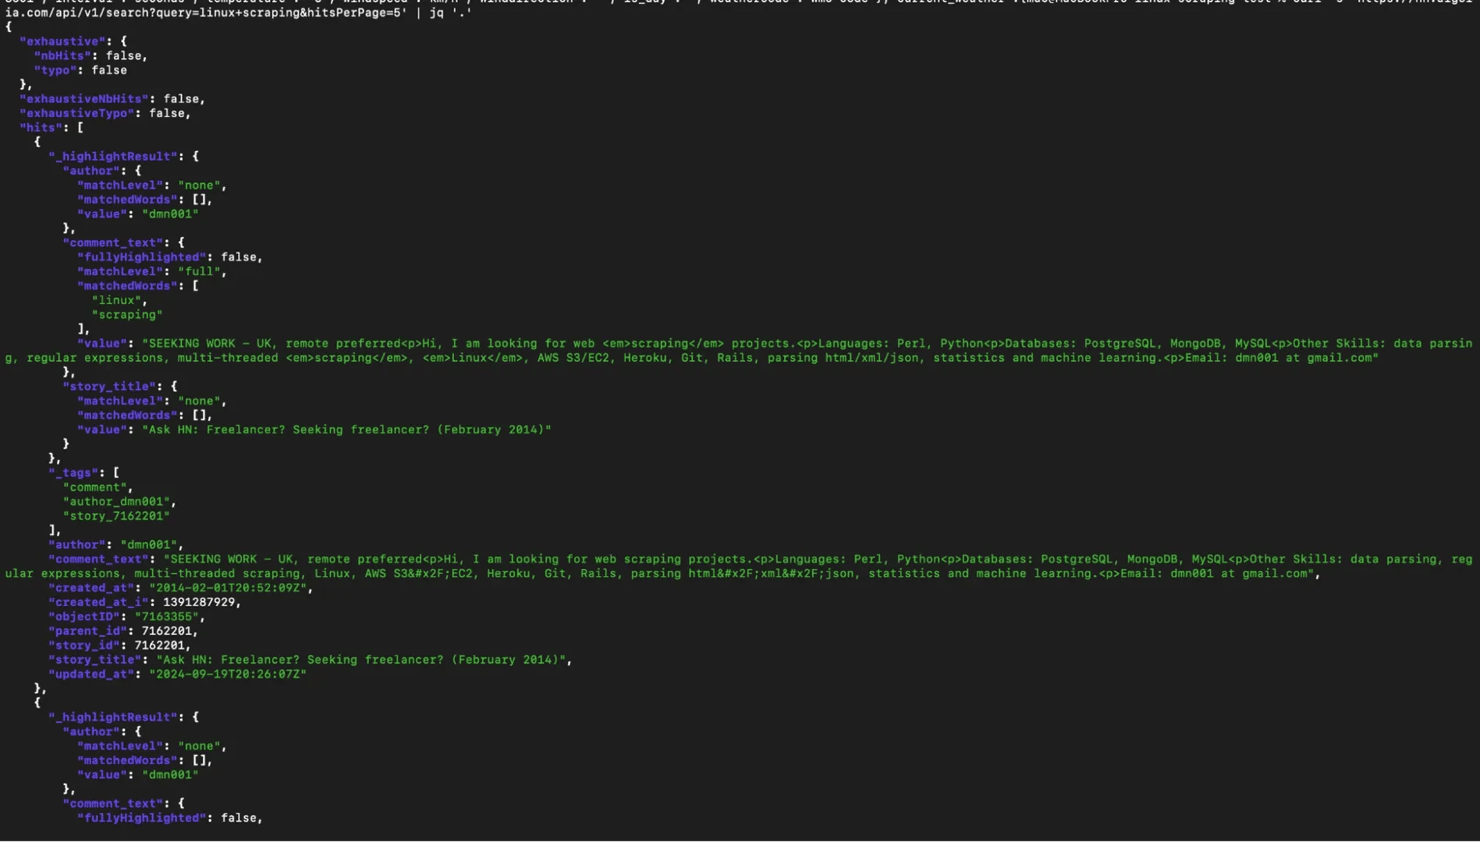
Filtering results with conditions
When you're extracting data from a web app, in most cases, you don't really need all of the data you get back, so you filter it. For instance, if you only want stories about “web scraping” that scored above 100 points, you can narrow things down with a command like this:
The command above loops through each hit (from the hits array), then checks whether .points is greater than 100, and only passes the matching items through to .title. It's a quick way to filter web data without having to write Python code.
![Terminal window running curl -s '...query=web+scraping...' | jq '.hits[].title' showing Hacker News titles about web scraping](https://decodo.com/cdn-cgi/image/width=1480,quality=70,format=auto/https://images.decodo.com/web_scraping_with_linux_4_png_c7025d575f/web_scraping_with_linux_4_png_c7025d575f.webp)
Reshaping JSON into cleaner output
Raw API responses often contain too much information, so you might want a smaller, cleaner structure. When you need more than one field per result, for instance, if you're extracting data for a report, you can always construct new JSON objects like this:
This gives you a clean subset with only the fields you care about. Each result comes back as its own JSON object with title, url, and score. You're reshaping the structured data to match your exact needs.
Converting JSON to CSV
Sometimes you don’t want JSON at all. You want something you can open in a spreadsheet. jq has built-in @csv and @tsv formatters for exactly this, so you can convert the output to suit your needs like this:
Now your data becomes CSV. This becomes useful to you when you're extracting data to feed into tabular reports or quick reviews of product offerings and trends in spreadsheets.
Handling missing data safely
Some API response fields come back as null and can break or produce messy output if you don’t handle them.
You can fix that with a fallback command like this:
This replaces any null title or url with "N/A" and defaults missing scores to 0. It stops your pipeline from breaking on incomplete records.
Saving processed data to a file
Once your pipeline looks good, you’ll want to store the results. You can save the output directly to a JSON file like this:
This command creates a clean JSON file you can reuse later. Saving output like this is important when you work with large-scale data from websites or when you need to track changes over time.
Some important tips when using jq
- You can use the -r flag when you want plain text output instead of JSON formatting. This will help you chain commands with tools like grep.
- Test your filters before adding them to scripts. You can head over to jqplay.org and paste in a sample JSON response. You'll be able to tweak your jq expressions interactively and see results right away.
- Keep your pipelines simple so you can easily debug later.
Building a complete scraping script in Bash
At this point, you’ve seen how the Linux command line handles HTTP requests and how you can use tools like jq to process HTML and JSON. Now you're going to wire all these tools together into a single Bash script that can handle real data extraction tasks from start to finish.
For this example, we are going to scrape a public API that returns job listings. We will be pulling out remote job listings from the Remotive public API, extracting job titles, company names, and URLs, and then saving the results to both a JSON file and a CSV. And we will be doing it entirely from the Linux command line.
1. Create a script file
Before you start writing your scraping script, you need to create a script file. Run this command to do that:
You can now open the file in nano on Bash like this:
You can now write your script right there on Bash and eventually save it as job_scraper.sh when you’re done.
2. Structure the script
The next step is to clearly structure your script if your scraper is going to be successful and run for a long time. You want your script to fail loudly when something goes wrong, not silently, so you can notice errors earlier in the scraping cycle and quickly correct them.
You can start with a simple Bash script like this:
The above command does 3 things for you.
- -e – stops the script immediately if any command fails
- -u – throws an error if you use a variable that hasn’t been set
- -o pipefail – catches errors in any part of a pipeline, not just the last command
Next, define your configuration variables at the top of the script. This will keep everything you might need to change in one place:
You're storing the target URL, output directory, and timestamped filenames as variables. The mkdir -p creates the output directory if it doesn't exist.
Now split your scraping logic into 2 functions, one for fetching, and one for parsing like this:
This will help you debug better, especially when you start scraping large volumes of data.
3. Fetch and validate the response
It’s never a good idea to just pipe the results you get from curl straight into jq and hope for the best. You need to save them in a temp file first and check the HTTP status code before you start parsing. This way, you won't end up processing an error page or an empty response and wonder why your data looks wrong.
Here's the fetch function with a basic retry loop:
This function fetches data from a given URL and saves the response to a file. It tries up to 3 times, checking if the request was successful by looking at the HTTP status code.
3. Parse and save results
Once you've got a valid response in a temp file, then jq can handle the rest. The Remotive API returns a JSON object with a jobs array, where each job has fields like title, company_name, and url. The next step is to extract those fields, add a timestamp, and save the result.
You can do that in your parsing function like this:
The function takes the scraped JSON file as input and uses jq to extract only the fields we need i.e., job title, company name, and URL. It also adds a timestamp to each job so we know when the data was collected. The cleaned and structured data is then saved into a new JSON file.
If you want the output in a CSV format that you can open in a spreadsheet, simply add this command right after the JSON output:
The -r flag tells jq to return plain text instead of JSON output, so you don’t get extra quotes around your values. The @csv part then formats that text into proper CSV, handling things like commas and quotes for you. In the end, you get a clean CSV file that you can open directly in Excel or any other tool you use for analysis.
You can check out this guide on how to save your scraped data for more context on this.
4. Run the full script
You can copy and paste this script into the file you created on nano:
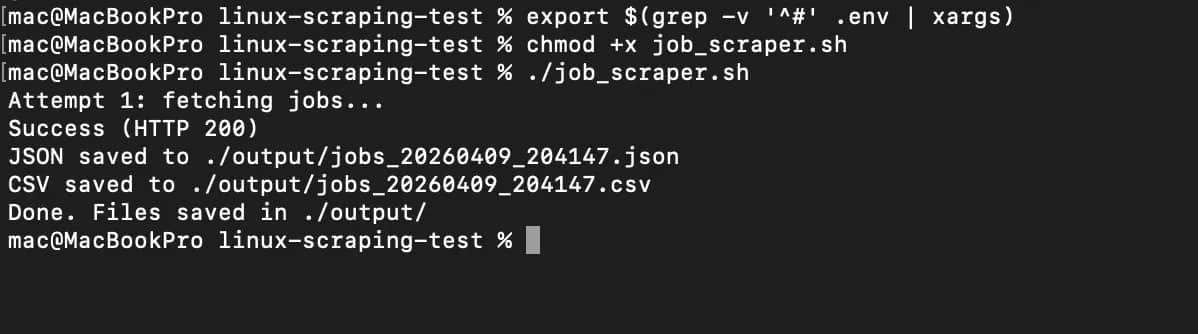
Save this as job_scraper.sh, you can make it executable and run it in your command line like this:
You should get a result like this:

You'll see a new folder named ./output/ that’s where you'll find the JSON and CSV files containing relevant data from the API we are scraping.
Here’s our JSON response:
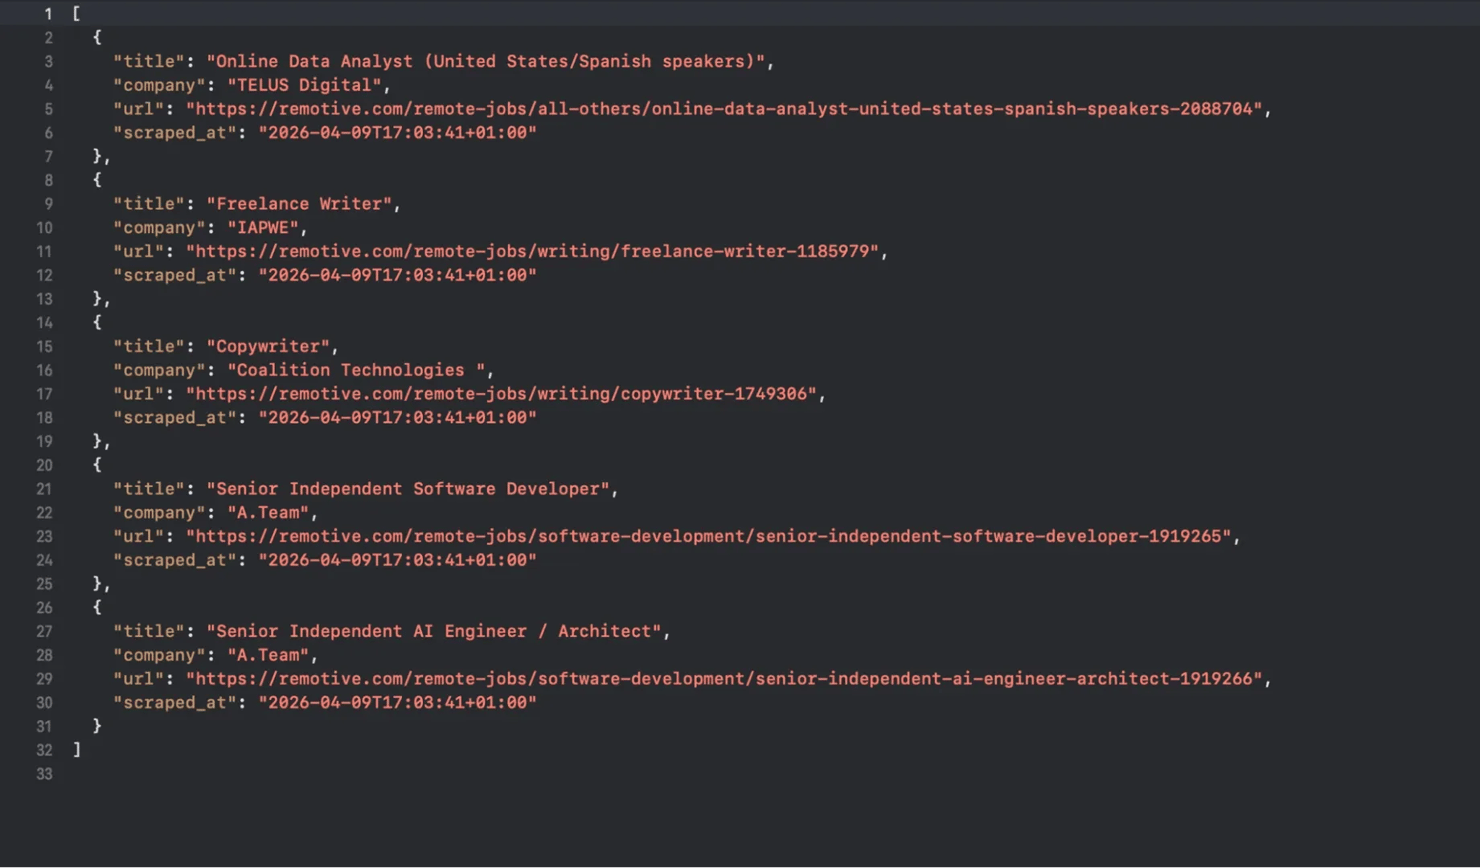
And here’s the output in CSV format:

Adding proxy support to your Linux scraper
Scraping a public API like Remotive or Open-Meteo is straightforward because you can just send a request and get data back, no stress. Once you move beyond simple public API calls and start working with real web applications, your setup on the Linux command line will then need an upgrade because most websites apply rate limits, track repeated requests, and block traffic that looks automated. That’s where proxies now come in.
A proxy will sit between your web scraper and the target server, so the target server won’t see your server's IP on every request; it'll see the proxy's designated IP location instead. You need to use proxies if you’re serious about web scraping successfully on Linux and Bash.
Configuring curl to use a proxy
curl has built-in proxy support through the -x flag. Here's how to set it up:
curl will now route the request through the proxy, and the target server will now see the proxy's IP instead of yours.
If you don't want to pass the -x flag on every time you use curl in your script, but you want to use proxies, then you just set your proxies up as environment variables like this:
Once those are set, every curl request in that shell session will automatically route through the proxy, so you don’t need to send requests with extra -x flags.
Important tip for web scraping with proxies
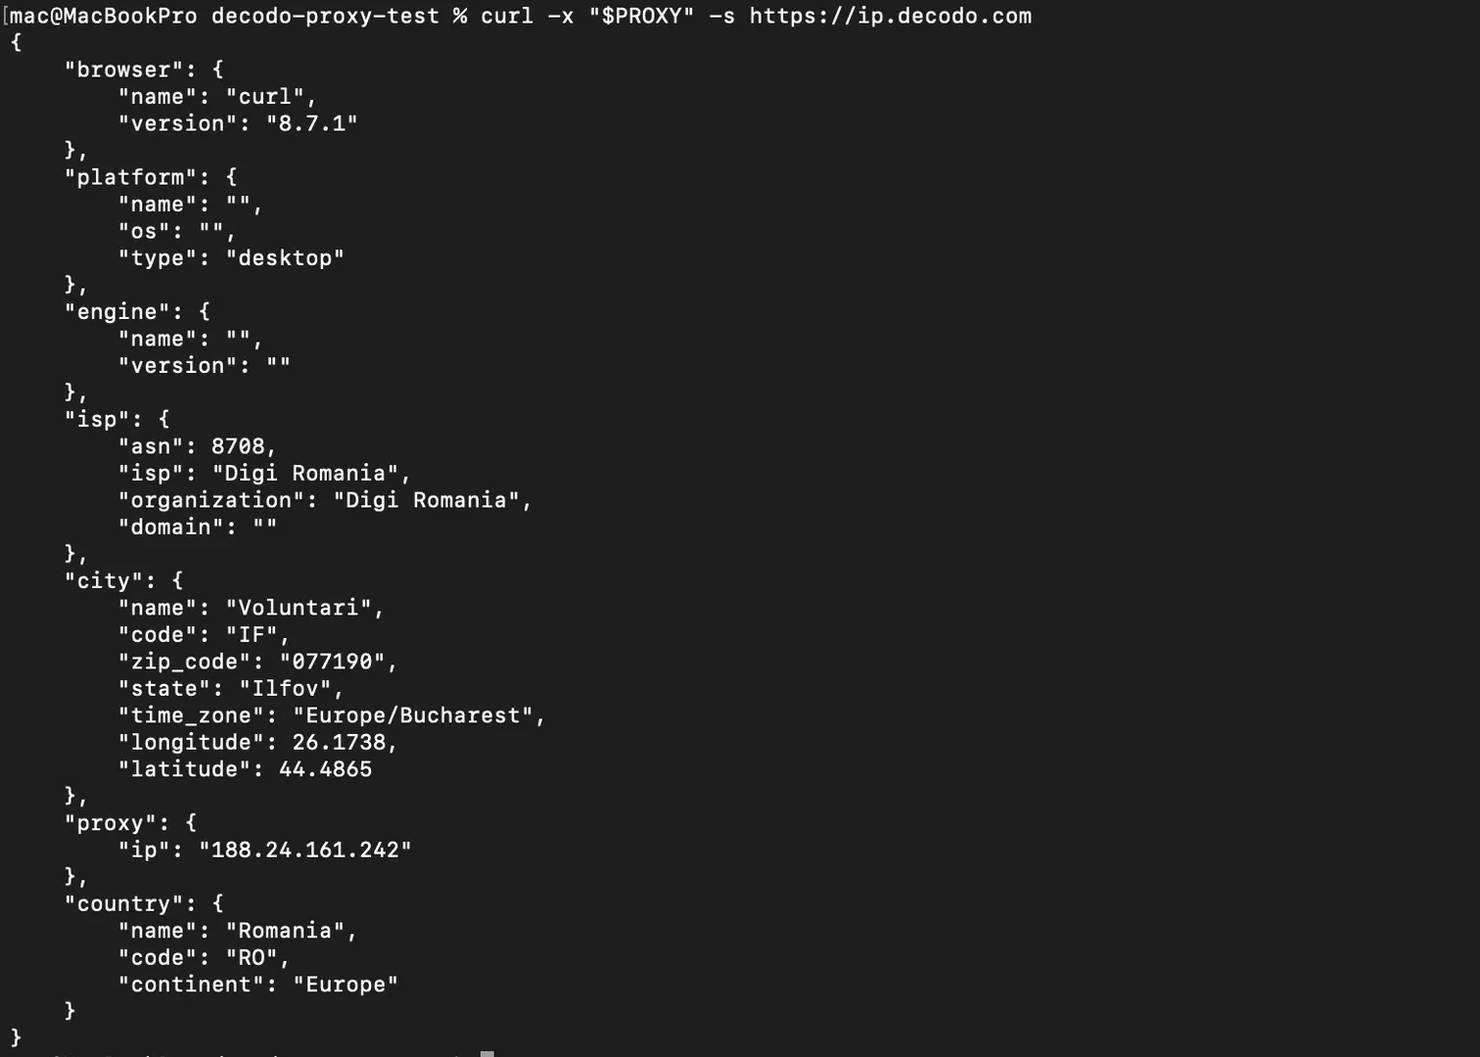
Before you start scraping through a proxy, you need to verify that it's actually working. You can run a quick test against an endpoint that actively checks IP addresses like this:
If the IP in the response is different from your device’s IP, that’s how you know your proxy is active.
Setting up Decodo residential proxies
It’s objectively better and safer to use residential proxies to scrape websites that have built-in bot detection or rate limiting. Residential proxies will route your traffic through real residential IPs, which makes your requests look like they're coming from regular users on home internet connections. Datacenter proxies work fine for less restrictive targets, but anything with serious anti-bot measures will quickly flag and potentially block datacenter IP ranges.
Decodo's rotating proxies automatically assign a fresh IP to every request, so you don't need to manage an IP pool or build rotation logic into your script.
You can start using the proxies by signing into your Decodo dashboard. Under Proxies, navigate to Residential. This is where you define how your traffic should look to the target site.
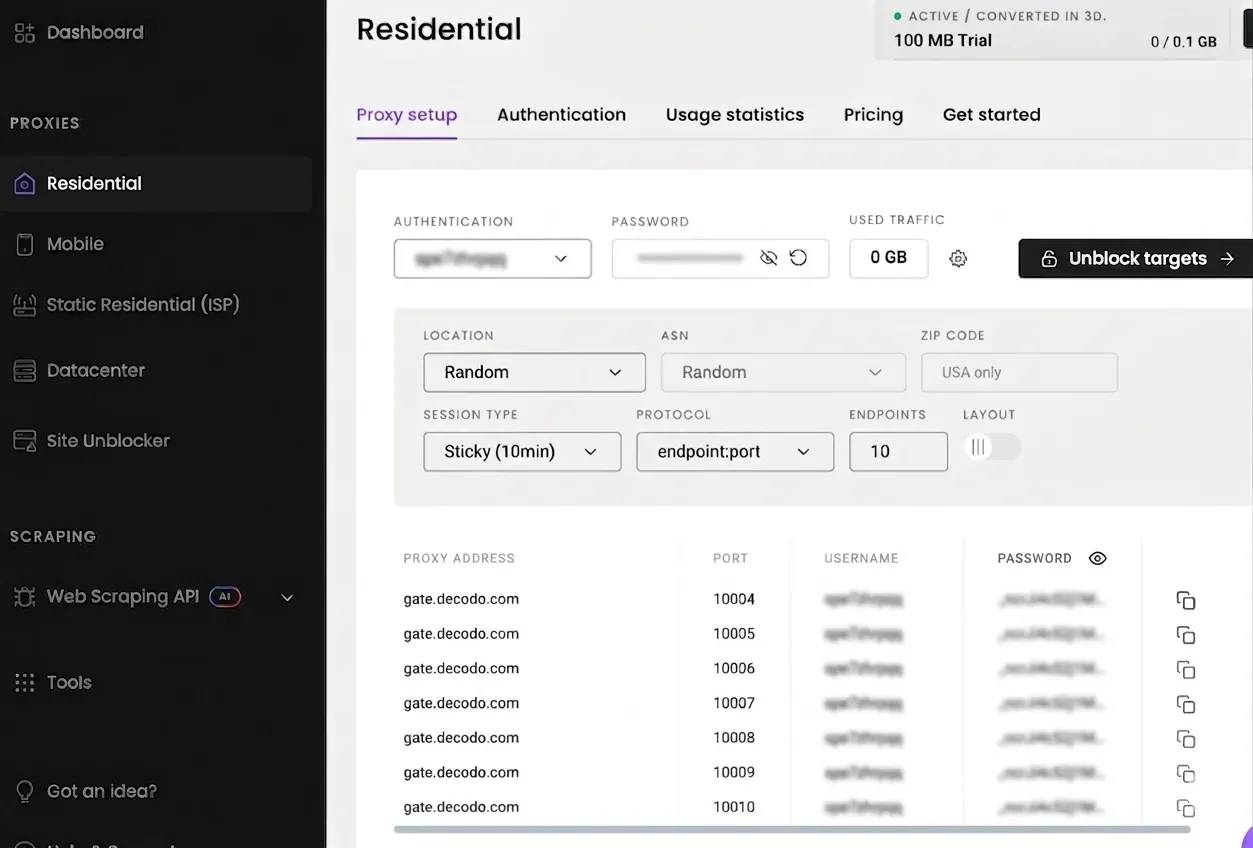
You’ll configure a few things here:
- An authentication username and password
- The IP location you want the target site to see
- The session type (rotating or sticky)
Once that’s set, Decodo will give you everything you need to connect: proxy host, port, username, and password. You can copy these details directly and plug them into your scraper.
Storing proxy credentials securely
The next step is to store those credentials in a .env file so you don’t hardcode sensitive values inside your script. You can also create this file on nano like this:
Here’s how to store your credentials in the .env file:
Then load those variables at the top of your script like this:
The first line loads your proxy credentials from the .env file into your shell session. The second line combines those credentials into a full proxy URL that curl can use to route requests through Decodo.
Testing the proxy connection
You need to check whether the proxy is working before using it in a full scraper:
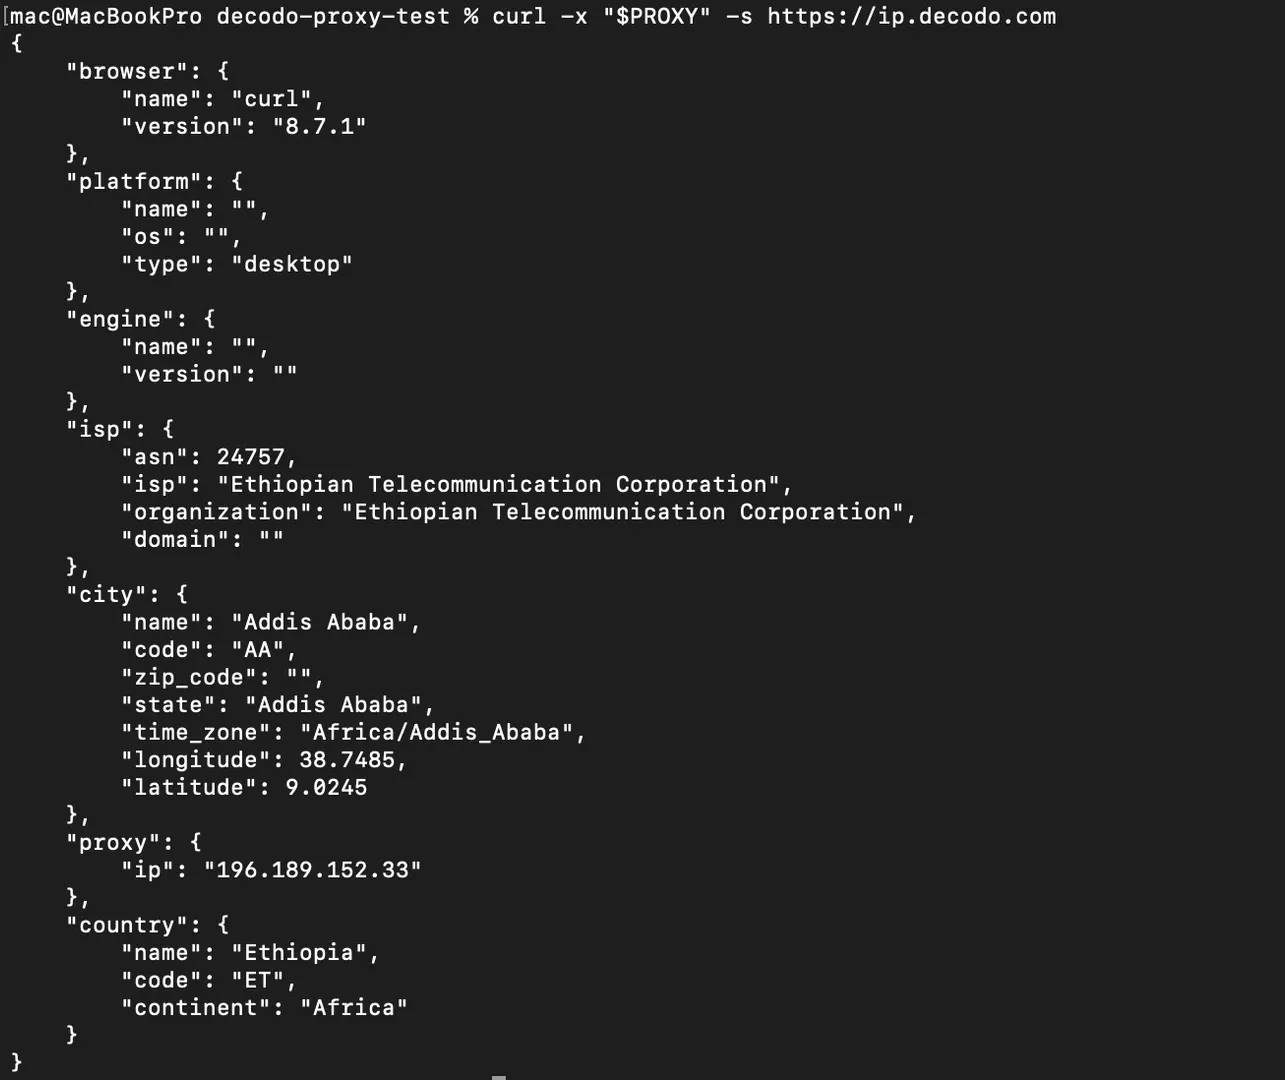
Run that command, and the IP you get should be different from your local server's IP.
Run it again, and you should see a different IP address, that means the rotation is working.
Sticky sessions and geo-targeting
Some when you’re extracting data from certain websites, they may require you to keep the same IP when sending multiple requests. Instances where you might need to log in, browse a few pages, and then extract data, if your IP changes mid-session, the site might log you out or flag your scraper.
Decodo supports these types of sticky sessions through a session parameter in the username field. You can set it up like this:
That session-abc123 tag tells Decodo to reuse the same IP for every request that includes it. You can get a new sticky IP by changing the session ID.
When you're collecting data that's tied to a specific country, for instance if you want to scrape pricing pages from regions in the US or local news data, then you can target that region by adding the country code as your proxy username like this:
You can swap us for any other supported country code, and your requests will exit through an IP in that region.
Putting it into the scraper script
Here's how the proxy setup fits into our scraper and how we can use it to effectively extract data:
You should get a result like this:
Once again, you'll see the JSON and CSV files in the ./output folder.
Some important tips
- Never commit your .env file to version control. Make sure you add it to .gitignore when you’re pushing to production so that your proxy credentials don’t leak into the wrong hands.
- Always test your proxy setup before you use it to send requests. Ensure that the proxy rotation is working and the sticky sessions too.
If you're new to how proxies work in web scraping, you can reference Decodo's introduction to residential proxies and guide to rotating proxies.
Your bash script deserves better
You've been rotating IPs with a for loop and a text file. Decodo's proxies do it without the duct tape.
Scheduling and automating your Linux scraper
Manually running a web scraper on Bash can quickly get redundant when the volume of data you're scraping or the scraping frequency increases over time.
Imagine you have to run your scraper every 6 hours, or everyday, it will be very valuable if you can set up an automation system that will allow your scraper to run on its own. You can do this in 2 ways, you can use cron (the classic way) or you can use systemd timers (the modern option with better visibility).
1. Scheduling your scraper with cron
cron is the traditional job scheduler on Linux systems. You might have bumped into it, and it's available on practically every distribution out there.
To set up a scheduled job, first you need to open your user's crontab like this:
This opens an editor where you add a schedule expression followed by the command you want to run.
To set your scraper up to run every 6 hours, you can use this command:
This command will run your scraper every 6 hours and send the output to a log file that will capture the output messages.
One thing you need to know about cron is that it runs with a minimal PATH that's different from your interactive shell. cron might not be able to find your script if you're calling curl or jq and you don’t set up absolute paths for them.
The safest way to fix this is by setting up full paths inside your script like this:
Or add a PATH declaration at the top of your crontab like this:
Before you commit a schedule expression, make sure you verify it at crontab. Paste in 0 */6 * * * and it'll confirm in plain English that it runs at minute 0 past every 6th hour.
2. Scheduling with systemd timers
If you’re running a modern Linux system, systemd timers give you more control than cron. They solve some real problems you run into when your web scraping setup grows.
With systemd, you can define two files:
- A .service file that defines what to run, and
- A .timer file that defines when to run it
First, create the service file at /etc/systemd/system/scraper.service:
Type=oneshot will tell systemd that this is a run-and-done task, not a long-running daemon. It runs your script, waits for it to finish, and exits.
Next, create the timer file at /etc/systemd/system/scraper.timer:
This configuration sets up a systemd timer that runs your job scraper every 6 hours at specific times (midnight, 6 AM, 12 PM, and 6 PM). The RandomizedDelaySec=300 adds a random delay of up to 5 minutes so your script doesn’t always run at the exact same time. Then Persistent=true will make sure you don’t miss a run, so even if your system is off, it will run the scraping job when the system comes back on.
After this setup, you can just enable and start the timer like this:
That single command both registers the timer to start on boot and kicks it off immediately. So you don’t always need to reboot the automation system every time your system goes off.
Some important tips when scheduling scraping
- If you need to quickly schedule a simple script, you can use cron for that. It's everywhere, it's familiar, and it takes about 30 seconds to set up.
- If you’re running scraping jobs on a server and you care about stability, systemd timers are usually the better choice. They give you clearer logs, so when something breaks, like in the middle of the night, you can quickly check what happened and fix it without having to guess the problem.
If you'd rather skip cron and systemd entirely and schedule scrapers through a visual interface that doesn’t require you to write any code or command, then you need to check out Decodo's guide on n8n web scraping automations.
Limitations of web scraping with Bash
The Linux command line gives you a fast and flexible way to handle web scraping, especially when you’re working with a public API, simple web page structures, or quick data collection tasks. You can use curl, grep, and jq together to effectively scrape data on Bash but there's a limit to how much data you can extract or how frequent you can scrape data from certain websites. You need to understand what those limits are and what you can do to get around them, so that you don't waste time building a scraping pipeline on Bash that doesn't work the way you want it to.
Here are some of those limitations:
1. JavaScript-rendered content
curl fetches raw HTML so if your target is a single-page application built with JavaScript frameworks like React, Vue, or Angular, curl will return an empty shell, you might see empty HTML containers with none of the actual content.
Most web apps these days load data dynamically through JavaScript after the initial page loads, and curl has no JavaScript engine to execute any of it. If you want to scrape dynamic web pages, then you'll need much more than Bash to effectively get the data you need from that server.
2. CAPTCHAs
There's no mechanism in Bash for solving CAPTCHA challenges. You can rotate proxies, set realistic headers, and throttle your requests, but the moment a site throws up an interactive CAPTCHA, your script will stop working immediately. The best way to bypass a CAPTCHA while scraping with Bash is not encountering one in the first place.
3. Complex anti-bot systems
Services like Cloudflare, Imperva, and Datadome don't just block scrapers with their IP addresses, they set up real antibot system protocols by fingerprinting the browser itself and checking things like how the browser executes JavaScript rendering, TLS handshake details, and even how the mouse on the browser moves. A curl request, no matter how well you set the headers, doesn't look like a real browser at this type of protocol level so these systems will flag it and ultimately block it.
4. Pagination and session handling at scale
It’s easy to scrape a few pages with Bash but much harder to handle hundreds or thousands. Bash can start to give you sketchy results or no results at all when you try to scrape web apps that you have to manage cookies, CSRF tokens, or go through multiple steps to be able to login and keep that session running.
5. Breaking silently
Most times when you're scraping the web on Bash, you rely heavily on certain web page patterns. When the site changes its HTML structure or class names, your grep patterns and CSS selectors will surely break and they won't throw an error if you don't log them. They might just be quietly returning empty results or wrong data, and you won't even notice until you manually check the output you've been getting over time.
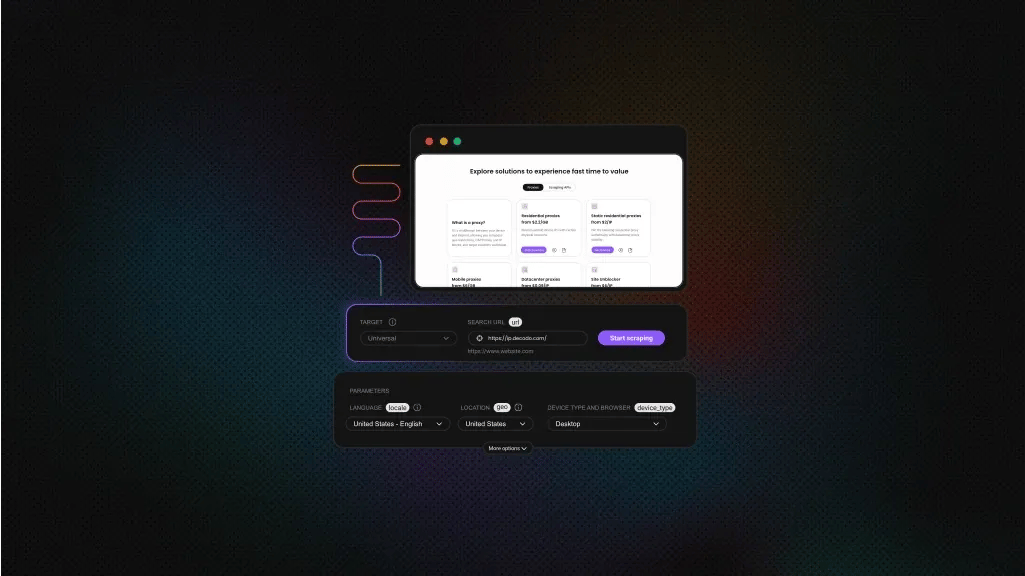
When to use a dedicated scraping API instead
The moment you start hitting the limits outlined above is the time you need to decide that you need a scrapingAPI to handle your data extraction. Decodo's Web Scraping API can help you scrape sites that render their content dynamically with JavaScript. The API can also solve CAPTCHAs and bypass those complex antibot systems that more sophisticated web apps put up these days and give you clean structured output right there on Bash.
You don't need to go through the hassle of setting up a whole Bash scraping pipeline when you can just get the data you need with one API call.
To get started, sign into your Decodo dashboard, navigate to Web Scraping API, then choose an Authentication method, enter your username and password, and click Generate. That will give you a Base64-encoded token that you'll use in the Authorization header.
Here's how to use the API to grab the same Remotive job listings from earlier:
Replace YOUR_API_TOKEN with the Base64 token from your dashboard. The "headless": "html" parameter tells the API to render JavaScript before returning the page, and "proxy_pool": "premium" routes your request through premium proxies that can bypass anti-bot protections. You can see that we piped the output into jq exactly like before because your existing parsing logic still stays the same; you’re just getting the data much quicker with the API.
Here’s the result you'll get on Bash:

Once again, you can access the JSON and CSV files in the ./output folder.
Important tip
- You can use Bash and curl for lightweight scraping tasks like when you just want to integrate a simple REST API, or get data from a static page, or quick one-off jobs where you're extracting data from a predictable source.
- You have to switch to the Web Scraping API when the target site has integrated certain bot protection strategies like CAPTCHAs, or they render content through JavaScript, or when you need to manage sessions and cookies to effectively extract the data you need at a scale so that your requests look like they’re coming from a real browser.
If you want to understand headless browsers and why they matter for scraping dynamic content, that's worth reading alongside this. You can also read more about specific anti-scraping techniques and how they work if you want to know how to outsmart them.
Best practices for web scraping with Linux and Bash
Building a scraper that works on Linux and Bash is one thing but building the one that works overtime, that you don’t have to supervise, is another thing. When you're scraping data on the linux command line, things can quietly go wrong. For instance, your script may run and you get good data at first, but overtime you start getting data that is incomplete, duplicated, or completely broken. There are some measures you can take to prevent this from happening.
Here are some of those measures that will help you build a web scraper on Bash that you can easily maintain and don't have to supervise all the time
1. Respect the target server
You need to remember that you're not the only one sending requests to that server. If you send too many curl requests at a time, you'll trigger rate limits or get blocked completely. Even when you're pulling data from websites or a public API, you should control how often you run your scraper. INsights in how to check if a website allows scraping can be found in our guide on the topic.
A simple way to fix it is to add a delay between requests like this:
That gives you a random pause between 2 and 7 seconds. It makes your traffic pattern look a lot less like a bot and a lot more like someone actually clicking around.
You'll do well to check a site’s robots.txt file before you start scraping it so you get an idea of the data you're allowed to extract.
You can pull it up with this command:
Try to schedule your data extraction tasks to occur during off-peak hours i.e. early morning or late night for the target's timezone, to reduce the impact of your scraping on their server during normal working hours.
2. Write resilient scripts
A script that works fine on your first test run can still fall apart after some time running. Servers can go down, there could be connections time out, websites can also change their page structures. You need to set your web scraper to effectively handle all of these edge cases and make sure it gives you a worthwhile output on each scraping run.
The first step is to always validate HTTP status codes before you start extracting data like this:
Anything other than HTTP code 200 means something went wrong, and you shouldn't parse that response.
The next thing is to always set timers so that your scraper doesn’t hang when there’s an issue with the server. Here’s how you can do that:
The --connect-timeout flag will make your scraper give up after 10 seconds if it can't establish a connection with the server. The --max-time flag kills the entire request after 30 seconds regardless of what happens.
You also need to enforce strict error handling at the top of your script with set -euo pipefail and trap. These two catch a surprising number of silent failures that would otherwise turn into corrupted output.
3. Maintain data quality
Scraping is not just about extracting data, it’s about making sure you and your team can actually use that data you have collected, so you don’t have to go through the rigorous process of cleaning the data later.
Before you save the output your scraper gives you, you need to validate the following:
- If you're scraping prices, check that they actually look like numbers.
- If you're collecting URLs, make sure they start with http.
- Confirm that required fields don't come back empty
Your scraper might also give you duplicated output. If you're running the same script daily, you'll inevitably pull the same data points more than once and that can be redundant and a waste of scraping resources. You need to make sure you deduplicate these records before you add them to your existing dataset.
Finally, ensure you always add meta data that effectively describes the timestamp, the source URL, as well as the script version for that dataset.
4. Manage selectors and patterns as code
It's never a good idea to hardcode CSS selectors and regex patterns when you're writing your parsing logic. It will make debugging very difficult and time consuming for you when the site changes their web layout. It’s better for you to store them as named variables at the top of your script like this:
Now, when the site changes, you update one place instead of rewriting your entire script.
You should also add a simple test mode to your script. You can use the --dry-run flag to fetch and parse a single page without writing output. This gives you a quick way to verify things still work after a site update, without touching your production data.
Here’s how to do this:
If you suspect the site has updated its web page, simply run ./scraper.sh --dry-run to know whether your selectors still hold up.
For more on how sites try to block scrapers, and how to stay on the right side of that line, check out Decodo's guide on anti-scraping techniques and how to outsmart them.
Final thoughts
The Linux command line offers a practical way to handle web scraping without overcomplicating your setup. With tools like curl, jq, grep, and htmlq, you can fetch web data, parse HTML, extract JSON, and turn raw responses into structured output. This approach works well for consuming REST APIs, pulling data from public endpoints, or extracting specific data points from web pages, all without writing a full scraper application. That said, Bash has clear limitations. It can't handle JavaScript-rendered content or bypass bot protection systems like CAPTCHAs. For those cases, a web scraping API can manage JavaScript rendering, anti-bot bypass, and large-scale data collection in a single call. Use Bash for quick, lightweight jobs and switch to a scraping API for more demanding targets.
Reviewed by Churchill Doro
When bash hits its limit
Decodo's Web Scraping API picks up where curl and grep leave off – JS rendering, anti-bot bypass, and structured data in one call.
About the author

Vilius Sakutis
Head of Partnerships
Vilius leads performance marketing initiatives with expertize rooted in affiliates and SaaS marketing strategies. Armed with a Master's in International Marketing and Management, he combines academic insight with hands-on experience to drive measurable results in digital marketing campaigns.
Connect with Vilius via LinkedIn
All information on Decodo Blog is provided on an as is basis and for informational purposes only. We make no representation and disclaim all liability with respect to your use of any information contained on Decodo Blog or any third-party websites that may belinked therein.