Puppeteer in Python With Pyppeteer: Setup, Scraping, and 2026 Alternatives
Pyppeteer is an unofficial Python port of Puppeteer, the Node.js library that drives headless Chromium through the DevTools Protocol. It brings the same async model to Python for clicking, filling forms, waiting, and scraping JavaScript-heavy sites. It works, but it's no longer the 2026 default. This guide covers using it and when to switch to Playwright or nodriver.
Lukas Mikelionis
Last updated: Jun 18, 2026
10 min read
TL;DR
- Pyppeteer ports Puppeteer's async API to Python and controls Chromium through the DevTools Protocol.
- The project is effectively unmaintained: its latest release shipped in February 2024, and its PyPI page recommends Playwright.
- Use Pyppeteer to port existing Puppeteer scripts or for lightweight async scraping; choose Playwright for new projects and nodriver for stealth-heavy targets.
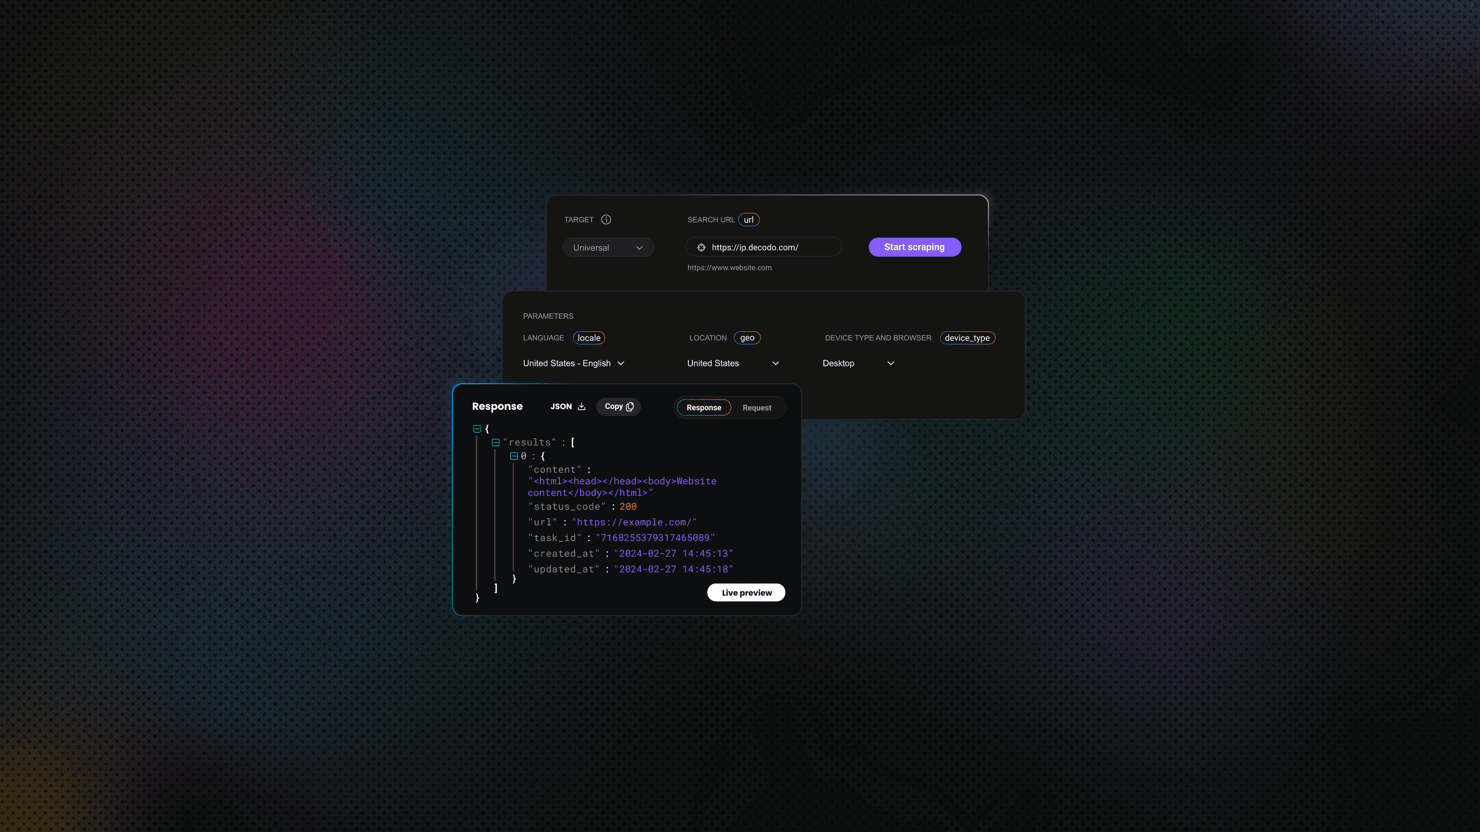
- Pyppeteer can render JavaScript-heavy pages through Chromium, but advanced anti-bot systems may require proxies or other unblocking measures.
What is Pyppeteer and how does it relate to Puppeteer?
Puppeteer is the original Node.js library for controlling Chromium through the Chrome DevTools Protocol. Pyppeteer brings that same browser automation model to Python.
It began as the miyakogi/pyppeteer project and has since been continued in the pyppeteer/pyppeteer repository on GitHub. By default, it downloads and controls its own Chromium build using the same DevTools Protocol that Puppeteer relies on, which is the wire protocol Chrome exposes for inspecting and controlling the browser.
If you've used Puppeteer before, Pyppeteer will feel familiar. The workflow is largely the same: launch a browser, open a page, navigate to a URL, click buttons, fill forms, wait for content to load, and extract the data you need.
The main difference is the language. Instead of JavaScript, you write everything in Python using asyncio. Most browser actions are asynchronous, so you'll spend a lot of time using await as you move through a scraping or automation workflow.
You're not limited to the Python API, either. When you need to interact with a page in a way Pyppeteer doesn't support directly, page.evaluate() lets you run JavaScript inside the browser. That makes it possible to access page variables, manipulate the DOM, or execute custom logic before extracting data.
What doesn't carry over is feature parity. New Puppeteer APIs often arrive months or years later in Pyppeteer, if they arrive at all. Puppeteer supports Firefox, while Pyppeteer remains Chromium-only.
On its own, Pyppeteer is also not designed to bypass modern bot-detection systems such as Cloudflare Turnstile, DataDome, or PerimeterX. Sites protected by these services often require additional measures such as stealth patches, browser fingerprint management, or proxies, which we cover later.
Is Pyppeteer still maintained in 2026?
Pyppeteer still works, but maintenance is no longer one of its strengths. The latest release, version 2.0.0, was published in February 2024, and its development status on PyPI remains listed as Alpha.
More tellingly, the project's README includes a notice stating that the repository is unmaintained and recommends Playwright for Python as an alternative. The companion pyppeteer-stealth package has also seen little activity, with its most recent release dating back to 2022.
Rather than trust any single article on this, including this one, check the signals yourself before you adopt any library. Look at the latest release date on the PyPI page, the last commit date on the GitHub repo, and the ratio of open to closed issues over the past twelve months. Those indicators will usually tell you more about a project's health than any opinion piece.
That said, "unmaintained" is not the same as "useless." Pyppeteer is still a reasonable choice in a few situations. If you're porting an existing Puppeteer script from Node.js to Python, the familiar API reduces translation work. If you want a lightweight async browser automation library and don't need the latest features, it can still get the job done. It’s also a reasonable way to learn the Puppeteer programming model without leaving Python.
For most new projects, however, there are better options. Playwright is actively developed, supports multiple browsers, and includes reliability features such as auto-waiting and isolated browser contexts.
Teams focused on scraping sites with aggressive bot detection often look at tools such as nodriver, the successor to undetected-chromedriver. And if your organisation already uses Puppeteer in Node.js, it's often simpler to keep it there and connect it to Python through an API, subprocess, or message queue rather than maintaining two separate automation stacks.
Installing Pyppeteer and setting up your environment
Pyppeteer 2.0.0 requires Python 3.8 or later. Because the project is effectively unmaintained, it's worth testing carefully on newer Python releases before adopting it in production.
Start with an isolated environment so the dependency doesn't leak into the rest of your tooling:
Then install the package:
On the first run, Pyppeteer automatically downloads a Chromium build if one isn't already available. If you encounter issues with the bundled browser, you can install Chrome separately and pass executablePath=... when launching Pyppeteer.
Your first Pyppeteer script: launch, navigate, extract
With Pyppeteer installed, you're ready to launch a browser and scrape some data.
Most scripts follow the same pattern: start a browser, open a page, navigate to a URL, extract the information you need, and close the browser when you're finished.
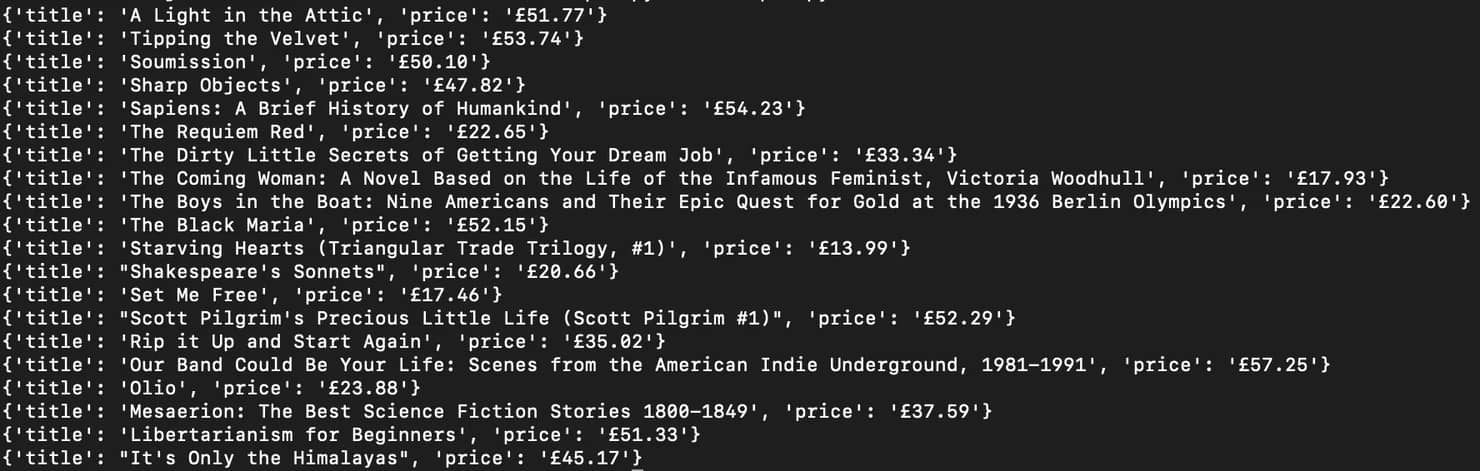
The example below pulls book titles and prices from Books to Scrape, a website built specifically for learning and testing scraping tools.
Create a file called scraper.py, and paste in the code below:
Save the file, then run it from your terminal with:
The first time you run the script, Pyppeteer may download a Chromium browser automatically. Once the script finishes, you should see a list of book titles and prices printed in your terminal.
If you're new to Pyppeteer, focus on the overall flow rather than every line of code. launch() starts a browser, newPage() opens a new tab, and goto() loads the target website.
The extraction happens inside querySelectorAllEval(). Pyppeteer finds every element matching the CSS selector and passes those elements to a JavaScript function running inside the page. That function extracts the title and price for each book and returns the results to Python.
The try/finally block ensures the browser closes even if something goes wrong. Without it, failed scripts can leave Chromium processes running in the background.
Notice that the browser launches with headless=True, which means Chromium runs without opening a visible browser window. That's the standard setting for production scraping. While building a scraper, however, it can be useful to switch to headless=False so you can watch the browser interact with the page and debug selectors more easily.
Note: If you see BrowserError: Browser closed unexpectedly, the bundled Chromium build may not be compatible with your environment. In that case, install Chrome and point Pyppeteer to your local browser using the executablePath argument.
For example, this works on macOS:
Once you're comfortable launching pages and extracting content, the next step is learning how to interact with websites through clicks, forms, navigation events, and wait conditions.
Interacting with pages: clicks, forms, navigation, and waits
The previous example loaded a page and extracted data immediately. Real websites are rarely that simple. You often need to click buttons, submit forms, navigate between pages, or wait for content to load before the information you want becomes available.
Most of that work comes down to a handful of methods. Use page.click() to click buttons and links, page.type() to enter text into forms, and page.select() to choose an option from a dropdown menu:
The methods that usually determine whether a scraper succeeds or fails are the wait strategies. It's tempting to drop an asyncio.sleep(3) between steps and move on, but fixed delays are both slow and unreliable. Too short and the element isn't there yet. Too long and you waste time on every page.
Instead, wait for something specific to happen. Use page.waitForSelector() when you need to wait for an element to appear on the page:
Use page.waitForNavigation() after a click or form submission that loads a new page:
And if a website exposes a JavaScript condition that indicates loading is complete, use page.waitForFunction():
Choosing the right wait strategy is one of the biggest factors in scraper reliability. Many browser automation failures are not caused by bad selectors. They happen because the script tries to interact with a page before the page is ready.
Infinite-scroll websites are a common example. The typical pattern is to scroll down, wait for new content to load, and then repeat:
Some websites also open content in new tabs or popup windows. In those cases, browser.pages() returns a list of currently open tabs, allowing you to switch between them and continue scraping.
Alert and confirmation dialogs require their own event handler. Use the page's dialog event and accept the dialog when it appears:
The key takeaway is that browser automation is often less about extracting data and more about managing page state.
Cookies, sessions, and logged-in scraping
Clicking buttons and navigating pages gets you through public content. The next step is accessing pages behind a login, which is where cookies and session persistence come in.
The difference between a scraper that logs in on every run and one that picks up where it left off is how it handles sessions. Pyppeteer gives you two common approaches.
The lightweight option is to save cookies after logging in. Use page.cookies() to retrieve them, write them to a JSON file, and then load them back with page.setCookie() before the next run. This works well for many sites and is easy to implement.
The more robust option is to use a persistent browser profile. Launch Chromium with a user data directory:
This tells Chromium to store cookies, local storage, and other browser state in that folder and reuse it across runs. Because it preserves more than just cookies, this approach is often more reliable for sites that use additional authentication mechanisms.
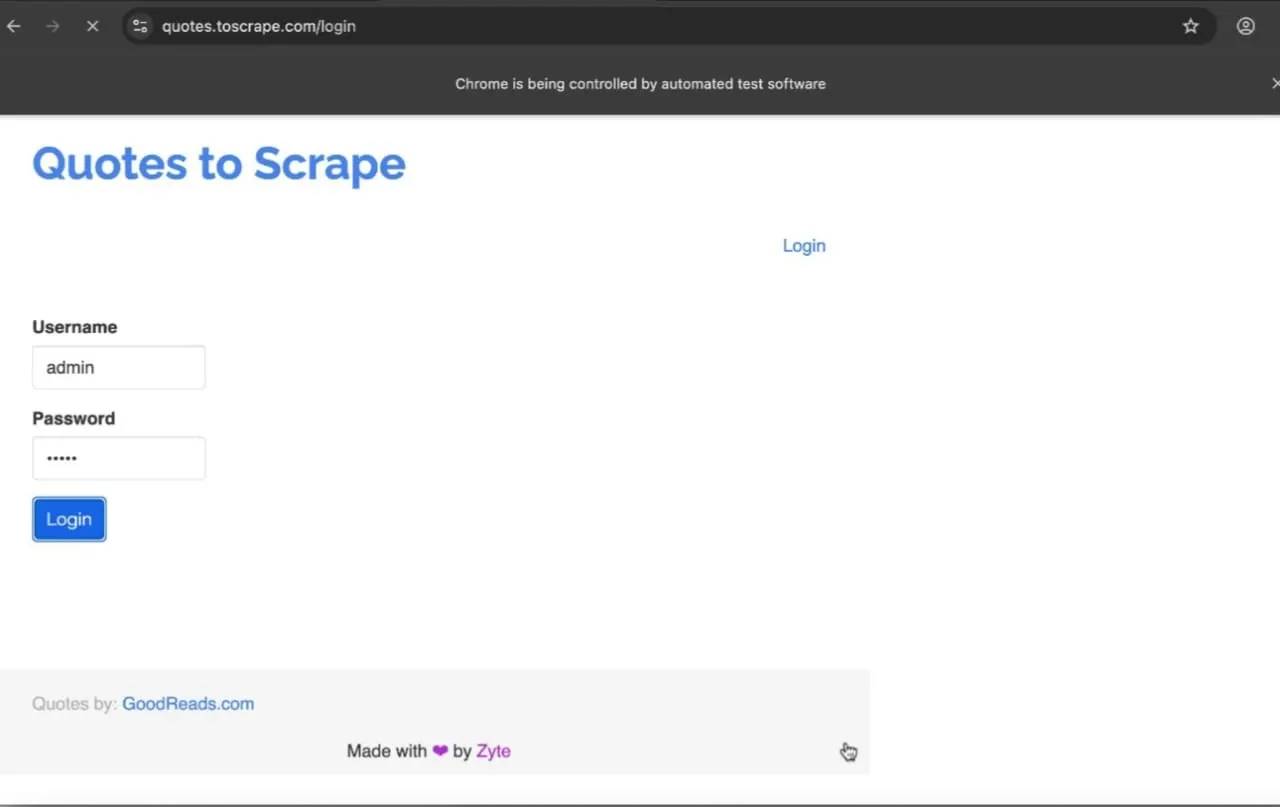
Automating the login itself is straightforward against a sandbox such as quotes.toscrape.com/login.
Navigate to the login page, fill in the credentials, submit the form, and wait for the page to reload:
In this example, the username and password are loaded from environment variables rather than being hard-coded into the script. That is a good habit to adopt early. Credentials inevitably change, and keeping them outside your code reduces the risk of accidentally committing them to source control.
When the script runs, Pyppeteer opens the login page, fills in the form fields, clicks the Login button, and waits for the resulting navigation to complete.
The screenshot below shows the automation just before the form is submitted.
Once you're authenticated and can persist the session, you can scrape pages that would otherwise be inaccessible to anonymous visitors without having to log in from scratch every time the scraper runs.
Configuring proxies and avoiding detection
Once you move beyond small test projects, you'll eventually run into rate limits, CAPTCHAs, or IP blocks. That's where proxies come in.
Pyppeteer passes proxy settings when the browser launches:
If the proxy requires authentication, provide the credentials after creating the page:
One limitation to be aware of is that Pyppeteer doesn't support per-page proxies natively. If you need to rotate proxies, the usual approach is to launch a new browser instance for each proxy.
The type of proxy you choose matters. Datacenter proxies are fast and inexpensive, but they are also the easiest for websites to detect. Residential proxies use IP addresses assigned to real devices and are generally more reliable for scraping. Mobile proxies tend to have the highest trust levels, but they are usually slower and more expensive.
It’s also worth setting expectations around stealth tools. Projects such as pyppeteer-stealth can hide some common automation signals, including the navigator.webdriver flag and a few browser fingerprinting indicators. However, they are not a magic solution. They do not reliably bypass modern anti-bot systems and the project itself has seen little recent development.
If avoiding detection is a major requirement, newer tools such as Playwright or nodriver are generally better starting points in 2026. For Pyppeteer users, a combination of realistic browser behaviour, sensible request rates, and high-quality residential proxies tends to be more effective than relying on stealth patches alone.
Stop losing scrapes to detection
Decodo's residential proxies route your Pyppeteer traffic through 115M+ ethically sourced IPs across 195+ locations, so concurrent requests don't trip IP bans.
Scraping at scale: async patterns Pyppeteer excels at
So far, we've used Pyppeteer to automate a single page at a time. The real advantage of its async design is that you can handle multiple pages concurrently without launching a separate browser for each one.
The usual pattern is to launch one browser, open multiple pages, and process a list of URLs with asyncio.gather():
In practice, the limit is usually memory rather than CPU. Each tab consumes resources, so opening too many pages at once can slow the browser down or cause crashes.
A common solution is to use asyncio.Semaphore() to cap the number of active pages:
In this example, no more than 10 pages can run at the same time, even if the URL list contains hundreds of entries.
One final optimization is knowing when not to use a browser. Pyppeteer is useful for JavaScript-heavy sites, but it's still much slower than a simple HTTP request. If Requests, aiohttp, or lxml can retrieve the data, use those instead and reserve Pyppeteer for pages that genuinely require browser rendering.
Common Pyppeteer errors and how to fix them
You've seen how to install Pyppeteer, launch a browser, scrape pages, and automate logins. When something breaks, the error is usually one of a handful of common issues.
BrowserError: Browser closed unexpectedly
This error appears when Chromium fails to start. During testing for this guide, the bundled Chromium downloaded successfully but wouldn't launch until Pyppeteer was pointed at a locally installed Chrome executable using executablePath.
TimeoutError on waitForSelector()
This usually means the element never appeared, appeared too slowly, or the page structure changed. Start by verifying the selector in a real browser. If it's correct, try increasing the timeout or running with headless=False to see what is actually being rendered.
Chromium download errors or HTTP 404s
Pyppeteer downloads Chromium automatically on the first run. If the download fails or the bundled browser revision is no longer available, install Chrome separately and launch Pyppeteer with executablePath instead.
Pages that never finish loading
Some websites keep network connections open indefinitely, causing page.goto() to wait longer than expected. In these cases, using waitUntil="domcontentloaded" is often more reliable than waiting for the entire page to load.
Memory usage grows over time
The most common cause is pages being left open. Always close pages with await page.close(), and make sure browser.close() runs even when an exception occurs.
The good news is that most Pyppeteer issues aren't difficult to diagnose. When in doubt, switch to headless=False and watch what the browser is doing. Seeing the page often reveals the problem faster than reading the stack trace.
Best practices for reliable and ethical Pyppeteer scraping
The difference between a scraper that runs for a few hours and one that runs for longer usually comes down to a handful of habits.
- Reuse browser instances. Launch one browser per scraper run rather than one browser per page, and reuse it across multiple tabs whenever possible.
- Close resources explicitly. Use await page.close() when you're finished with a page, and wrap browser launches in try/finally so browser.close() always runs.
- Throttle your requests. Use semaphores, delays, or other rate-limiting techniques to avoid overwhelming the target site.
- Retry temporary failures. Network timeouts and occasional server errors are good candidates for retries with exponential backoff. HTTP 403 and 429 responses usually require a different approach, such as slowing down requests or rotating proxies.
- Save progress frequently. Writing results to disk every few pages is much safer than waiting until the end of a multi-hour scrape.
- Log important events. Recording URLs, response status codes, item counts, and timing information makes debugging much easier when something eventually breaks.
- Respect the site's rules. Review the target site's terms of service, respect robots.txt where appropriate, and avoid collecting personal data without a valid legal basis.
- Use an API when one exists. If a website provides an official API that exposes the data you need, it's often a better choice.
Final thoughts
Pyppeteer still has a place in 2026, but it’s no longer the obvious choice for new browser automation projects. It remains useful for porting existing Puppeteer scripts to Python, building lightweight async-first scrapers, or learning the Puppeteer programming model without switching to Node.js.
At the same time, its limitations are hard to ignore. Development activity has slowed, the project is effectively unmaintained, and newer tools have largely moved ahead in terms of features, reliability, and browser support.
If you're starting a new project today, Playwright will usually be the better option. But if you already have Pyppeteer code, prefer its API, or simply need a straightforward way to automate Chromium from Python, it can still get the job done.
Enhance your scraper with proxies
Claim your 3-day free trial of residential proxies and explore 115M+ ethically-sourced IPs, advanced geo-targeting options, a 99.86% success rate, and more.
About the author

Lukas Mikelionis
Senior Account Manager
Lukas is a seasoned enterprise sales professional with extensive experience in the SaaS industry. Throughout his career, he has built strong relationships with Fortune 500 technology companies, developing a deep understanding of complex enterprise needs and strategic account management.
Connect with Lukas via LinkedIn.
All information on Decodo Blog is provided on an as is basis and for informational purposes only. We make no representation and disclaim all liability with respect to your use of any information contained on Decodo Blog or any third-party websites that may belinked therein.