Crawl4AI Tutorial: Build Powerful AI Web Scrapers
Traditional scrapers return raw HTML. Turning that raw data into structured AI-ready data takes 50%+ extra engineering time, and pushing it directly into an LLM quickly becomes expensive at scale. Crawl4AI was built for that gap: Playwright rendering, automatic Markdown conversion, and native LLM extraction in one open-source framework. This guide takes you from a basic page crawl to production-ready structured data extraction.
Justinas Tamasevicius
Last updated: Apr 15, 2026
15 min read
TL;DR
- Crawl4AI is an open-source Python library that renders JavaScript via Playwright and converts page output to clean Markdown ready for LLMs and RAG pipelines.
- The library supports 3 extraction methods: CSS selectors, XPath, and LLM extraction.
- Deep crawling with Crawl4AI supports BFS, DFS, and BestFirst strategies, but without a reliable proxy, most anti-bot-protected targets will block you before the crawl gets past the first few pages.
- For pages with frequently changing UI, LLM extraction replaces brittle selectors with a Pydantic schema and a natural language prompt.
- All code from this guide is collected in a single compressed file. Extract it to run the scripts end-to-end.
What is Crawl4AI, and when should you use it?
Crawl4AI is an open-source Python library built specifically for AI and LLM data pipelines, with 60K+ GitHub stars and over 9M cumulative PyPI downloads as of March 2026. It combines headless browser automation, asynchronous crawling, and native LLM extraction into a single tool designed to produce AI-ready data.
The "Scrapy for the LLM era" label gets thrown around, but it's more than just that. Under the hood, Crawl4AI runs a real Playwright-powered Chromium browser to execute JavaScript and render pages fully.
That would typically mean a lot of boilerplate and, consequently, glue code. But the library handles all of it.
Feed it a page buried in navigation menus, cookie banners, and sidebar widgets, and the built-in content filter cuts through the noise, returning only the actual content as clean Markdown.
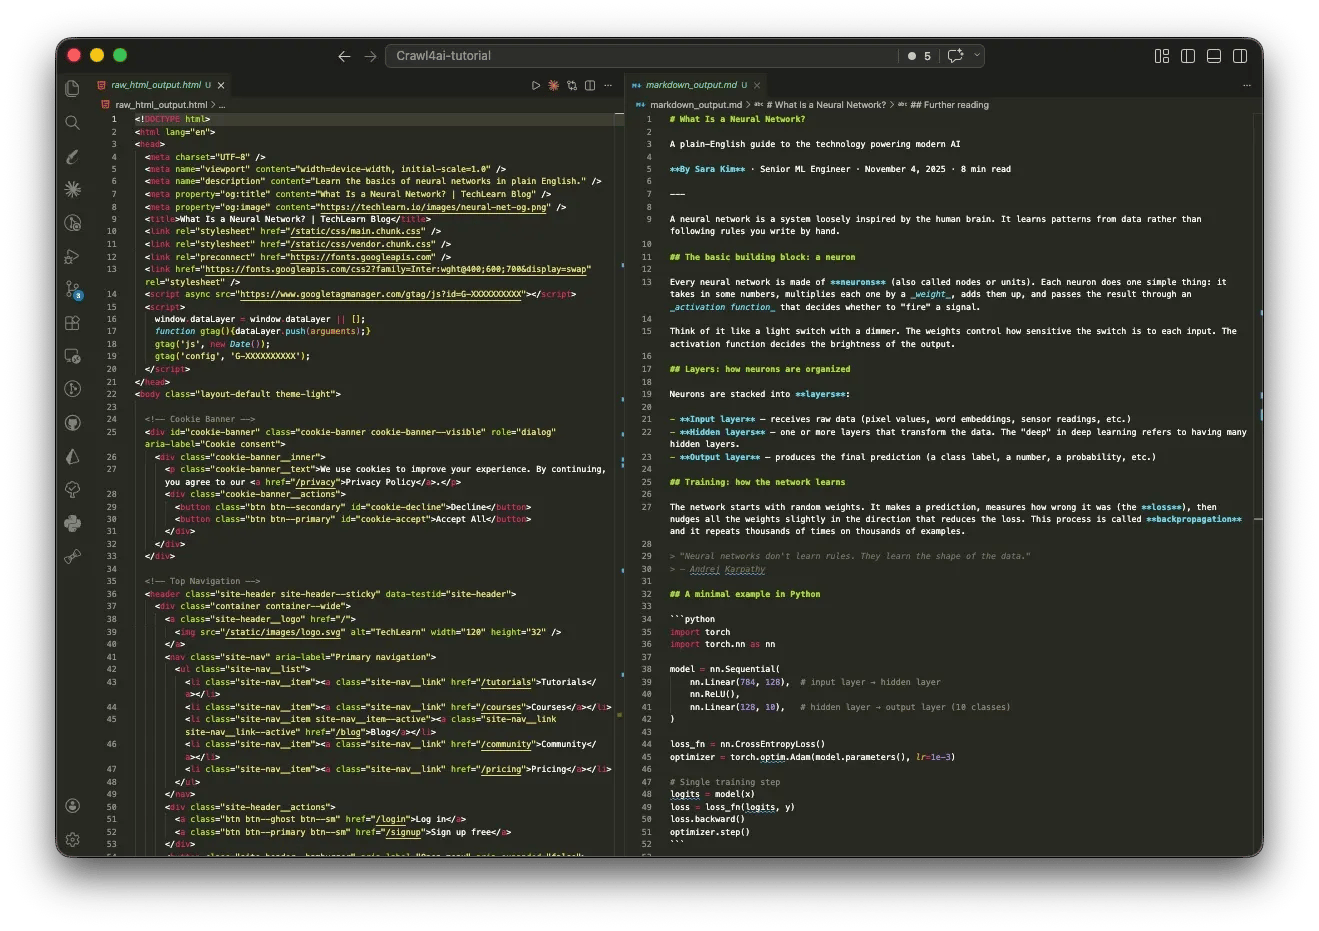
The result is structured data that you can feed directly into an AI agent or RAG pipeline.
Crawl4AI’s core capabilities and use cases:
- Multiple extraction strategies. CSS, XPath, and LLM-based extraction. When site structure changes, you switch strategies instead of rewriting your scraper.
- Filtered Markdown. Strip boilerplate before content reaches your pipeline - BM25 and pruning algorithms handle the noise so you don't have to.
- Async by default. Scrape multiple pages concurrently without spawning separate browser instances.
- Deep crawling. Crawl multiple pages with BFS, DFS, and BestFirst search strategies. Depth limits, page caps, and URL filters keep it scoped to what you actually need.
- Built-in proxy and stealth support. For sites with anti-bot protection, proxy config, session management, and browser fingerprint controls are all first-class.
These capabilities solve several cost problems as well as technical ones.
Scrapy breaks on modern sites because the data never exists in the initial HTML. Selenium solves rendering but carries testing-oriented overhead and stops at raw page output. Beautiful Soup assumes crawling and rendering are already handled. Commercial APIs like Firecrawl abstract everything, but you pay per request and lose control over extraction decisions.
The pattern is consistent. Each tool optimizes for one layer of the pipeline, then leaves the rest to you. And as such, the shift that Crawl4AI brings isn't to replace existing tools, but to bridge the cost gap and provide you with a choice at every decision point.
Installation and setup
Crawl4AI's install is a two-step process: the Python package first, then the browser binaries. Both need to be verified before you write a single line of crawl code.
Prerequisites
Before you begin, confirm your environment meets the following requirements:
- Python 3.10 or later (see how to run Python in the terminal)
- Windows, macOS, or Linux
- 4GB+ RAM recommended for parallel crawling
Technically, Crawl4AI supports Python 3.9+, but 3.10 is the practical baseline. Playwright, which the crawler uses for browser automation, relies on improvements introduced in 3.10, earlier versions tend to surface edge-case issues under load.
Project setup
Start by creating a virtual environment – an isolated Python workspace that keeps Crawl4AI's dependencies separate from your other projects.
On macOS and Linux:
On Windows:
Install the package
Run the install:
This installs the core library. The -U flag ensures pip upgrades to the latest available version instead of using a cached one. It does not install the browser binaries yet – that's the next step:
The latter command installs Playwright, alongside other OS-level dependencies your system may need. This is the step where browser binaries and system dependencies are actually provisioned, and it's the most common failure point in first-time setups.
Verify the installation
Run a quick check to confirm everything is correctly configured:
This checks 3 things: Python version compatibility, whether Playwright is installed correctly, and whether any environment variables or library conflicts will cause problems at runtime. If it flags anything, fix it and re-run the command.
Here are some solutions to the errors flagged by crawl4ai-doctor:
- Playwright not found → run playwright install chromium manually, then re-run crawl4ai-setup
- Missing system libraries on Linux → install libnss3 libatk-bridge2.0-0 libxss1, then retry
- Cache directory permission error → check write access to ~/.crawl4ai
Note on Docker: An official Docker image exists, but it's marked experimental in the current release. Use it for testing, not production, until a stable version ships.
Optional: full feature install
The base install covers everything required for this guide, including the LLMExtractionStrategy. If you need ML-heavy extras like Torch and Transformers, you can add them explicitly, or use the command below to add all features:
With crawl4ai-doctor returning clean, the next step is to put the library to work and see how it handles a real page.
Building and running your first Crawl4AI crawler
Crawl4AI splits configuration across 3 objects which control different things. Mixing them up is the most common source of bugs:
- AsyncWebCrawler manages the browser session: it opens Chromium, keeps it alive across requests, and closes cleanly when done.
- BrowserConfig controls how that browser behaves. Headless mode, which user agent to present, proxy configuration, etc. You configure it once when you initialize the crawler.
- CrawlerRunConfig controls a single crawl run: caching, content filters, and extraction strategy.
Put simply, BrowserConfig defines how the browser runs; CrawlerRunConfig defines what each crawl does.
Your first crawl
Create crawler.py. This file will hold all the crawl logic in this tutorial.
The code below fetches TechCrunch and returns it as Markdown. Since most of the page renders client-side, you get to see Crawl4AI's rendering engine in action:
Using asyncio allows Python to run the event loop that executes AsyncWebCrawler’s non-blocking operations.
Here's a sample output of the script:
Here the raw_markdown function gives you the full unfiltered extraction that includes everything Crawl4AI picked up from the page, noise included.
Alternatively, we can use fit_markdown – it offers filtered and cleaned output:
PruningContentFilter scores each content block by density and relevance, then drops anything below the threshold. Putting it at 0.5 is typically a reasonable default, but you might be losing content you need.
To take it a step further, you can pass a BM25ContentFilter, which filters content by keyword relevance. You pass it a query, and it keeps only the blocks that score above the threshold for that query.
Sample output:
The caveat, however, is that BM25 is still unstructured – you get relevant text blocks, but they're still flat Markdown. You can't reliably extract "this salary belongs to this job title" or "this tech stack belongs to this listing" because BM25 has no concept of relationships between fields.
Extracting structured data with CSS selectors and XPath
CSS selectors have been the backbone of structured extraction since Scrapy's 2008 debut. Crawl4AI's JsonCssExtractionStrategy extends that pattern, but instead of querying one element at a time, you define a schema upfront and get back a list of typed objects.
RemoteOK's job listings follow a consistent DOM structure. Inspect any listing in DevTools and the selectors surface immediately – here's what that looks like in practice:
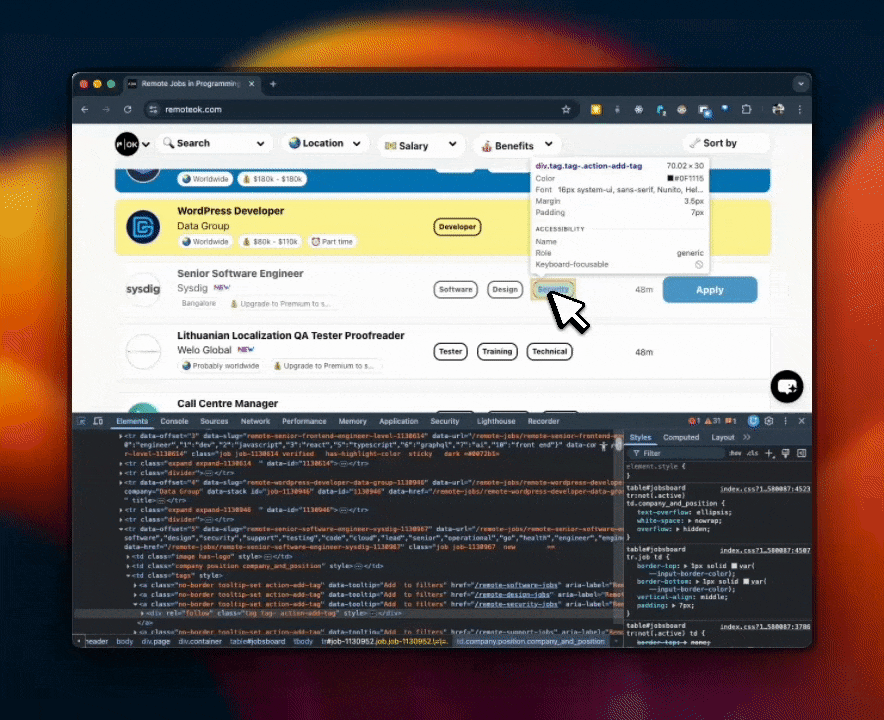
Those selectors map directly to a JsonCssExtractionStrategy schema:
Here's what the output looks like then:
A few important details about Crawl4AI's behavior here:
- wait_for alone is not enough on JS-rendered pages. It holds the crawler until the target elements appear in the DOM, but the page may still be mid-render at that point. The delay_before_return_html function adds a hard buffer after that condition is met.
- The list type returns dicts, not strings. Tags come back as [{"tag": "Engineer"}] rather than a flat array.
- There is no multiple flag in Crawl4AI. Unlike Beautiful Soup or Scrapy, passing multiple: True does nothing – the schema processes silently and returns only the first match, with no error.
Selectors fail in 2 predictable ways. Timing is the first, which the delay parameters above address as shown. The second failure mode is structural, and there are no parameters for it.
CSS selectors depend on class names and DOM structure. Neither is under your control. If just one class gets renamed, your job listing extraction will return empty objects. This is the most common failure mode in production scrapers, and to make things worse, it fails silently without errors.
If the page structure changes frequently, reach for JsonXPathExtractionStrategy instead. It doesn't eliminate the problem, but since XPath targets elements by text content and position rather than class names, a markup shift is less likely to break your schema. For a more in-depth comparison, check out our XPath vs. CSS selectors guide.
For pages with "Load More" buttons or infinite scroll, use the js_code parameter in CrawlerRunConfig. It accepts a JavaScript string that Crawl4AI executes in the browser before extraction. This lets you trigger whatever is needed to expose content in the DOM – clicking a button, scrolling the page, or dismissing a modal:
It's worth highlighting the use of CacheMode.ENABLED here. Enabling cache mode tells Crawl4AI to save pages it has already crawled, so if your crawler crashes mid-run, you can resume from where you left off. And when the scraping is done, you can save the final output to JSON, CSV, or a database.
A nice perk of enabling caching is that cached pages return almost instantly (fetch times of 0.01s). As such, repeat runs are dramatically faster. Just note that you're getting saved data, not a live crawl. You can always switch back to CacheMode.BYPASS when you need fresh results.
When one page isn't enough: deep crawling strategies
A single-page crawler works until the data you need is 3 clicks deep on a site you haven't fully mapped. Job categories, paginated listings, nested pages. At that point, you'll need a crawler that links the graph.
Crawl4AI gives you 3 strategies for navigating this: breadth-first search (BFS), depth-first search (DFS), and a relevance-scored search (BestFirst):
While Breadth-first search is the right default for most use cases, BestFirst is the most nuanced. It scores every discovered URL against your keywords before fetching. So, in this case, the crawler prioritizes /remote-python-jobs over /remote-accounting-jobs without you having to specify that explicitly:
The on_state_change and resume_state, as shown in the code, were added in v0.8.0. With them, the crawler writes its progress to JSON at every state change, so a mid-run crash doesn't mean starting over. It’s worth enabling on any crawl where losing progress is expensive.
The output looks like this:
When you don't know how much to crawl
Both BFS and DFS require you to set stopping conditions like max depth and max pages upfront. That only works when you're familiar with the site structure. Otherwise, you either set the cap too low and miss data, or too high and crawl into noise.
AdaptiveCrawler flips this. Instead of a traversal pattern, you give it a natural language query, and it determines its own stopping point based on what it finds. But no, there's no LLM involved:
AdaptiveCrawler's default strategy is purely statistical. Behind the scenes, it algorithmically tracks 3 signals per crawl: coverage, consistency, and saturation. No API calls, no extra cost.
However, if you need it to understand query intent semantically, AdaptiveCrawler has an embedding strategy that accepts an LLMConfig.
As a rule of thumb, use BFS when you need comprehensive coverage of a site with known structure, and use AdaptiveCrawler when you need the tool itself to determine the stopping point.
Why your IP gets flagged (and how to fix it)
RemoteOK served clean results in the previous section. Run the same crawler 50 times in an hour, and the pipeline breaks. The average site treats high-volume headless requests as a threat, and their response isn't always a 403. Some throttle silently. Some return empty results. Some serve a CAPTCHA. By the time you know something is wrong, the IP is already flagged.
Why your crawler needs a proxy
Proxies solve 3 problems here: IP bans at volume, geo-restricted content, and detection risk from predictable request patterns.
Free proxies typically handle most unprotected targets. But no visible protection does not equate to no protection. Even lightly protected sites still rate-limit, fingerprint, or block repeated requests. That's where free proxies usually fall apart.
When the target runs active bot detection systems like Cloudflare, Akamai, or any active bot detection layer, you need residential proxies. Your requests route through ethically-sourced real devices with a 99.92% success rate on protected targets. Here's how to get them:
- Create your account. Sign up at the Decodo dashboard.
- Select a proxy plan. Choose a subscription that suits your needs or start with a 3-day free trial.
- Configure proxy settings. Set up your proxies with rotating sessions for maximum effectiveness.
- Select locations. Target specific regions based on your data requirements or keep it set to Random.
- Copy your credentials. You'll need your proxy username, password, and server endpoint to integrate into your scraping script.
Get residential proxies for scraping
Unlock superior scraping performance with a free 3-day trial of Decodo's residential proxy network.
Configuring a proxy in Crawl4AI
Proxy configuration goes on BrowserConfig via proxy_config. It applies to the entire browser session:
Decodo handles proxy rotation at the endpoint level – each request through gate.decodo.com:7000 is automatically assigned a different IP, so there’s no rotation logic to add in your Crawl4AI setup.
An exception, however, is when the target depends on session continuity, like login forms or cart flows, where changing IPs mid-session will break the flow. In those cases, you may need to switch to sticky sessions. Check out our comprehensive guide on rotating proxies that covers when to use each.
For sites that go beyond IP tracking into browser fingerprinting and other anti-detection mechanisms, Crawl4AI already gives you two layers: enable_stealth handles common JavaScript checks, and UndetectedAdapter goes deeper into fingerprinting. But if that’s not enough, Decodo Site Unblocker provides server-side anti-fingerprinting that's worth checking out.
Integrating LLMs for intelligent data extraction
The selector-based extractions we’ve built work. Until the site changes. With one target site, it's a maintenance task; across multiple sites, it compounds into a job in itself.
Simon Willison, co-creator of Django, called this out at NICAR 2025 when he said the single most commercially valuable application of LLMs is turning unstructured content into structured data.
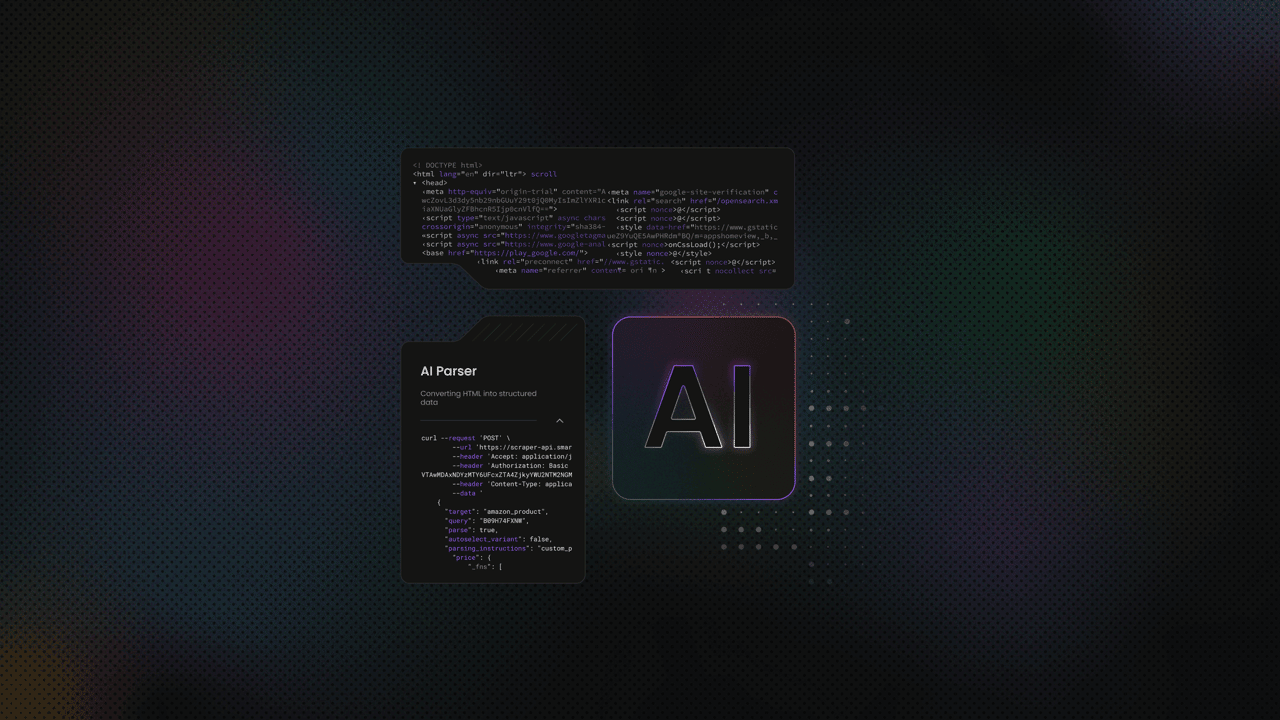
Crawl4AI brings a fundamental shift to data extraction with LLMExtractionStrategy. Instead of mapping fields to CSS selectors, you describe what you want in plain language and define the expected output as a Pydantic schema.
The LLM reads the structured Markdown generated by Crawl4AI, processes the schema with AI, and returns structured JSON matching that schema. No custom parsing logic required.
The key differentiator here is that the LLM gets structured input, eliminating the need to sift through heaps of unstructured data.
And the numbers back it up. A 2025 LLM-based web extraction study found that raw HTML fed to Gemini 2.5 produced a 91% hallucination rate; a flat structured text representation of the same page dropped that to 3%, with an F1 of 0.957**.** Same model, same prompt. The input format was the only variable.
But while structured input fixes accuracy, that flexibility still comes at a cost. Each extraction is still an API call to an LLM, and as such, the cost of your chosen model matters a lot more than most tutorials acknowledge.
Which LLM should you use with Crawl4AI?
A developer benchmarking DeepSeek R1 and V3 against a single moderately complex webpage hit approximately 150K tokens across 25 requests. Total cost: 8 cents. The same token volume through GPT-4o would run closer to $1.65. That’s why an informed model choice matters.
There are 3 factors to consider when choosing an LLM for your pipeline: token cost, schema compliance, and data privacy requirements.
The table below summarizes the trade-offs for each LLM model:
Model
Cost (input/output per 1M tokens)
Best for
Caveat
GPT-4o
$2.50 / $10.00
Complex layouts, high accuracy
Higher cost per output token
Claude Sonnet 4.6
$3.00 / $15.00
Precise instruction following
Higher output cost than GPT-4o
DeepSeek V3.2
$0.28 / $0.42
Cost-sensitive pipelines
Potential regional latency
Lla ma 3 / Mistral via Ollama
$0
Air-gapped or privacy-sensitive pipelines
16 GB+ RAM minimum, GPU recommended
Groq
Free tier (rate-limited)
Low-volume experimentation
Throttles too aggressively for production scraping
One thing worth knowing before you commit: prompts don't port cleanly between providers. The same instruction that works on DeepSeek V3 may produce different output on Gemini or GPT-4o. Test against the model you plan to run in production.
Setting up LLM extraction
Before running any LLM extraction, you need an API key from your chosen provider. Deepseek v3.2 is 6-11× cheaper than Claude and GPT-4o for similar extraction workloads, making it a good choice for starters. As such, we'll use DeepSeek for this section.
To set it up:
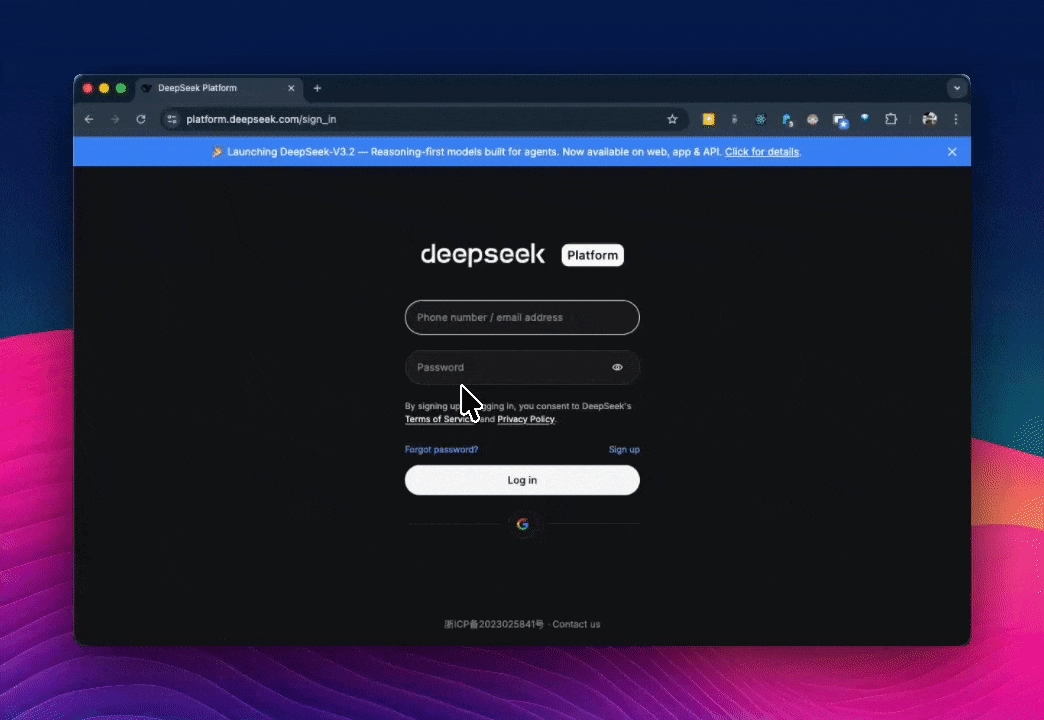
- Go to platform.deepseek.com and create an account.
- Top up your account with credits, if need be.
- Navigate to API Keys in the dashboard and generate a new key.
- Copy the key.
Then create a .env file at the project root:
Then load it at the top of your script:
If you're using GPT-4o or any other provider instead, swap DEEPSEEK_API_KEY for OPENAI_API_KEY and get your key from the respective platform. All else remains the same.
Important: Keep your .env file out of version control. Add it to .gitignore before your first commit – API keys pushed to a public repo get scraped within minutes.
Start with a Pydantic schema that defines the structure you want back. Every field becomes an extraction target – the LLM uses the field names and descriptions as instructions:
Since RemoteOK doesn't always list salary, salary has the Optional tag here. Without the tag, an entry without the salary field would cause the extraction to fail or halt.
Now configure LLMExtractionStrategy and pass it to CrawlerRunConfig:
Running models locally with Ollama
As mentioned earlier in the section, you can run your extractions locally. All you need do is point the llm_config to your local Ollama instance:
Token limits and chunking
A full RemoteOK page runs well over 2,000 tokens. Without chunking, sending it in one call risks hitting the model's context limit. And when that happens, the extraction either truncates silently or fails with no clear error.
LLMExtractionStrategy handles this by default. It splits content into chunks of 2,048 tokens with a 10% overlap between them to avoid cutting context at boundaries. A full RemoteOK page typically produces roughly 18 chunks, each processed as a separate LLM call.
You can override the defaults directly as shown below:
Note: Larger chunks mean fewer API calls and lower cost per page. But if the chunk exceeds the model's context window, the extraction fails. Keep apply_chunking=True unless you've confirmed the page consistently fits within your model's limit.
That's about all you need to get going with LLM extraction. However, if your goal is a production RAG pipeline, your biggest concern isn’t crawling; it’s ingestion.
Poor chunking, weak indexing, and inconsistent retrieval will degrade your results long before the model does. Our article on RAG with LlamaIndex and web scraping shows you how to build that ingestion layer properly.
If you’d rather not own dataset generation and maintenance, Decodo data for AI training covers that layer with production-ready data.
Best practices for production crawlers
Production crawling is about maintaining stability under load, handling resistance from target sites, and using resources efficiently. These five practices address that directly.
1. Remove everything that doesn’t serve the extraction
If the goal is text extraction, images, fonts, and stylesheets add unnecessary overhead.
Block non-essential resources at the browser level and run in headless mode by default. This reduces render time, memory usage, and bandwidth per page. For large-scale URL discovery, use prefetch mode to skip Markdown generation and return only HTML and links.
Throughput improves because each page requires less processing.
2. Concurrency should follow memory limits
Crawl4AI’s async model allows parallel execution, but each browser instance consumes RAM. Set concurrency based on available system memory. On constrained machines, high parallelism will exhaust resources before completing the crawl.
The memory-adaptive dispatcher adjusts concurrency based on real-time memory usage, which makes it a safer default than fixed limits.
3. Add controlled delays between requests
A crawler that sends requests continuously at maximum speed is easy to detect.
Introduce randomized delays between requests, typically 2 to 5 seconds for sensitive targets. This reduces detection risk and prevents unnecessary load on the target server. Delays improve stability and reduce the chance of being blocked.
4. Design for failure and recovery
Failures are expected in long-running crawls. Without state persistence, a single interruption can invalidate hours of progress.
Persist crawl state after each URL so work is continuously saved, for example, using a state.json or similar checkpoint file. Resume functionality should pick up from the last completed step without duplication or data loss. This ensures the crawler can recover cleanly from crashes, restarts, or external interruptions.
Log each failure with the URL, timestamp, and error details. This creates a reliable audit trail for debugging and makes it easier to identify patterns in failed requests.
5. Respect target sites’ systems
Responsible crawling reduces the risk of blocks and service disruption. Before crawling, check robots.txt, review the site’s terms of service, and ensure request rates stay within what the server can handle, for example, by applying rate limiting in your request loop.
These are operational constraints, not suggestions. Ignoring them leads to blocked IPs and unstable pipelines.
For more details on detection and mitigation strategies, see anti-scraping techniques and how to outsmart them.
Final thoughts
In this tutorial, you've moved from raw page crawling to structured, model-ready extraction. You’ve seen how Crawl4AI handles rendering with Playwright, reduces noise with fit Markdown, and uses LLMExtractionStrategy where selectors fall short. The sequence is clear: crawl first, filter second, then extract.
Access remains the constraint. Protected targets degrade data before they block requests, making failures harder to detect. Pairing Crawl4AI with Decodo's 115M+ residential proxy network bridges that gap.
Reviewed by Abdulhafeez Yusuf
About the author

Justinas Tamasevicius
Director of Engineering
Justinas Tamaševičius is Director of Engineering with over two decades of expertise in software development. What started as a self-taught passion during his school years has evolved into a distinguished career spanning backend engineering, system architecture, and infrastructure development.
Connect with Justinas via LinkedIn.
All information on Decodo Blog is provided on an as is basis and for informational purposes only. We make no representation and disclaim all liability with respect to your use of any information contained on Decodo Blog or any third-party websites that may belinked therein.