How to Set Up and Use SOCKS5 Proxy
SOCKS5 proxies route traffic at the network level and work with a wide range of applications. This guide shows how to set up and use a SOCKS5 proxy across devices and apps. You’ll learn how to configure SOCKS5 on Windows, macOS, Linux, mobile devices, browsers, and selected applications, and when system-wide or application-level setup is the better choice.
Dominykas Niaura
Last updated: Feb 26, 2026
10 min read
TL;DR
- SOCKS5 proxies operate at the application level, routing only the traffic of a specific tool or process without affecting the rest of your device.
- Setup involves entering the proxy server address, port, and credentials in your browser, OS, or app's network settings and selecting SOCKS v5 as the protocol.
- Windows and iOS lack native SOCKS5 support, so you need third-party tools like Proxifier, SwitchyOmega, or Shadowrocket to handle the connection.
- SOCKS5 supports both TCP and UDP, making it suitable for scraping, streaming, gaming, and multi-account management.
What SOCKS5 is and isn't
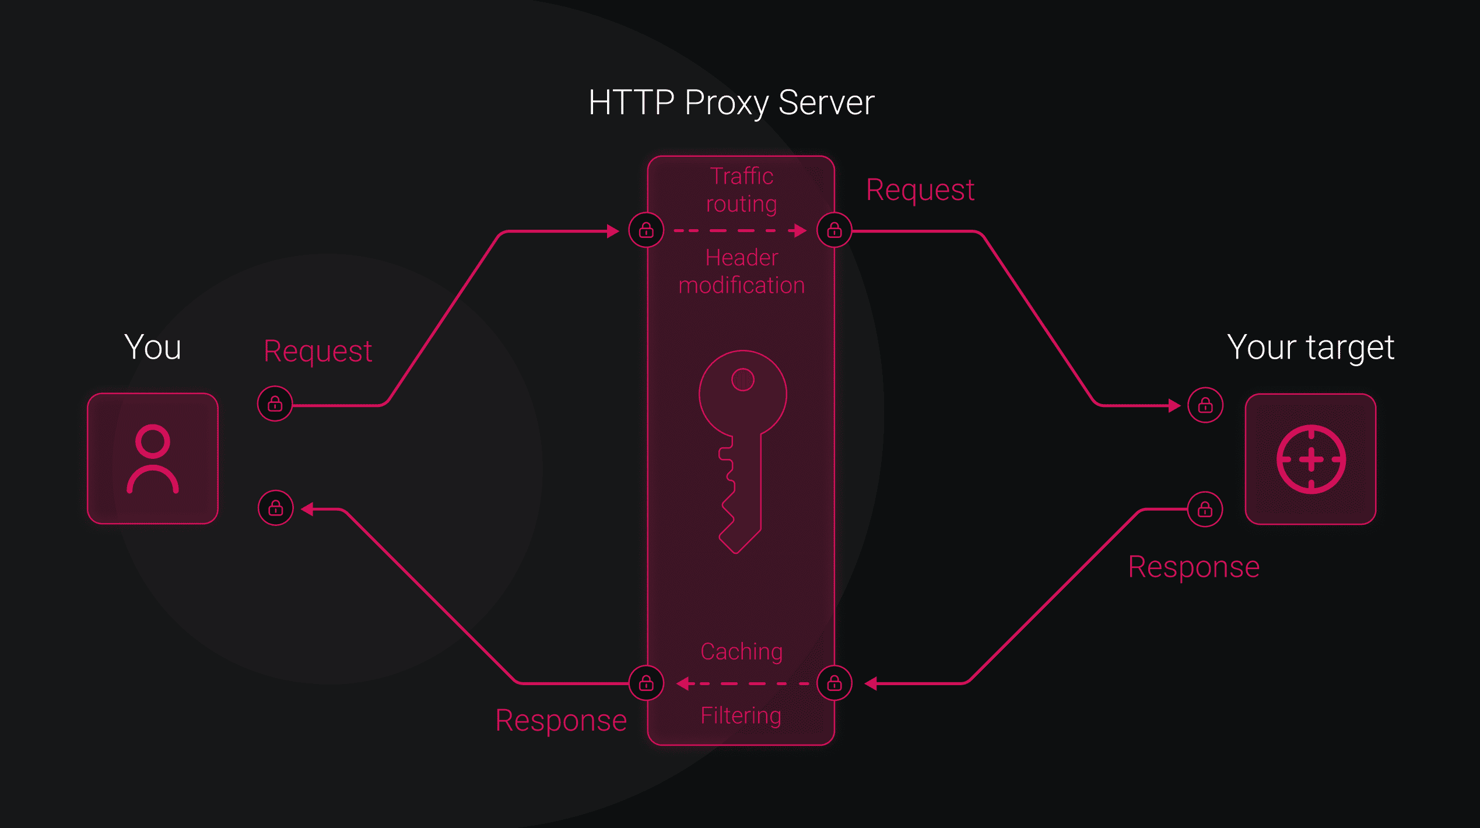
SOCKS5 is a proxy protocol that routes network traffic through a remote server. It masks IP addresses, enhances safety and privacy, and sidesteps geographical or firewall obstacles. However, be aware of its limitations. It doesn’t encrypt traffic, guarantee privacy, or prevent ISP visibility if not DNS-proxied.
Visit our blog to learn more about what SOCKS5 proxy is the difference between SOCKS5 and HTTP proxies.
What you'll need for setting up a SOCKS5 proxy
The first step for setting up a SOCKS5 proxy is getting prepared before actually diving into configuration. This will ensure a smooth process. Here’s a simple checklist:
1. Collect proxy connection details
Get the required information from your proxy provider:
- Server address. Hostname or IP.
- Port number. Common SOCKS5 ports include 1080 and 1081.
- Authentication credentials. Username and password.
Make sure the provider supports SOCKS5 rather than SOCKS4. SOCKS5 supports both TCP and UDP, which is required for use cases like streaming, gaming, and torrenting.
2. Decide how you want to use the proxy
Clarify your setup before configuring anything:
- Use case. What you plan to use the proxy for, such as privacy, speed, or account management.
- Scope. System-wide or application-specific. System-wide affects most apps and suits shared or company environments. Application-specific affects only one app and suits individual use.
- Devices. Single device or multiple devices. This depends on scale and workflow.
- Duration. Permanent or temporary. Permanent setups suit long-term privacy and consistent IP routing. Temporary setups work for short tasks or single websites.
3. Prepare for testing and rollback
Make it easy to verify and undo changes if needed:
- Backups. Save current network settings, including IP, DNS, and existing proxy configuration.
- Verification tools. Bookmark IP check tools for quick testing after setup.
- DNS behavior. Ensure the proxy handles DNS requests on the server side to avoid DNS leaks that expose activity to your ISP.
Recommendation: Decodo’s dashboard provides all required credentials and clearly separates HTTP(S) and SOCKS5 endpoint generation.
Setting up a SOCKS5 proxy on Windows
This section walks through SOCKS5 setup on Windows, covering both browser-level configuration and system-wide options.
Browser-level setup on Windows
You can configure SOCKS5 directly in browsers that support it natively:
- Open your browser’s Settings and go to Network or Proxy settings.
- Select Manual proxy setup and enable Use a proxy server.
- Enter the SOCKS5 server address and port.
- Choose SOCKS v5 where protocol options are available.
- Save the configuration.
If authentication is required, the browser will prompt you for credentials when you load the first website.
Keep in mind:
- Firefox DNS handling. Enable Proxy DNS when using SOCKS v5 to route DNS queries through the proxy and prevent DNS leaks.
- Chrome and Edge limitations. These browsers don't support SOCKS5 authentication natively. To use SOCKS5 with credentials, you’ll need a browser extension, which is covered later in this guide.
System-wide SOCKS5 configuration for Windows 10 and 11
Windows doesn't natively support full system-wide SOCKS5 proxy configuration through the Settings app. You can still enter SOCKS5 details, but functionality and performance may be limited, especially for authenticated proxies.
- Open Windows Settings and go to Network and Internet → Proxy.
- Under Manual proxy setup, enable Use a proxy server.
- Enter the SOCKS5 server address and port.
- Save the configuration and add authentication credentials if prompted.
This approach may work for basic routing but isn't recommended for reliable or high-performance SOCKS5 usage.
Using third-party tools on Windows
Due to Windows limitations, many users rely on third-party tools for more reliable and flexible routing. A common example for system-wide SOCKS5 usage is Proxifier.
Proxifier routes traffic through a SOCKS5 proxy at the application level, including apps that do not support proxies natively.
- Add the proxy. Open Profile → Proxy Servers → Add, then enter the server address, port, and credentials.
- Verify the connection. In the Proxy Servers window, click Check. You should see a confirmation that the proxy is ready to work with Proxifier.
- Configure rules. Go to Profile → Proxification Rules to define which applications or traffic should be routed through the proxy. This gives fine-grained control over routing and privacy.
Configuration methods compared
- Application-level. Native support inside individual apps. Most predictable behavior and easiest to debug.
- System-wide. Centralized configuration through the operating system. Limited SOCKS5 support on Windows and inconsistent app coverage.
- Third-party tools. Overlay routing that forces proxy usage even for unsupported apps. Best balance of coverage and control on Windows, at the cost of extra setup.
Setting up a SOCKS5 proxy on macOS
Setting up a SOCKS5 proxy on macOS differs from Windows mainly in system-level support and authentication handling. macOS provides native SOCKS5 configuration at the network level, which Safari and other system-dependent apps automatically inherit.
System-wide SOCKS5 configuration on macOS
- Open System Settings and go to Network.
- Select your active connection, such as Wi-Fi or Ethernet, and click Details.
- Open the Proxies tab and enable SOCKS Proxy.
- Enter the SOCKS proxy server address and port provided by your proxy service.
- If authentication is required, enable Proxy server requires password and enter the username and password.
- Click OK, then Apply.
To verify the setup, visit a https://ip.decodo.com/ and confirm that the displayed IP address matches the proxy location.
Browser-specific setup on macOS
Safari doesn't offer its own proxy settings. It always uses the system-level network configuration. Once SOCKS5 is enabled in macOS Network settings, Safari traffic is routed through the proxy automatically.
Firefox uses its own network configuration and ignores system proxy settings by default. To configure SOCKS5 in Firefox, go to Settings → General → Network Settings → Settings. Select Manual proxy configuration, enter the proxy IP and port under SOCKS Host, choose SOCKS v5, and save. If authentication is required, Firefox will prompt you for credentials when you load the first website.
Google Chrome relies on macOS system proxy settings, similar to Safari. Many users prefer SOCKS5 browser extensions for additional control, such as quick profile switching or per-site routing. Extensions like Proxy SwitchyOmega can be installed from the Chrome Web Store and configured with a dedicated SOCKS5 profile.
Authentication notes
If you enable authentication in macOS Network settings, credentials are stored in the system keychain. If you're repeatedly prompted for a password, verify the username and password and choose to save them in Keychain when prompted.
Some browsers may also request credentials on first connection, even if they are already stored at the system level.
Testing with Terminal
You can test a SOCKS5 proxy directly from Terminal using curl. This is useful for quick verification and IP checks. For example:
If the request succeeds and the IP address changes, the proxy is working correctly.
Setting up a SOCKS5 proxy on Linux
SOCKS5 configuration on Linux typically relies on command-line tools, proxy wrappers, or desktop environment settings. You can use temporary solutions like SSH tunnels or configure persistent routing with dedicated tools.
Temporary setup using an SSH tunnel
An SSH tunnel is useful for short-term or ad hoc proxying.
Open a terminal and run:
Replace username and remote_server_ip with your own values. Change 1080 if you want to use a different port. This creates a local SOCKS5 proxy on localhost:1080.
GUI configuration (GNOME and KDE)
Some Linux desktop environments allow basic SOCKS5 configuration through network settings.
GNOME: Open Settings → Network → Network Proxy. Switch from Automatic to Manual, then enter the SOCKS host and port. Close the window to apply the settings. This routes most system traffic through the proxy, depending on application support.
KDE Plasma: Open System Settings → Network → Proxy. Enable manual proxy configuration and enter the SOCKS proxy details. Save the configuration to apply it.
GUI-based setups rely on applications respecting system proxy settings and may not cover all traffic.
Command-line proxy tools
ProxyChains
ProxyChains forces TCP-based applications to route traffic through a proxy, even if they don't support proxies natively.
Install ProxyChains:
Edit the configuration file:
Add your proxy details:
Run applications through the proxy by prefixing the command, for example:
tsocks
tsocks is an older library-based wrapper that can support SOCKS5, depending on the version.
Install the tsocks package and edit /etc/tsocks.conf to point to the SOCKS5 proxy server. Applications are routed through the proxy by prefixing the command with tsocks.
If the application reports the proxy server’s IP address instead of the local one, routing is working.
Environment variables
Linux supports proxy configuration through environment variables such as all_proxy with the socks5:// prefix. This method depends heavily on application support and is often insufficient on its own, which is why wrapper tools are commonly used.
Browser setup (Firefox example)
Firefox ignores system proxy settings by default.
- Go to Settings → General → Network Settings → Settings.
- Select Manual proxy configuration.
- Enter the SOCKS host and port and choose SOCKS v5.
Authentication will be requested when you load the first website, if required.
Setting up a SOCKS5 proxy on Android
Setting up SOCKS5 on Android is possible but less straightforward due to the lack of native SOCKS5 support. As a result, third-party applications are typically required.
Native limitations
Android doesn't support SOCKS5 proxy configuration at the system level. You cannot set a SOCKS5 proxy directly in Android Settings under Network, and proxy settings don't automatically apply to all apps.
In addition, many popular apps, such as YouTube, Instagram, and TikTok, may ignore system proxy settings altogether.
Third-party proxy apps
Third-party proxy apps are the most practical solution on Android. These apps tunnel traffic through a SOCKS5 proxy without requiring root access.
Recommended app
Super Proxy is a commonly used option that provides fine-grained control over SOCKS5 routing. It allows you to route traffic for selected apps through a proxy.
Setup steps:
- Install Super Proxy from the Google Play Store.
- Add a new proxy profile and give it a name.
- Select SOCKS5 as the protocol.
- Enter the server address, port, and credentials provided by your proxy service.
- Save the configuration and start the proxy connection.
Alternative apps
Drony is a simpler option that supports SOCKS and HTTP(S) proxies with minimal configuration. It also supports automatic server switching.
Postern offers more advanced control. It supports HTTP, SOCKS5, and Shadowsocks, and allows rule-based routing by IP address, domain, or application.
Both apps provide traffic and connection logs for monitoring and troubleshooting.
Connection verification
After configuring the proxy, verify that traffic is routed correctly.
- IP check. Visit sites like whatismyip.com or browserleaks.com/ip and confirm the IP address matches the SOCKS5 proxy.
- Leak testing. Use tools such as browserleaks.com or dnsleaktest.com to ensure DNS requests are routed through the proxy server and not your ISP.
Setting up a SOCKS5 proxy on iOS
iOS doesn't provide native SOCKS5 proxy support. System settings allow only HTTP and HTTPS proxies, so SOCKS5 configuration requires third-party apps.
Recommended apps
Shadowrocket and Potatso are commonly used iOS apps that support SOCKS5. Their configuration steps are very similar.
App-based setup
- Install Shadowrocket or Potatso from the App Store.
- Open the app and add a new proxy profile.
- Select SOCKS5 as the proxy type.
- Enter the server address or hostname, port number, and authentication credentials if required.
- Save the configuration.
- Activate the proxy. If you're using Shadowrocket, toggle the added proxy node to On. If you're using Potatso, select the proxy and tap the Play button to connect.
If the app prompts you to add a VPN configuration, tap Allow and confirm using your device passcode. This is required for traffic routing and doesn't install a traditional VPN.
Configuring SOCKS5 proxy in popular browsers
This section covers browser-specific SOCKS5 configuration for users who want proxy routing only for browsing, not system-wide traffic.
Mozilla Firefox
Firefox supports native SOCKS5 proxy configuration and handles authentication via browser prompts rather than directly in the settings form. If your proxy requires authentication, you could try an extension like FoxyProxy.
Setup:
- Go to Settings → General → Network Settings → Settings.
- Select Manual proxy configuration.
- Enter the proxy IP address and port.
- Select SOCKS v5.
- Enable Proxy DNS when using SOCKS v5 to prevent DNS leaks.
- Save the configuration.
Google Chrome
Chrome doesn’t offer built-in proxy configuration. By default, it uses the operating system’s proxy settings on Windows and macOS.
To change the proxy for Chrome without affecting the entire system, browser extensions are commonly used. Chrome also doesn't natively support SOCKS5 authentication or proxy-side DNS handling.
A common approach is using Proxy SwitchyOmega:
- Install the extension from the Chrome Web Store.
- Create a new profile and select SOCKS5.
- Enter the proxy IP address and port.
- Apply changes and activate the profile from the toolbar.
Microsoft Edge
Microsoft Edge relies entirely on Windows system proxy settings. Any changes made under Network and Internet → Proxy will apply to Edge as well.
Edge doesn't natively support SOCKS5 authentication and routes only TCP traffic. For authenticated SOCKS5 or more granular control, browser extensions such as Proxy SwitchyOmega or FoxyProxy are required. System-level tools like Proxifier or ProxyCap can also be used.
Safari
Safari has no internal proxy configuration options. It always uses macOS system network proxy settings found under System Settings → Network → your active connection → Details → Proxies.
This setup is system-wide and affects all applications that follow macOS proxy settings. If you want browser-only control, third-party tools or proxy-switching extensions are required.
Configuring a SOCKS5 proxy in applications
Beyond browsers, many applications either support SOCKS5 directly or require external tools for routing.
Email clients
Thunderbird supports SOCKS5 natively:
- Go to Settings → General → Network and Disk Space.
- Select Manual proxy configuration.
- Enter the proxy IP and port, select SOCKS v5, and enable Proxy DNS when using SOCKS v5.
Outlook doesn't support proxy configuration. Routing Outlook traffic through SOCKS5 requires a system-wide setup or a third-party tool such as Proxifier.
Development tools
Support for SOCKS5 varies by tool.
- Git can be configured globally using a SOCKS5 proxy URL in its configuration.
- npm doesn't support SOCKS proxies directly and requires a local proxy converter that exposes an HTTP proxy interface.
- Node.js supports SOCKS5 through libraries such as socks-proxy-agent when used with HTTP or HTTPS clients.
- IDEs often provide proxy settings under Preferences → HTTP Proxy. Selecting SOCKS or using system proxy settings allows routing through a SOCKS5 proxy.
Communication apps
Some communication apps support SOCKS5 natively.
Telegram allows direct configuration:
- Go to Settings → Data and Storage → Proxy Settings.
- Add a new proxy and select SOCKS5.
- Enter the server address, port, username, and password, then enable the proxy.
Verifying your SOCKS5 proxy connection
The final step after any SOCKS5 setup is verification. You want to confirm that traffic is routed correctly and detect potential leaks. Leaks are especially risky when dealing with surveillance, targeted blocking, or restricted content.
Basic IP verification
To confirm traffic routing, visit sites like http://ip.decodo.com/ before and after enabling the proxy. Compare the results. If the IP address changes and matches the proxy server’s IP, the connection is working.
DNS leak testing
DNS leaks occur when apps or browsers send DNS queries directly to your ISP instead of through the SOCKS5 proxy.
Run tests on sites like dnsleaktest.com or browserleaks.com. You should see only DNS servers and locations associated with the proxy, not your ISP.
Common preventive measures include enabling Proxy DNS when using SOCKS v5, using tools like Proxifier or extensions like FoxyProxy, disabling IPv6, and pairing SOCKS5 with a VPN when needed.
WebRTC leak testing
WebRTC enables real-time communication in browsers but can expose your real IP address.
Test for leaks using tools such as browserleaks.com/webrtc, ipleak.net, or whatismyip.io/webrtc-leak-test. The IP shown there shouldn't match your real network IP.
You can prevent leaks by disabling WebRTC in browser settings or using extensions that block WebRTC traffic. This may limit some real-time features.
Advanced verification
UDP support testing: If your use case depends on UDP, verify that the SOCKS5 proxy supports it and that no firewall rules block UDP traffic. This can be tested using compatible clients that implement UDP ASSOCIATE. Custom scripts or tools like Proxifier can help with validation.
Latency testing: Measure latency using proxy checker tools, testing software, or command-line utilities like curl. Dedicated proxy testing tools provide the most consistent results.
Connection stability monitoring: Monitor uptime, response time, and error rates over time to detect dropped connections or unstable proxy nodes. Many testing tools and dashboards provide this functionality.
Troubleshooting common SOCKS5 proxy issues
Most SOCKS5 issues are straightforward to diagnose and fix.
Connection refused errors
A refused connection usually means the proxy server is unreachable or rejecting the request.
- Verify the proxy address, port, username, and password.
- Check that the proxy server is online.
- Confirm that firewalls or security software are not blocking the connection.
- Test connectivity using tools like Telnet or Netcat.
Authentication failures
Authentication errors typically result from incorrect credentials, unsupported authentication methods, or client-side limitations.
- Recheck username and password. These are case-sensitive.
- Confirm that the client supports SOCKS5 authentication. Some apps don't.
- Watch for special characters that may need escaping.
Slow connection speeds
Slow performance is often caused by server load or physical distance.
- Choose a geographically closer proxy server.
- Switch to a different proxy node from the same provider.
- Check local network conditions and restart networking equipment.
- Temporarily disable security software to rule out interference.
DNS leaks despite configuration
DNS leaks happen when DNS resolution occurs locally instead of through the proxy.
- Enable proxy-side DNS handling.
- Disable DNS over HTTPS in browser settings.
- Check for fallback DNS settings forcing local resolution.
- Disable IPv6 if the proxy supports only IPv4.
Applications bypassing the proxy
Some applications ignore system proxy settings or leak traffic.
- Confirm DNS queries are routed through the proxy.
- Disable WebRTC where applicable.
- Recheck app-level proxy configuration.
- Use tools like Proxifier or ProxyCap to force SOCKS5 routing for unsupported apps.
Intermittent disconnections
Frequent drops may be caused by unstable networks, low-quality proxy nodes, or timeout limits.
- Ensure a stable internet connection.
- Check the proxy provider’s uptime status.
- Review session timeout settings.
- Enable Keep-Alive or heartbeat mechanisms where supported.
Choosing the right SOCKS5 proxy provider
Choosing a SOCKS5 proxy provider depends on your use case. Key factors to evaluate include location coverage, IP pool size, connection speed, support for TCP and UDP, authentication options, security practices, and pricing models.
Look for providers that offer residential or mobile proxies, high uptime, low-latency infrastructure, a clear no-logs policy, and responsive customer support. Free trials or flexible pricing models are also useful for testing performance before committing.
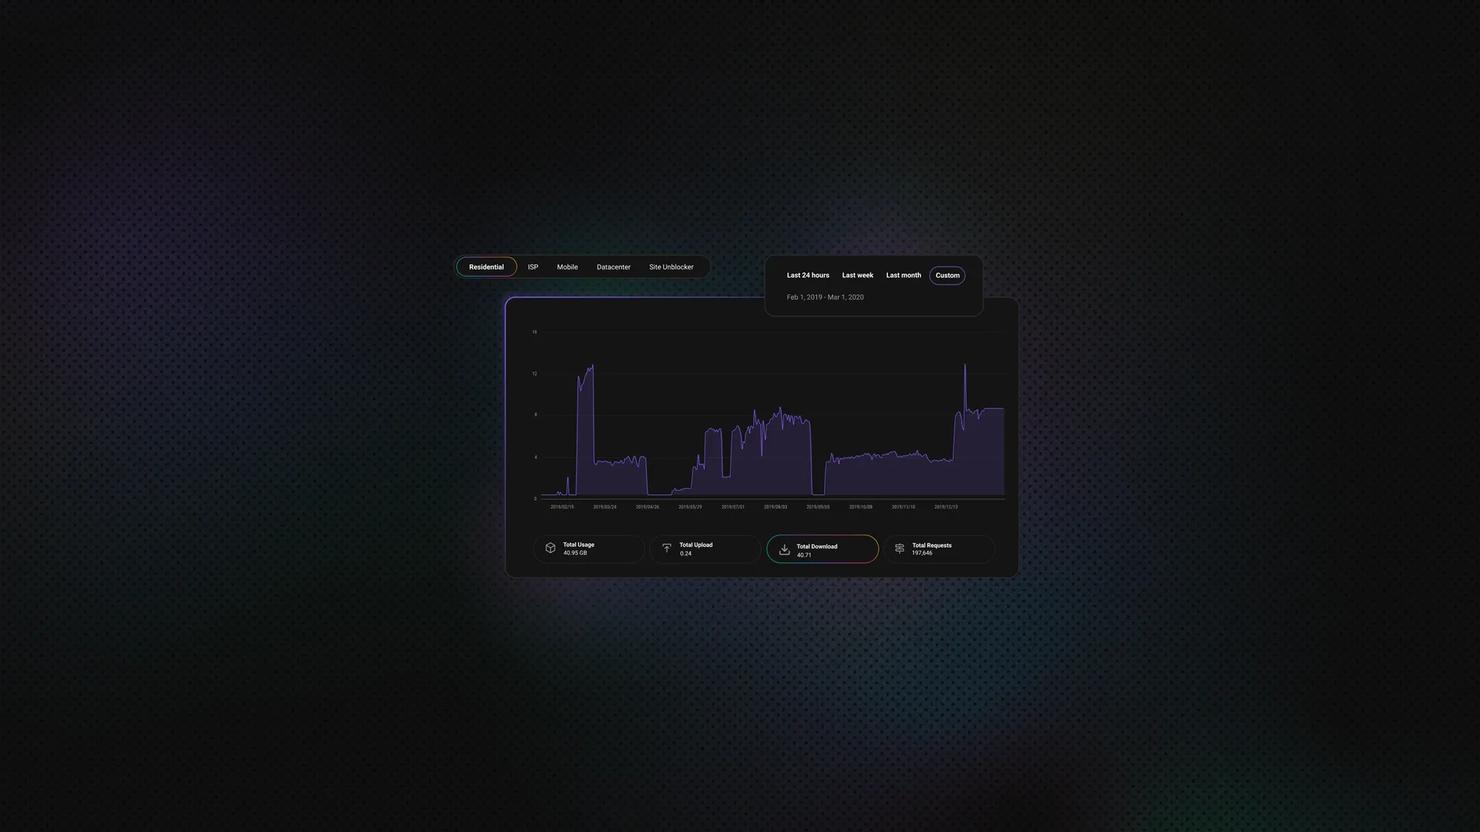
Decodo's SOCKS5 proxies cover a wide range of use cases. It provides residential, mobile, and datacenter proxies, along with high-trust IP options. The service reports 99.99% uptime, a 99.92% success rate, and 24/7 technical support. Residential plans include access to 115M+ ethically-sourced IPs across 195+ locations.
All proxy types support automatic rotation by default, with optional sticky sessions of up to 30 minutes when a consistent IP is required. You can explore the service through a 3-day free trial or choose a subscription or Pay As You Go plan for flexible usage.
Power your traffic with SOCKS5
Get started with industry-leading residential proxies with SOCKS5 support.
Final thoughts
SOCKS5 is a flexible proxy protocol that supports both TCP and UDP traffic and works across most devices, browsers, and applications. To get reliable SOCKS5 proxies without extra setup friction, Decodo offers residential, mobile, and datacenter SOCKS5 endpoints with built-in rotation, sticky sessions, and broad global coverage.
About the author

Dominykas Niaura
Technical Copywriter
Dominykas brings a unique blend of philosophical insight and technical expertise to his writing. Starting his career as a film critic and music industry copywriter, he's now an expert in making complex proxy and web scraping concepts accessible to everyone.
Connect with Dominykas via LinkedIn
All information on Decodo Blog is provided on an as is basis and for informational purposes only. We make no representation and disclaim all liability with respect to your use of any information contained on Decodo Blog or any third-party websites that may belinked therein.